The Digital UNIX software is distributed on three read-only compact discs (CD-ROM):
This appendix describes how to perform the following tasks:
Before you insert a CD-ROM in its drive, make sure you know how to operate the disc drive. The Optical Disc Drive Owner's Manual contains instructions for using the disc drive.
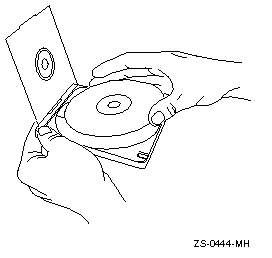
A Digital UNIX CD-ROM must be placed in a caddy before it can be inserted in an RRD42 or RRD44 disc drive. Caddies are not required for RRD43 disc drives. Follow these steps to load a CD-ROM in a caddy:
Figure B-1 shows how to press the tabs of the caddy and lift the lid:

Figure B-2 shows how to place the disc in the caddy:

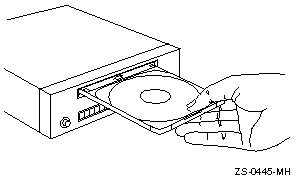
After placing the CD-ROM in a caddy, follow these steps to insert the disc caddy in to a disc drive:
Figure B-3 shows a CD-ROM (in its caddy) being inserted in to a disc drive:

Before you can access the files and directories on a CD-ROM, it must be mounted on a mount point. Follow these steps to mount a CD-ROM:
#
file /dev/rrz*c | grep RRD
/dev/rrz4c: character special (8/4098) SCSI #0 RRD44 disk #32 \
(SCSI ID #4)
In the previous example, the CD-ROM device is RRD44 on device /dev/rz4c. The backslash in the previous example indicates line continuation and is not in the actual display. If you have more than one RRD device connected to your system, specify the device where the CD-ROM will be mounted.
Standard device names begin with rz for the block special file and rrz for the raw (character) special file. The result of the file command displays the raw device name, but you must specify the block special file when mounting the CD-ROM device.
mount -r /dev/rzunit_numberc /mount-point
For example, to mount the CD-ROM in drive /dev/rz4c on the directory /cdrom, enter the following commands:
#
mkdir /cdrom
#
mount -r /dev/rz4c /cdrom
/dev/rz4c /cdrom ufs ro 0 0
When you have ensured that your edits are correct, write and quit the file. The system will now mount the CD-ROM on the /cdrom mount point on every reboot.
You must unmount a CD-ROM by using the umount command before you can eject it from the disc drive. To unmount a CD-ROM, you must be superuser or root and you must be one directory above the mount point of the CD-ROM. Use a command similar to the following to unmount a CD-ROM:
#
umount /dev/rz4c
If you do not unmount the CD-ROM before trying to remove it, the CD-ROM will not eject from the drive when you press the EJECT button. If you are not one directory above the mount point of the CD-ROM when you execute the umount command, you will see the message device busy.
To remove the disc from the disc drive after it is unmounted, press the EJECT button on the disc drive.
If the EJECT button is disabled by software or if the drive does not eject the caddy after you press the EJECT button, refer to your Optical Disc Drive Owner's Manual for instructions.