This chapter describes the LSM Support Operations designed to help you perform LSM disk and disk group operations in the menu interface. You enable LSM Support Operations using the voldiskadm command, which starts up a menu-driven interface. The menus are easy to use and provide information about each step to help you decide the correct response for each prompt.
The following sections describe how to start up and use the LSM Support Operations menu interface for some of the most common disk management tasks.
To start LSM Support Operations, enter the following command:
#
voldiskadm
LSM brings up a Support Operations main menu shown in Figure 9-1 that displays the disk operation options available to you.
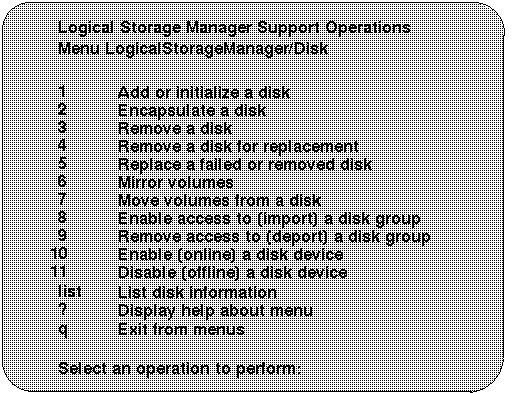
Table 9-1 describes the main menu selections.
| Option | Description |
| 1 | Identifies a disk to LSM and prepares the disk for LSM use. Use this option to initialize disks that are new or that do not contain valid data. |
| 2 | Prepares a disk for LSM usage while preserving existing data on the disk. |
| 3 | Removes a disk from LSM. This option does not retain the disk name for future disk replacement. |
| 4 | Removes a failed disk, retaining the disk name, and replaces it with another disk. |
| 5 | Specifies a replacement disk for a disk that either failed or was removed using menu option 4. |
| 6 | Duplicates data to give you one or more copies on another disk. |
| 7 | Moves data on a disk to another disk or disks on the system. |
| 8 | Enables access by this system to a disk group. |
| 9 | Disables access to a disk group that is currently enabled (imported) by this system. |
| 10 | Places the disk access record in an online state. |
| 11 | Places the disk access record in an offline state. |
| list | Lists disks that are available to the system. |
| ? | Provides help when using the LSM menus. The output of the ? command is a list of operations and a definition of each. |
| q |
Enter the
q
command:
|
This section describes the disk operations available with the LSM Support Operations.
Disk initialization identifies a disk to LSM and prepares the disk for LSM use. This operation involves installing a disk header and writing an empty configuration on the disk. A disk access record is created for the disk, unless such a record already exists.
To initialize a disk for use with LSM, perform the following steps:
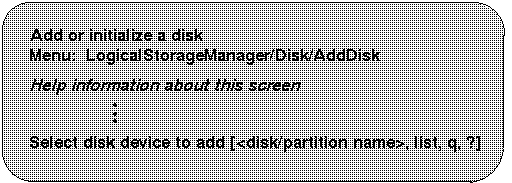
If you do not know the address of the disk you want to add, enter the letter l or type the word list at the prompt. LSM displays a list of the disks that are available as replacement disks. For example:


Note that you can press the Return key to accept the default disk group name, rootdg. You can also enter the word none if either of the following conditions are true:


Press the Return key to continue.

Press the Return key to return to the main menu.
If the fstype in the disk label of the specified partition or an overlapping partition is set, LSM displays a warning message to inform you that initializing the disk might destroy existing data.
If you are sure that the disk partition has no valid data and that the partition can be added to LSM, you can ignore the warning message and answer y to the prompt. The voldiskadm utility then proceeds to initialize the disk partition and add it to LSM.
If the disk cannot be initialized because the specified partition or an overlapping partition on the disk is open (that is, a partition is actively in use by UFS, AdvFS, LSM or swap), the initialization process fails and voldiskadm exits with an error message informing you of the problem.
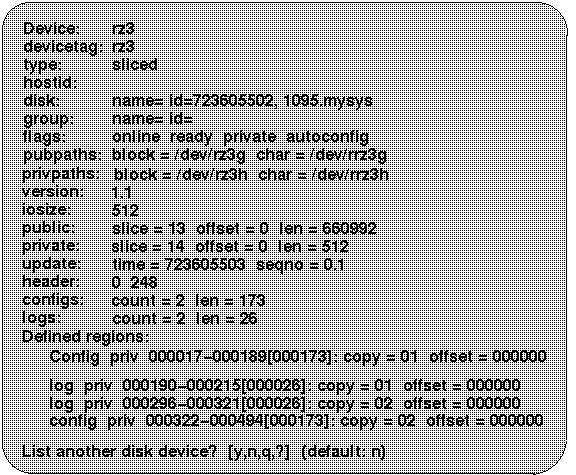
The following steps describe how to find information about disks available on the system.
LSM displays a list of devices similar to the following screen, and prompts you to enter the address of the disk for which you want to obtain detailed information.

You may want to add a new disk to an already established disk group. Perhaps the current disks have insufficient space for the project or work group requirements, especially if these requirements have changed.
You can add a disk to a disk group by performing these steps:

Use the information in the following table to determine whether or not you should reinitialize the disk.
| If... | Then... |
| The disk is new | Initialize the disk before placing it under the control of LSM. |
| The disk was previously in use and contains useful data | Do not initialize the disk. Instead, use the LSM encapsulation function to add the disk to the LSM system while still preserving the existing data. |
| The disk was previously in use but it does not contain useful data | Initialize the disk before placing the disk under LSM control. |
Before you disable or remove a disk, you may want to move the data from that disk to other disks on the system. Use this operation immediately prior to removing a disk, either permanently or for replacement (described in Section 9.2.5).
Note
Simply moving volumes off of a disk without also removing the disk, does not prevent volumes from being moved onto the disk by future operations. For example, two consecutive move operations could move volumes from one disk to another.
Also note that you need to make sure the other disks in the disk group have sufficient space available.
To move volumes from a disk, do the following:
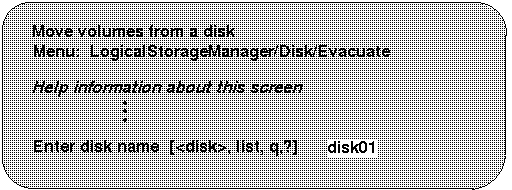

Press Return to move the volumes.


Press Return to return to the main menu.
This operation involves removing the LSM disk associated with the selected partitions from LSM control by removing the associated disk access records. LSM Support Operations provides two methods (menu items 3 and 4 on the main menu shown in Figure 9-1) for removing disks. These two operations remove a disk as follows:
See also Section 9.2.4 which describes how to move data from a disk to another disk on the system, and see Section 9.2.6 which describes how to replace a failed or removed disk.
Note
You must disable the disk group before you can remove the last disk in that group. Disabling a disk group, also referred to as deporting a disk group, is described in Section 9.3.2.
To remove a disk from its disk group, perform the following steps:
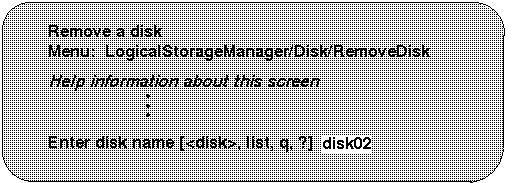
This example removes the disk device disk02.

Press the Return key to continue.

Press the Return key to return to the main menu.
You may occasionally need to replace a disk in a disk group. This operation involves initializing the disk for LSM use, and replacing the old disk and associated disk media records with the new disk and its information. Perform the following steps to replace a disk while retaining the disk name:


Press the Return key if you want to use the default disk.

Press the Return key to continue.

Press the Return key to return to the main menu.
Use this menu operation to specify a replacement disk for a disk that you removed with the "Remove a disk for replacement" menu operation (see Section 9.2.5.2), or for a disk that failed during use. To replace a disk, use the following instructions:
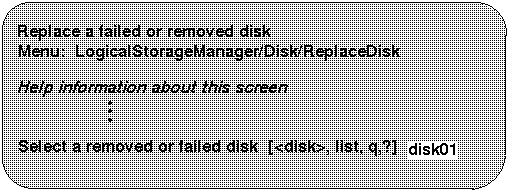

Press Return to select the default device or enter the device name of the device of your choice.

Press Return to replace the disk.

Press Return to return to the main menu.
To rename a disk, perform the following steps:
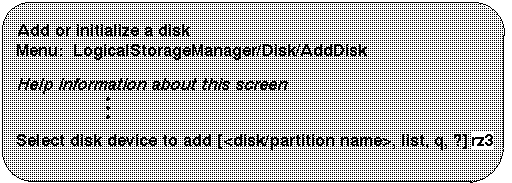


Press the Return key to return to the main menu.
This operation places the disk access record in an offline state. During searches for disk IDs or members of a disk group, offline disks are ignored. To disable a disk, perform the following steps:
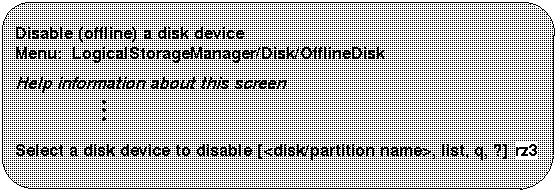
This example shows that disk rz3 has been selected.

Press the Return key to return to the main menu.
This section describes the disk group operations that can be performed with the LSM Support Operations.
Use this menu operation to enable access by this system to a disk group. This operation can be used to move a disk group from one system to another. If you want to move a disk group from one system to another you must first disable (deport) it on the original system (see Section 9.3.2), then move the disk between systems and enable (import) the disk group.
Note
If two hosts share a SCSI bus, make sure that the other host really failed or deported the disk group. If two hosts import a disk group at the same time, the disk group will be corrupted and become unusable.
To import a disk group, do the following:
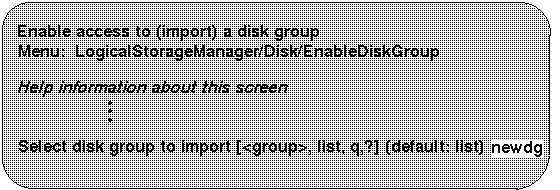

Press Return to return to the main menu
Use this operation to disable access to a disk group that is currently enabled (imported) by this system. Deport a disk group if you intend to move the disks in a disk group to another system. Also, deport a disk group if you want to use all of the disks remaining in a disk group for some new purpose.
Note
For removable disk devices on some systems, it is important to disable all access to the disk before removing the disk.
To deport a disk group, perform the following steps:
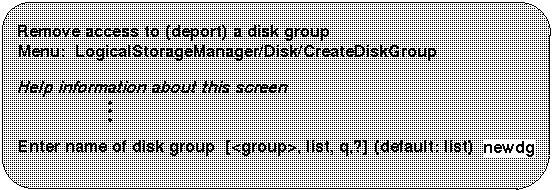
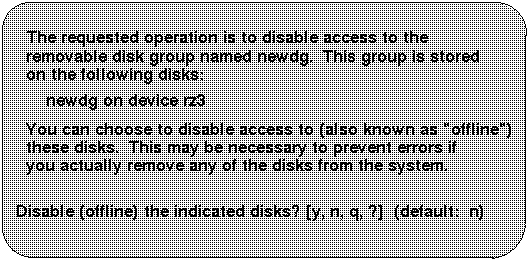
Press Return to deport the disk group.

Press Return to continue.

Press Return to go to the main menu.
Mirroring the volumes on a disk gives you one or more copies of your volumes in another disk location. By creating mirror copies of your volumes, you protect yourself against loss of data in case of a disk failure.
LSM's voldiskadm utility cannot be used to mirror volumes that are already mirrored, or that are comprised of more than one subdisk.
To mirror volumes on a disk, make sure that the target disk has an equal or greater amount of space as the originating disk and then do the following:
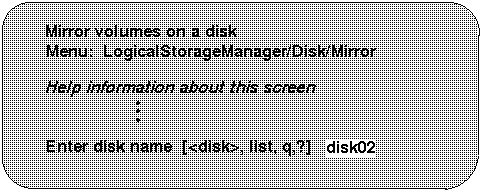
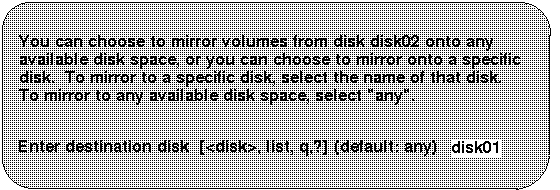

Press Return to make the mirror.

When you have completed all of your disk administration activities, exit the LSM Support Operations by selecting menu option q from the main menu.