9 Solving Network and Network Services Problems
This chapter contains a diagnostic map to help you solve problems that
might occur when you use the network and network services software.
Use this
chapter together with the appropriate Compaq documentation to solve
as many problems as possible at your level.
Section 9.1
and
Section 9.2
provide
information about how to use the diagnostic map and where in the map to start
for certain problems.
The sections that follow contain portions of the diagnostic
map.
They describe how to solve problems on the following systems:
9.1 Using the Diagnostic Map
Network and network service problems
can occur for a number of reasons.
The diagnostic map in this chapter and
a similar diagnostic map in the
Network Administration: Connections
manual help you to isolate
the problem.
The following figure explains how to use the diagnostic map:
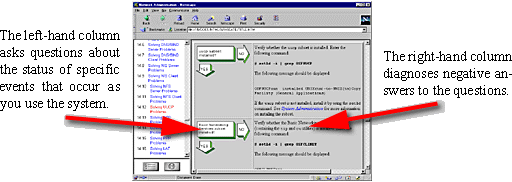
After you isolate the problem, the map refers you to other chapters
for instructions on using the various problem solving tools and utilities.
The map also refers you to other manuals for more complete diagnostic information
for particular devices and software products.
You could experience problems that are not documented in this manual
when you use base system network and network services software with other
layered products.
See the documentation for the other products for additional
information.
9.2 Getting Started
Before you start problem solving, ensure that the communications hardware
is ready for use.
Verify the following:
The system's physical cable connections (the Ethernet connection
and the transceiver connection) are properly installed.
See the documentation
for your system and communications hardware device.
Event logging is enabled in order to monitor network events.
See the
System Administration
manual for information on starting event logging
and for descriptions of the event messages.
Also see the product release notes for up-to-date information on known
problems.
Table 9-1
helps you identify a starting point in
the diagnostic map.
Table 9-1: Problem Solving Starting Points
9.3 Solving DNS/BIND Server Problems
|

|
Verify that the Additional Networking Services subset is installed.
Enter the following command:
# setld -i | grep OSFINET
If the subset is installed, the following message is displayed:
OSFINETnnn installed Additional Networking Services (Network-Server/Communications)
If the subset is not installed, install it by using
the
setld
command.
See the
Installation Guide
for more
information on installing the subset.
|
|
|
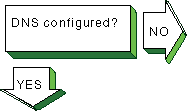
Use the
rcmgr
utility to display the value of the
BIND_SERVERTYPE
entry in the
/etc/rc.config.common
file:
# rcmgr get BIND_SERVERTYPE
If no type is specified, run the SysMan Menu utility
to configure your DNS server.
See
Section 2.5
for more
information.
|
|
|
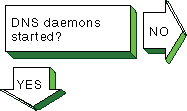
Verify that the BIND daemon (named) is running.
Enter
the following command:
# ps -e | grep named
If no
named
process is running, start the
named
daemon, using the following command:
# /sbin/init.d/named start
|
|

|
If you have enabled authentication, and secure dynamic updates or secure
zone transfers are not successful, look for errors in the
daemon.log
file generated by the
syslogd
daemon.
For secure dynamic updates, examine the log on the master server.
For secure
zone transfers, examine the log on the master server and the slave server.
See
Section 10.4
for more information about viewing
syslogd
message files.
If you see a
syntax error near 'item'
message, look for syntax errors in your
named.conf
file and key file (possibly
named.keys).
Verify that there
are no missing braces, quotes, or semicolons.
If necessary, compare the contents
of these files with those in
Section 2.6.3.
If you see an
unknown key 'key-name'
message or an
Invalid TSIG secret "key-string"
message, do the following:
Verify that you are using the correct key for the update or
transfer.
Verify the spelling of the key name.
Verify the integrity of the key string.
There must be no line
feeds or spaces between the quotes that contain the key.
Verify that the algorithm specified for the key is
hmac-md5
and that the key was generated correctly.
If necessary,
generate a new key.
See
Section 2.6
for more information.
|
|


Problem still exists? Report it to your service representative.
See
Chapter 12.
|
If the
nslookup
command does not return information
for any host or the host specified in the client
nslookup
command, use the value of the
BIND_SERVERTYPE
entry you
collected in a previous step to select a course of action from below:
- If the type is:
Go to:
CLIENTStop.
This system is
not a DNS/BIND server and cannot provide name resolution to clients.
MASTERSection 11.4
SLAVESection 11.4
FORWARDERSection 11.5
CACHINGSection 11.9
|
9.4 Solving DNS/BIND Client Problems
|

|
Verify that the Additional Networking Services subset is
installed.
Enter the following command:
# setld -i | grep OSFINET
If the subset is installed, the following message is displayed:
OSFINETnnn installed Additional Networking Services (Network-Server/Communications)
If the subset is not installed, install it by using
the
setld
command.
See the
Installation Guide
for more
information on installing the subset.
|
|

|
Use the
rcmgr
utility to display the value of the
BIND_SERVERTYPE
entry in the
/etc/rc.config.common
file:
# rcmgr get BIND_SERVERTYPE
If no type is specified, run the SysMan Menu utility
to configure your DNS client.
See
Section 2.5
for more
information.
|
|


Problem still exists? Report it to your service representative.
See
Chapter 12.
|
If you attempt to use one of the network commands (for example,
telnet,
rlogin, and
rsh
commands)
and the remote host is not known, the following message is displayed:
unknown host
Complete
the following steps:
Look in the
/etc/svc.conf
file to determine
if DNS is being used for the
hosts
database lookup.
If
it is, go to step 2.
If it is not, add it to the file by using the
/usr/sbin/svcsetup
script.
Retrieve information about the remote host with which you
tried to communicate by using the
nslookup
command.
Enter
the following command:
# nslookup hostname
If the command
succeeds, the client is set up correctly; try the network command again.
If
the command fails, go to step 3.
View the
/etc/resolv.conf
file and retrieve
the addresses for the
nameserver
entries.
Verify that the servers are reachable by using the
ping
command.
If no servers are reachable, contact your network
administrator.
If any name server fails to respond to the
ping
command, delete the name server entry from the
resolv.conf
file.
Try the
nslookup
command again.
If the
command fails, see the solutions for solving DNS/BIND server problems in
Section 9.3.
|
9.5 Solving NIS Server Problems
|

|
Verify that the Additional Networking Services subset is installed.
Enter the following command:
# setld -i | grep OSFINET
If the subset is installed, the following message is displayed:
OSFINETnnn installed Additional Networking Services (Network-Server/Communications)
If the subset is not installed, install it by using
the
setld
command.
See the
Installation Guide
for more
information on installing the subset.
|
|
|
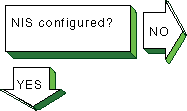
Use the
rcmgr
utility to display the value of the
NIS_CONF
entry in the
/etc/rc.config.common
file:
# rcmgr get NIS_CONF
If nothing is returned, run the SysMan Menu utility
to configure your NIS server.
See
Section 3.3
for more
information.
|
|
|
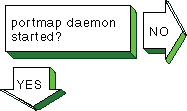
Verify that the
portmap
daemon is running.
Enter
the following command:
# ps -e | grep portmap
If you do not find the
portmap
daemon, stop and restart
NIS, using the following commands:
# /sbin/init.d/nis stop
# /sbin/init.d/nis start
If the
portmap
daemon does not start, reboot the
server.
|
|

|
Verify that a
ypserv
process is running.
Enter the
following command:
# ps -e | grep yp
If no
ypserv
process is running, stop and start NIS,
using the following commands:
# /sbin/init.d/nis stop
# /sbin/init.d/nis start
If a
ypserv
process is running, execute a
ypwhich
command.
Enter the following command:
# ypwhich
If nothing is returned, find the process ID (PID) of the
portmap
process and kill it.
Enter the following commands:
# ps -e | grep portmap
# kill -9 portmap_PID
Note
Because other network services use the
portmap
daemon,
stopping it can affect network service.
Therefore, notify your users of potential
disruptions.
Stop and start NIS by using the following commands:
# /sbin/init.d/nis stop
# /sbin/init.d/nis start
|
|
|
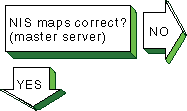
Verify that the information in the map is correct.
Enter the following
command:
# ypcat map_name
The
map_name
variable is the name of the
NIS map.
If the information is incorrect, create a new map.
Enter the following
commands:
# cd /var/yp
# make map_name
The following message is displayed:
map_name updated
If the
make
command indicates that the database is not updated, complete the
following steps:
Remove the
database_name.time
file in the
/var/yp
and
/var/yp/domainname
directories.
Create a new map by using the
make
command.
Enter the following commands:
# cd /var/yp
# make map_name
|
|

Problem still exists? Report it to your service representative.
See
Chapter 12.
|
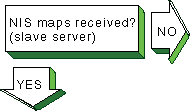
If you suspect that a slave server is not getting NIS map updates, complete
the following steps on the slave server:
Verify that the NIS master server is running and reachable
by using the
ping
command.
Create a
ypxfr
log file.
Enter the following
commands:
# cd /var/yp
# touch ypxfr.log
Run
ypxfr
interactively to get map updates.
Enter the following command:
# ypxfr mapname
Examine the
ypxfr.log
file and resolve
any problems.
Remove the log file to turn logging off.
Verify the
ypxfr
entries in the
/var/spool/cron/crontabs/root
file.
Use either the
pg
command or the
/usr/bin/crontab -l
command.
The slave server entries are similar to the following:
# Network Information Service: SLAVE server entries
30 * * * * sh /var/yp/ypxfr_1perhour
31 1,13 * * * sh /var/yp/ypxfr_2perday
32 1 * * * sh /var/yp/ypxfr_2perday
Verify that the map has an entry in the corresponding
ypxfr
shell script.
Look in the
syslogd
daemon message files
for any NIS messages.
See
Section 10.4
for more information.
Verify that the slave server is in the
ypservers
map for the domain.
|
9.6 Solving NIS Client Problems
|

|
Use the
rcmgr
utility to display the value of the
NIS_CONF
entry in the
/etc/rc.config.common
file:
# rcmgr get NIS_CONF
If nothing is returned, run the SysMan Menu utility
to configure your NIS client.
See
Section 3.3
for more
information.
|
|
|
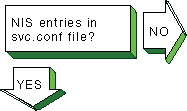
Use the
/usr/sbin/svcsetup
script to verify that
the
svc.conf
file contains entries for NIS.
NIS entries
are indicated by the letters "yp."
For the
passwd
and
group
databases,
the Security Integration Architecture (SIA) controls whether or not NIS is
used.
However, in order to use NIS, a plus sign followed by a colon (+:) must
be on the last line in both databases.
|
|

|
Verify that the
portmap
daemon is running.
Enter
the following command:
# ps -e | grep portmap
If no
portmap
daemon is running, stop and restart
NIS, using the following commands:
# /sbin/init.d/nis stop
# /sbin/init.d/nis start
If the
portmap
daemon does not start, reboot the
client.
|
|

|
Verify that a
ypbind
process is running.
Enter the
following command:
# ps -e | grep yp
If no
ypbind
process is running, stop and start NIS,
using the following commands:
# /sbin/init.d/nis stop
# /sbin/init.d/nis start
If a
ypbind
process is running, enter the
ypwhich
command:
# ypwhich
If the
ypwhich
command does not return an answer,
kill the
portmap
process.
Enter the following command:
# kill -9 portmap_PID
Stop and start NIS, using the following commands:
# /sbin/init.d/nis stop
# /sbin/init.d/nis start
|
|
|
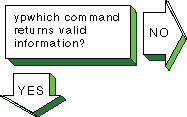
If the
ypwhich
command displays inconsistent information
when invoked several times in succession, your client system is changing the
server system to which it is bound.
This can occur over time, especially if
your system is on a busy network or if the NIS servers are busy.
Once all
clients get acceptable response time from the NIS servers, the system will
stabilize.
If the
ypwhich
command reports that the domain is
not bound, your system did not initially bind to a server system.
Issue a
ypcat
command, then reissue the
ypwhich
command.
|
|


Problem still exists? Report it to your service representative.
See
Chapter 12.
|
If an NIS command hangs, the following message is displayed on the console:
yp: server not responding for domain domainname.
Still trying
The client cannot communicate with the server.
Complete the following
steps:
Use the
rcmgr
command to verify that the
domain name returned by the
domainname
command matches
the value of the
NIS_DOMAIN
entry in the server's
/etc/rc.config.common
file:
# rcmgr get NIS_CONF
If the
domain name does not match, or is not correct for your environment (note that
the domain name is case-sensitive), reconfigure the client system by using
the SysMan Menu utility.
See
Section 3.3
for more information.
Verify that at least one NIS server for your domain is running
on your local subnetwork.
If there is not, reconfigure the client by using
the SysMan Menu utility, and choose to use the
-S
option to the
ypbind
command.
Determine if other clients on the subnetwork are having problems
with any of the NIS commands.
Verify that
ypserv
daemon was started on
the server by entering the following command:
# rpcinfo -p server_name
Also, verify that the
ypserv
daemon is currently
running on the server by entering the following command:
# rpcinfo -t server_name ypserv 2
If the server fails either test, stop and restart NIS on the server
as follows:
# /sbin/init.d/nis stop
# /sbin/init.d/nis start
Look in the
syslogd
daemon message files
for any NIS messages.
See
Section 10.4
for more information.
Verify that the server is running.
See the solutions for
solving NIS server problems in
Section 9.5.
If the previous steps do not solve the problem, complete the following
steps:
Stop and start NIS.
Enter the following commands:
# /sbin/init.d/nis stop
# /sbin/init.d/nis start
If this does not solve the problem, go to step 2.
Reboot the system.
Reconfigure NIS by running the SysMan Menu utility.
|
9.7 Solving NFS Server Problems
|
|
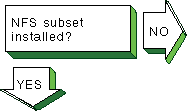
Verify that the NFS Utilities subset is installed.
Enter the following
command:
# setld -i | grep OSFNFS
If the subset is installed, the following message is displayed:
OSFNFSnnn
 installed  NFS(tm) Utilities  (Network-Server/Communications)
If the subset is not installed, install it by using the
setld
command.
See the
Installation Guide
for more information on installing
the subset.
|
|
|
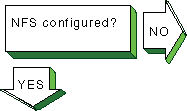
Use the
rcmgr
utility to display the value of the
NFSSERVING
entry in the
/etc/rc.config.common
file:
# rcmgr get NFSSERVING
If nothing is returned, run the SysMan Menu utility
to configure your NFS server.
See
Section 4.3
for more
information.
Verify that the network software has been configured.
See the solution
at
[Network configured?]
in the diagnostic map in
Network Administration: Connections.
|
|

|
Verify that the
portmap
daemon is running.
Enter
the following command:
# ps -e | grep portmap
If the
portmap
daemon is not running, stop and restart
NFS by using the following commands:
# /sbin/init.d/nfs stop
# /sbin/init.d/nfs start
If the
portmap
daemon does not start, reboot the
server.
|
|

|
Verify that the NFS daemons are registered with the
portmap
daemon.
Enter the following commands:
# rpcinfo -u server_name mount
# rpcinfo -u server_name nfs
If neither is registered, start NFS by using the following command:
# /sbin/init.d/nfs start
|
|

|
To verify that the NFS daemons are running, complete the following steps:
Verify that a
mountd
process is running.
Enter the following command:
# ps -e | grep mountd
If a
mountd
process is running, go to step 2.
If no
mountd
process
is running, stop and start NFS by using the following commands:
# /sbin/init.d/nfs stop
# /sbin/init.d/nfs start
Verify that an
nfsd
process is running.
Enter the following command:
# ps -e | grep nfsd
If no
nfsd
process is running, stop and start NFS by using the following commands:
# /sbin/init.d/nfs stop
# /sbin/init.d/nfs start
Alternatively, you can use the SysMan Menu utility to view the status
of some NFS daemons.
You can skip directly to the status dialog box by entering
the following command:
# /usr/sbin/sysman nfs_daemon_status
|
|


Problem still exists? Report it to your service representative.
See
Chapter 12.
|
To verify that the files are being exported, complete the following
steps:
Verify that file is being exported.
Enter the following command:
# showmount -e
If the file is being exported, go to step 3.
If the file is not being exported, verify that the file has
an entry in the
/etc/exports
file.
If there is no entry
in the
/etc/exports
file, edit the file and create an entry.
Have the remote system mount the file.
If the file is being exported and the users cannot mount the
file, use the
rcmgr
utility to display the value of the
NONROOTMOUNTS
entry in the
/etc/rc.config
file
and determine if the users are allowed to mount the file:
# rcmgr get NONROOTMOUNTS
If
the
NONROOTMOUNTS
parameter is 0, only users running as
root can mount files from this server.
To allow users not running as root
to mount the files, enter the following command:
# rcmgr set NONROOTMOUNTS 1
Verify that the
mountd
daemon is running
with Internet address checking on.
Enter the following command:
# ps -e | grep mountd
If the
-i
option is displayed, the client's name
and address must be in the
/etc/hosts
file, or in the DNS
or NIS
hosts
database.
Only known hosts can mount the file
system.
If the
-d
or
-s
option is displayed, the client system must be in the same DNS domain or subdomain,
respectively, as the server.
If the
mountd
daemon is returning stale
file handles for exported files, send a hangup signal (SIGHUP) to the
mountd
daemon to force it to reread the
/etc/exports
file.
Enter the following commands:
# ps -e | grep mountd
# kill -1 mountd_pid
|
9.8 Solving NFS Client Problems
|

|
Verify that the NFS Utilities subset is installed.
Enter the following
command:
# setld -i | grep OSFNFS
If the subset is installed, the following message is displayed:
OSFNFSnnn installed NFS(tm) Utilities (Network-Server/Communications)
If the subset is not installed, install it by using the
setld
command.
See the
Installation Guide
for more information on installing
the subset.
|
|

|
Use the
rcmgr
utility to display the value of the
NFS_CONFIGURED
entry in the
/etc/rc.config.common
file:
# rcmgr get NFS_CONFIGURED
If nothing is returned, run the SysMan Menu utility
to configure your NFS client.
See
Section 4.3
for more
information.
Verify that the network software has been configured.
See the solution
at
[Network configured?]
in the diagnostic map in
Network Administration: Connections.
|
|

|
Verify that the
portmap
daemon is running.
Enter
the following command:
# ps -e | grep portmap
If the
portmap
daemon is not running, stop and restart
NFS by using the following commands:
# /sbin/init.d/nfs stop
# /sbin/init.d/nfs start
If
the
portmap
daemon does not start, reboot the client.
|
|

|
If the client cannot mount a remote file system or directory, complete
the following steps:
If an error message is displayed on the user's terminal, see
Appendix C
for the error message and a description.
Verify that the remote NFS server is on your local network
and in your
hosts
database.
Verify that the server daemons on the remote system are running.
Enter the following command:
# rpcinfo -p server_name
Verify that the server is exporting the files you want to
mount.
Enter the following command:
# showmount -e server_name
See the solutions for solving NFS server problems in
Section 9.7.
If the server is running and you still have problems,
verify the Ethernet connections and the Internet connections between the
client system and the remote server.
Determine if other clients on the network are having problems
with the remote server.
Verify that the mount command line or the entry in the
/etc/fstab
file is correct, and verify the following:
The host name matches the name of the remote NFS server.
The mount point exists on your system.
If you get an authentication error, verify the following:
If you are not a superuser, the server allows nonroot mounts.
Your host name is in the server's
hosts
database.
If your system is not in the same domain as the server, the
server performs domain checking.
See
mountd(8)
for more information
on server options.
|
|


Problem still exists? Report it to your service representative.
See
Chapter 12.
|
If application programs that perform file-related tasks do not complete
their tasks or take a long time to do so, complete the following steps:
If an error message is displayed on the user's terminal, see
Appendix C
for the error message and a description.
Verify that the server is running.
See the solutions for
solving NFS server problems in
Section 9.7.
If the server
is running, verify that the
nfsd
daemon is accumulating
CPU time.
If it is not, kill it and restart it.
If this does not solve the
problem, reboot the server.
If the remote file systems or directories are
mounted with the
hard
option, the program continues when
the server is running once again.
Determine if other clients on the network are having problems
with the remote server.
If they are not, verify that the Ethernet connections
and the internet connections between the client system and the remote server
are working properly.
Determine if any
nfsiod
daemons are running.
Enter the following command:
# ps -e | grep nfsiod
If no
nfsiod
daemons are running, start some.
Enter the following command:
# /usr/sbin/nfsiod 7
Although
the
nfsiod
daemons are not necessary for a client, they
perform read-ahead and write-behind functions, which might make I/O faster.
If file access requests succeed but file locking requests
hang indefinitely, verify that the local
rpc.statd
and
rpc.lockd
daemons are running.
Enter the following commands:
# ps -e | grep rpc.statd
# ps -e | grep rpc.lockd
If they are not running, start them.
Enter the following
commands:
# /usr/sbin/rpc.statd
# /usr/sbin/rpc.lockd
Also, verify that the local
rpc.statd
and
rpc.lockd
daemons are running on the server.
Enter the following commands:
# rpcinfo -p server_name | grep status
# rpcinfo -p server_name | grep lockmgr
If they are not running, contact the server's system administrator.
Alternatively, you can use the SysMan Menu utility to view
the status of some NFS daemons.
You can skip directly to the status dialog
box by entering the following command:
# /usr/sbin/sysman nfs_daemon_status
|
9.9 Solving UUCP Problems
|

|
Verify that the UNIX-to-UNIX Copy Facility subset is installed.
Enter
the following command:
# setld -i | grep OSFUUCP
If the subset is installed, the
following message is displayed:
OSFUUCPnnn installed UNIX(tm)-to-UNIX(tm) Copy Facility (General Applications)
If the subset is not installed, install it by using
the
setld
command.
See the
Installation Guide
for more
information on installing the subset.
|
|

|
Verify that the Basic Networking Services subset (containing the
tip
and
cu
utilities) is installed.
Enter the
following command:
# setld -i | grep OSFCLINET
If the subset is installed,
the following message is displayed:
OSFCLINETnnn installed Basic Networking Services (Network-Server/Communications)
If the subset is not installed, install it by using
the
setld
command.
See the
Installation Guide
for more
information on installing the subset.
|
|

|
Look for entries in the
Permissions,
Devices, and
Systems
files in the
/usr/lib/uucp
directory.
If there are no entries, run the
uucpsetup
script.
See
Section 5.3
for more information.
|
|
|
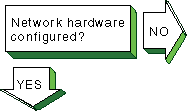
Configure the network hardware as follows:
Direct connections to remote host -- Use a null modem
or modem eliminator cable to connect your system to the remote host.
Phone line connection to remote host -- Use a cable to
connect your system to a modem and another cable to connect your modem to
a phone line.
The modem you use must be compatible with the modem at the
remote host.
Make sure the modem is configured as follows:
Forced data set ready (DSR) is disabled.
Full or verbose status messages are enabled.
Character echo is disabled.
Use 8-bit characters with no parity.
XON/XOFF flow control is disabled.
TCP/IP connection to remote host -- Use a cable to connect
your system to the network.
Then, run the Network Configuration application
to configure the network.
See
Network Administration: Connections
for more information on
setting up the network.
|
|

|
If you cannot dial up the remote system, verify the following:
Make sure that the setup parameters (such as speed, parity,
modem control, flow control, and other terminal characteristics) on the local
and remote ends are properly defined for your modem type.
Dial the number to the remote node.
If you do not get an "Attached"
message or a login prompt, plug a telephone handset into the local telephone
line to verify that there is a dial tone.
If you do not hear a dial tone,
call you local carrier to fix this problem.
If you get no message, verify
that the cabling between the local system and the modem is properly installed
and undamaged.
If you get a dial tone, check that your modem is operational
and perform diagnostic tests on your modem.
See the modem manual for more
information.
From another handset, dial the local telephone line.
If the
local telephone rings and you can carry on a conversation, the telephone
line on the local end is good.
If you cannot pass voice traffic, or if there
is no ring, call your local carrier to fix this problem.
Repeat steps 2 and 3 on the remote node to resolve problems
with the remote end.
If the telephone line is operational, verify that the remote
modem is set up to automatically answer incoming calls when the system raises
the data terminal ready (DTR) signal.
The system raises the DTR signal by
issuing a
uugetty
or
getty
command on
the port.
|
|

|
Run the
uucp
tests to test the connection to the
remote system.
See
Section 10.1
and
Section 10.2.
If you can establish a connection, but your file transfer eventually
times out and exits, attempt to set the type of flow control that the
uucico
daemon uses, as described in
Section 5.3.5
and the
uucico(8)
reference page.
|
|


Problem still exists? Report it to your service representative.
See
Chapter 12.
|
If the
tip
command does not execute successfully,
complete the following steps:
Verify that the system name, connection speed, and phone number
are in the
/etc/remote
file or that the system name and
connection speed are in the
/etc/remote
file and the phone
number is in the
/etc/phones
file.
See
remote(4)
and
phones(4)
for more information.
Examine the
at
entry in the
/etc/remote
file.
If the entry is correct, create an entry for the modem in
the
/etc/acucap
file.
See
acucap(4)
for more information.
Verify that the remote system is configured to answer incoming
calls.
|
9.10 Solving NTP Problems
|
|
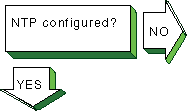
Use the
rcmgr
utility to display the value of the
XNTPD_CONF
entry in the
/etc/rc.config
file:
# rcmgr get XNTPD_CONF
If nothing is returned, run the SysMan Menu utility
to configure NTP.
See
Section 6.3
for more information.
|
|
|
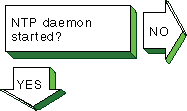
Verify that an
xntpd
process is running.
Enter the
following command:
# ps -e | grep xntpd
Alternatively, you can use the SysMan Menu
utility to view the status of the
xntpd
daemon.
You can
skip directly to the status dialog box by entering the following command:
# /usr/sbin/sysman ntp_status
If no
xntpd
process is running, start
NTP by using the following command:
# /sbin/init.d/xntpd start
|
|

|
If the
ntpq
or
xntpdc
command
cannot find the server host, the following message is displayed:
***Can't find host hostname
The
hostname
is not in the
/etc/hosts
file, the DNS
hosts
database, or the NIS
hosts
database.
Edit the appropriate file or database and add an
entry for the server host.
|
|

|
If you run one of the monitor programs and in the output from the
peers
command the reach column contains zeros (0s), complete the
following steps:
Contact the system administrator of the server and verify
which NTP daemon the server is running.
The entry for the server in the
/etc/ntp.conf
file must contain the phrase
version
x
after the server name, as follows:
server host1 version x
Look in the
/etc/hosts
file and verify
that there is an entry for each NTP server specified in the
/etc/ntp.conf
file.
If you are using either DNS or NIS for host information,
verify that the
hosts
database has an entry for each NTP
server.
If the
xntpdc
hostname
command does not display any information, verify that the
hostname
server is running NTP.
|
|


Problem still exists? Report it to your service representative.
See
Chapter 12.
|
If the
ntpq
or
xntpdc
request
times out, the following message is displayed:
hostname: timed out, nothing received
***Request timed out
Complete the following steps:
The
hostname
is not running the
xntpd
daemon.
Contact the system administrator for that system.
The network connection has gone down.
See the solutions for
[Host Reachable?]
in the diagnostic map in
Network Administration: Connections.
If you still cannot solve the problem, complete the following steps:
Examine the
/etc/rc.config
file to make
sure it contains entries similar to the following:
XNTPD_CONF="YES"
export XNTPD_CONF
XNTP_SERV1=server1
export XNTP_SERV1
XNTP_SERV2=server2
export XNTP_SERV2
XNTP_SERV3=server3
export XNTP_SERV3
XNTPD_OPTS="-g"
export XNTPD_OPTS
If this entry does not exist
or is incorrect, run the SysMan Menu utility to configure NTP.
See
Section 6.3
for more information.
Examine the
/etc/ntp.conf
file and make
sure the information in it is accurate.
It must contain entries for hosts
running NTP with which you want to synchronize system time.
Make sure the
correct version number is specified for each server and peer.
Use the SysMan Menu
utility to correct any entries.
See
Section 6.3
for information.
Look in the
/var/adm/syslog.dated/current/daemon.log
file for information about NTP problems on the system.
See
Section 10.4
for more information.
|
9.11 Solving sendmail Problems
|

|
Verify that mail is configured by switching to the
/var/adm/sendmail
directory and checking for the presence of the
sendmail.cf
and
sendmail.cf.orig
files.
If one of the files does not exist, run the SysMan Menu utility
to configure mail.
See
Section 6.3
for more information.
|
|

|
Verify that the
sendmail
command has been started.
Enter the following command:
# ps -e | grep sendmail
If
sendmail
is not running, start it using the following command:
# /sbin/init.d/sendmail start
|
|

|
If a user cannot send mail to another user, complete the following steps:
Determine if the
aliases
database was changed.
If it was, update the database by using the
newaliases
command.
Look in the
mail.log
files generated by
the
syslogd
daemon for the specific mail message.
If the
message reached its destination, the addressee is not on the destination system.
Verify that the user has the correct address.
See
Section 10.4
for information on viewing the
syslogd
message files.
|
|

|
If you sent a mail message and the recipient did not receive it, complete
the following steps:
Verify that the address is correct.
Verify that the remote node is reachable by using the
ping
command.
Look in the
mail.log
files generated by
the
syslogd
daemon for the sender's user name.
See
Section 10.4
for information on viewing the
syslogd
message files.
If you find an entry, write down the message ID.
If no entry is found, send the message again.
Using the message ID, search through the
mail.log
files for the "from" and "to" entries.
If you find a "from" entry
but no "to" entry, either
sendmail
did not receive the
message or the message was corrupted.
Look in the
/var/spool/mqueue
directory for files containing the message ID by entering the following
command:
# ls -l /var/spool/mqueue/*fmessage_ID
Possible outcomes include:
The
qf*message_ID
control file is present but the (df*message_ID)
data file is not.
The message was lost.
A "from" entry and a "to" entry exist, and the status is deferred.
The message is in the queue.
There is no corresponding sent entry.
Use the
mailq
command to report the reason for the deferral.
A "from" entry and a "to" entry exist, the status is sent,
and the message was delivered.
If a local delivery, the message reached the
destination.
If a remote delivery, have the system administrator on the remote
host search for the message.
|
|


Problem still exists? Report it to your service representative.
See
Chapter 12.
|
If sendmail is not working correctly, complete the following steps:
Look in the rejected message for an error message.
Look for error messages in the
mail.log
files generated by the
syslogd
daemon.
See
Section 10.4
for information on viewing the
syslogd
message files.
See
Appendix E
for a list of
sendmail
error messages.
|
9.12 Solving POP and IMAP Problems
|

|
Verify that the Additional Networking Services subset is installed on
the server.
Enter the following command:
# setld -i | grep OSFINET
If the subset is installed, the following message is displayed:
OSFINETnnn installed Additional Networking Services (Network-Server/Communications)
If the subset is not installed, install it by using
the
setld
command.
See the
Installation Guide
for more
information on installing the subset.
|
|

|
If the user cannot connect to the Post Office Protocol (POP) or Internet
Message Access Protocol (IMAP) server:
Verify that the user is connecting to the correct server.
Verify that the server is reachable by using the
ping
command.
Verify the POP or IMAP entries in the
/etc/passwd,
/etc/services, and
/etc/inetd.conf
files on the server, as described in
Section 7.4.1
and
Section 7.5.1.
If necessary, restart network services
to effect the changes.
|
|

|
Verify that the user has specified a valid user name and password.
Use
the
mailusradm
utility to verify the existence of the POP
or IMAP account on the server or to change the password, if necessary.
|
|

|
If a user cannot retrieve mail from the POP or IMAP server:
Verify that the user has a POP3 or IMAP4-compatible mail program.
For POP, look in the
/usr/spool/mail
directory
for a lock file named after the user.
If one exists, delete the file to remove
the lock.
For IMAP, verify that the user has proper ACLs for the IMAP
mail folder by using the
cyradm
command.
See
Section 7.5.8
and
cyradm(8).
Look in the
mail.log
files generated by
the
syslogd
daemon for error messages related to POP or
IMAP.
See
Section 10.4
for information on viewing the
syslogd
message files.
Create a directory with the user's account name in the
configdirectory/log
directory (usually, the log directory
is
/var/imap/log, see the
/etc/imapd.conf
file for the location of the
configdirectory
on
your system).
When the user attempts to access the server, examine the log
of the session to see where the error occurs.
|
|


Problem still exists? Report it to your service representative.
See
Chapter 12.
|
If the user is not receiving new mail:
Look in the
mail.log
files generated
by the
syslogd
daemon for errors.
See
Section 10.4
for information on viewing the
syslogd
message files.
For IMAP, look at the
user
and
quota
configuration directories to verify that subdirectories
a
through
z
exist (see
Section 7.5.2),
that the subdirectories contain the proper files for the given user (see
Section 7.5.6), and that all directories and files under
/var/imap
and
/var/spool/imap
are
owned by the
imap
user.
If the user cannot send mail:
Verify that the user is connecting to the correct SMTP server.
Verify that the SMTP server is reachable by using the
ping
command.
See
Section 9.11
on solving
sendmail
problems.
|