Several desktop applications and a suite of system management (SysMan) applications are integrated into the Common Desktop Environment (CDE). Most of these applications can be started from the Application Manager.
This chapter provides the following information:
You can start many desktop and SysMan applications from either the Application Manager or from the command line. Use one of the following methods to start applications:
To start an integrated application from the Application Manager:
Click the Application Manager icon on the Front Panel.
Double click the application group you want to access.
Double click on the application that you want to start.
To start an application from the command line, enter the
command name.
If the command location is not included in your
$PATH
variable, you must include the command's full pathname.
For example,
to start the Image Viewer application from the command line, you could type
the following:
$ /usr/bin/X11/dximageview &
The ampersand ( & ) at the end of the command line runs the application
in the background, letting you use the same terminal window to perform other
tasks.
Section 1.3.4.1 tells you how to find reference pages for commands and applications. The reference page tells you what command invokes the application, explains options, and provides the location of the command.
Other system management applications can be started from the SysMan Menu or the SysMan Station.
Section 5.5 explains how to use the SysMan Menu to get system management data and run selected system administration tasks.
Section 5.6 introduces the SysMan Station, a tool to help your system administrator manage either single systems and clusters.
5.2 Running Applications Across the Network
To run an application that is not installed on your system, you need network access and an account on a remote system where that application is installed. You can run the remote application and display the output on your system as though the application was running locally. Before you can do this, you must do the following:
You can use the Host Manager to display remotely run applications.
See the Host Manager online help volume for more information.
5.2.1 Authorizing Access to your System
To
display remotely run applications on your local system, use the
xhost
command to provide the remote host access to your display
before you log into the remote system.
For example, if the host name of the
remote machine is
trenton, enter the following on your
system:
$ /usr/bin/X11/xhost +trenton
The remote system named
trenton
is added to the list of hosts that have access to your machine.
See the
xhost(1X)
reference page for more information.
5.2.2 Enabling the Display
Once you have authorized the remote system access to your local system, log into the remote system and specify where you want to display the remotely run application.
The command you enter to enable the display varies depending on the operating system of the remote host you are using, and the shell you are using.
Use one of the following methods to enable the display:
If the remote host uses the C shell, enter the following at the system prompt:
setenv DISPLAY local_sysname:0
If the remote host uses the Bourne or Korn shell, enter the following at the system prompt:
DISPLAY=local_sysname:0
export DISPLAY
If the remote host is an OpenVMS system and the OpenVMS network host is running DECnet, enter the following at the system prompt:
set display/create/node=local_sysname
If the OpenVMS network host is running Transmission Control Protocol/Internet Protocol (TCP/IP), you can use the TCP/IP network transport as follows:
set display/create/transport=tcpip/node=local_sysname
If the name of your system appears in lowercase in the OpenVMS TCP/IP database
file, you must enclose the name of your local system in double quotes ("local_sysname").
If it does not, do
not use quotes.
Use the
hostname
command to see how your
system name is entered into the database file.
In the previous examples, local_sysname is the host name of the machine where you want the remote application to display.
Once you have authorized access to your system and enabled the display,
you can run the application from the remote machine by using the command name
as described in
Section 5.1.
The application then displays
on the system you specified.
5.3 Using Desktop Applications
Several desktop applications have been integrated into CDE. Your primary source of information about any of these applications is each application's online help volume. Table 5-1 highlights some of these applications.
Note
The desktop applications available on your system may depend upon the software subsets that you have loaded. This section does not list all desktop applications available.
Table 5-1
shows some of the desktop applications that
are integrated into CDE.
Table 5-1: Desktop Applications
| Application | Use of Application |
| DECterm | DECterm provides a video terminal emulator. |
| Differences | Provides a graphical display of differences between two files. |
| Image Viewer | Displays the contents of documents that are in specific formats such as GIF, JPEG, and TIFF. |
| Keyboard Options | Offers a choice of options that you can use to customize your keyboard. |
| Keycaps | Shows a graphical display of a keyboard with keycaps drawn according to the current server keymap and can be used to start the Keymaps application. |
| Input Method Options | Changes how keystrokes are interpreted by the operating system. |
Note
The Input Method Options application is located in
/usr/dt/binand is not included in the Application Manager under Desktop_Apps. To start this application, see Section 5.3.4.
Some of the applications described here are advanced tools that address
special needs, and are not intended for everyday use.
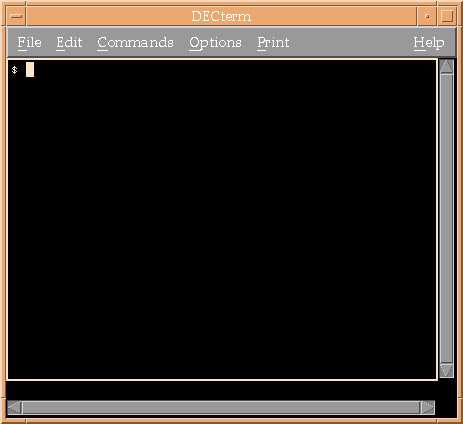
5.3.1 Using DECterm
The DECterm application is a video terminal emulator. When DECterm is started, a window appears on your screen. Enter commands in this window as you would on any terminal attached to your system or use it for remote communications to other systems. To start DECterm, enter the following on your system:
$ /usr/bin/X11/dxterm
Figure 5-1
shows the DECterm application.
Figure 5-1: DECterm Application
5.3.1.1 Summary of Other DECterm Features
DECterm also lets you:
Change the appearance of the DECterm window, for example, font size and window title
Change the DECterm display features such as the type of cursor and the use of horizontal and vertical scroll bars
Change DECterm general features like terminal type
Compose characters
Choose a National Replacement Character Set (NRCS)
Change keyboard, graphic, and printer options
For more information on using the DECterm application, see the
dxterm(1X)
reference page and the online help volume.
To access the online help volume,
start DECterm, then select Help.
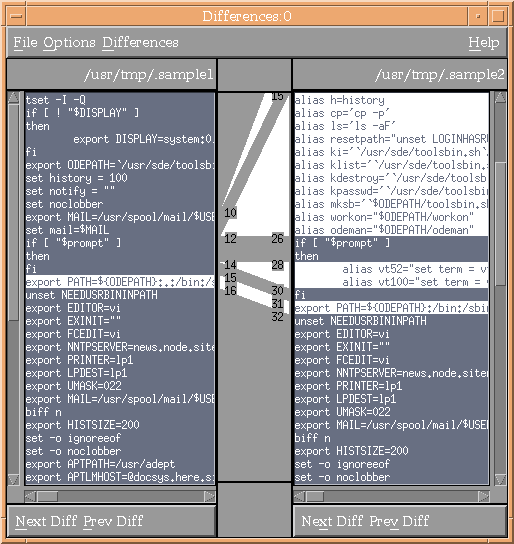
5.3.2 Using Visual Differences
Visual
Differences is a graphical interface to the
diff
command.
By using Visual Differences, you can compare two ASCII text files line by
line, and then browse through a graphical display of these differences.
Figure 5-2
shows the Visual Differences application.
Figure 5-2: Visual Differences Application
For information on using the Differences application, see the
dxdiff(1X)
reference page and the online help volume.
To access the online help volume,
start Differences, then select Help.
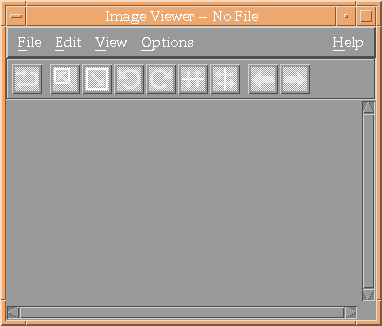
5.3.3 Using Image Viewer
The Image Viewer application can be used to view graphic files.
The supported image types are GIF, JPEG, TIFF, and XPM.
In the Image Viewer
window, you can display images and manipulate the image views using either
the toolbar icons or menus.
Figure 5-3
shows the Image
Viewer application.
Figure 5-3: Image Viewer Application
For information on using the Image Viewer application, see the
dximageview(1X)
reference page and the online help volume.
To access the online help volume,
start Image Viewer, then select Help.
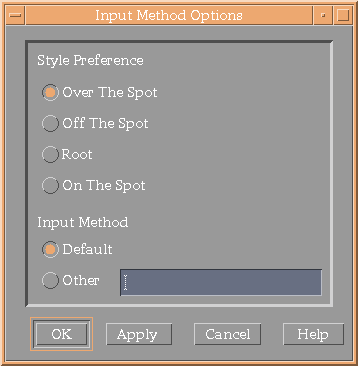
5.3.4 Using Input Method Options
The Input Method Options application is a tool for advanced users. You can use this application to specify an input method and to change how keystroke characters are interpreted by the system. For example, Asian (multibyte) characters such as Japanese Kanji or Chinese Hanzi characters can be entered from the keyboard by using this application. To start this application, follow these steps:
Open a terminal emulator window.
Enter the following:
%/usr/dt/bin/dtimsstart
Figure 5-4
shows the Input Method Options application.
Figure 5-4: Input Method Options Application
For information on using the Input Method Options application, see the
dtimsstart(1)
reference page and the online help volume.
To access the online help volume,
start Input Method Options, then select Help.
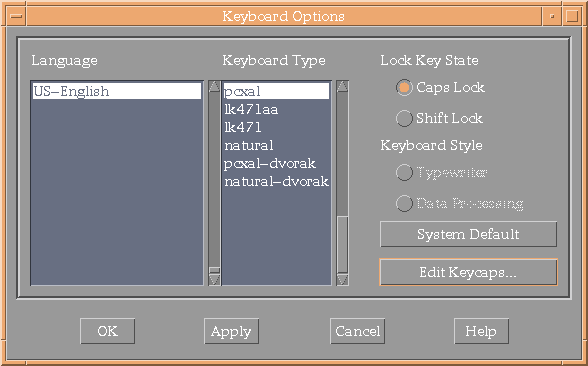
5.3.5 Using Keyboard Options
The Keyboard Options
application is a tool for advanced users.
Use this tool to customize keyboard
settings.
This tool is normally used after the initial setup of your system
only to set options that cannot be specified during the installation.
Figure 5-5
shows the Keyboard Options application.
Figure 5-5: Keyboard Options Application
For information on using the Keyboard Options application, see the
dxkeyboard(1)
and the online help volume.
To access the online help volume, start Keyboard
Options, then select Help.
5.3.6 Using Keycaps
The Keycaps application is a tool for advanced users. Use this application to display and edit keyboard mappings.
For information on using the Keycaps application, see the
dxkeycaps(1X)
reference page and the online help volume.
To access the online help volume,
start Keycaps, then select Help.
5.4 Using System Management Applications
A suite of system management (SysMan) applications provide a graphical front-end to administrative commands for the person who administers your system.
Section 5.1 describes how to access and start the SysMan applications. You must have the appropriate privileges to use most of these applications. For information on using each application, see that application's online help volume. You can access the help volume by opening an application and clicking on the Help menu.
The suite of SysMan applications is divided into several categories,
shown in
Figure 5-6:
Figure 5-6: SysMan Categories in Application Manager
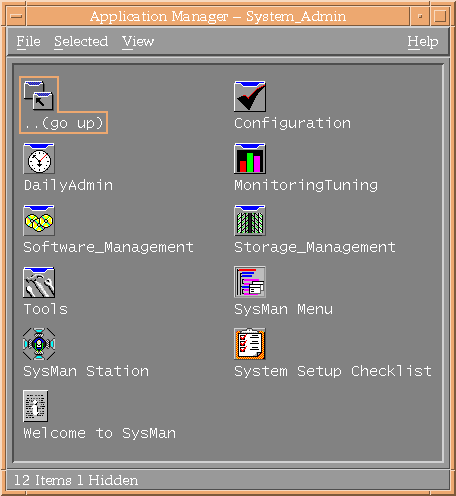
Use applications in this category to configure a system after installation. Ordinarily, you will not need to use these applications once your system is set up.
Use applications in this category for frequently performed system administration tasks.
Use applications in this category to monitor and tune your system after it is up and running.
Use applications in this category to install and manage additional software on your system.
Use applications in this category to monitor and manage file sytems.
Use applications in this category to display a variety of system statistics with the Display Window application. You can repeatedly display the same statistics to monitor progress or trends.
The SysMan Menu provides a hierarchical menu of system management tasks that can be used in several different user environments such as X Windows, web browsers, or character-based terminal displays. It can be started from the command line or from the CDE Application Manager. Authorized users also can invoke the SysMan Menu from the SysMan Applications Subpanel.
The SysMan Station provides a graphical topological representation
of the system and all its components, letting a system administrator visually
select system components and then run SysMan applications that apply
to that component.
The system administrator can use the SysMan Station
to manage both single systems and clusters.
You must be logged in as
root
to access the SysMan Station.
Note
The system management applications available on your system may depend upon the software subsets that you have loaded. This section does not list all of the system management applications available.
To find information about the applications in each SysMan application group, do the following:
Click the Help Manager control from the CDE Front Panel.
Click System Management.
Click Welcome to SysMan.
Scroll down, and click on one of the SysMan application groups.
Each SysMan application in the application group is described along with restrictions, configuration dependencies, and links to additional information such as the application's online help volume and reference page. You also can access the online help for any application by starting the application and selecting Help.
The following items, although not SysMan application categories, are also available from the Application Manager's System Administration selection.
System Setup Checklist
This opens the System Setup application, which launches Quick Setup and Custom Setup. You can use the System Setup Checklist after installation to configure your system with each of the Configuration Applications listed. A check mark next to an application icon indicates that the application has been run. For more information on the System Setup Checklist, refer to the online help volume and the System Administration.
Welcome to SysMan
Select this item for a shortcut to the Welcome to SysMan online help volume.
A system administrator uses the SysMan Menu to view system management data and run selected system administration tasks. You must have the appropriate privileges to run some of the tasks on the SysMan Menu.
Note
Although many of the system administration tasks on the SysMan Menu may seem to duplicate those available from the Application Manager, the SysMan Menu also provides access to these tasks from the following platforms:
Any local or remote character-cell terminal
Any X11-compliant windowing environment, such as CDE or DECwindows
Windows 95 or Windows NT running on a personal computer (PC)
Multiplatform access to the SysMan Menu is described in the System Administration manual.
If you have the appropriate privileges, you can access the SysMan Menu in one of the following ways:
From the command line:
# /usr/sbin/sysman
The
sysman(8)
reference page
discusses available options, including GUI and character-cell interfaces.
From the CDE Front Panel:
Select the SysMan Menu icon from the Application Manager
Select the SysMan Menu icon from the SysMan Applications subpanel
To select and run a task from the SysMan Menu, first highlight the item that you want. Categories and tasks are displayed in the following manner:
Categories that can be expanded are preceded by a plus ( + ) character
Categories that are fully expanded are preceded by a minus ( - ) character
Executable tasks are preceded by a pipe ( | ) character
To expand a category, do one of the following:
Select an expandable category
Highlight the category and choose the Select button
Continue to expand subcategories until the task title is displayed. You can use either selection method to start the actual task.
If you do not know where the task is located in the SysMan Menu hierarchy, you can do the following:
Select Find at the bottom of the SysMan Menu. The Find Task by Keyword dialog box is displayed.
Enter a keyword in the text entry field.
Wildcard characters
are permitted, and the search is case sensitive.
For example, you could enter
*[Nn]etwork*
to locate tasks related to networks.
Select the task that you want from the displayed list.
For information on using SysMan Menu, see the
sysman(8)
reference page,
the
System Administration
guide, and the online help volume.
To access the online
help volume, start SysMan Menu, then select Help.
5.6 Using SysMan Station
A system administrator uses the SysMan Station to manage both single
systems and clusters.
You must be logged in as
root
to
see the SysMan Station icon, which displays on the Front Panel, the SysMan
Applications subpanel, and in the Application Manager's System Management
Applications group.
The SysMan Station provides a graphical representation of the system and all its components. It lets you visually select system components and then run SysMan applications that apply to that component. The SysMan Station provides a graphical representation of the system hierarchy from the host down to individual devices such as disks and tapes. You can select devices and then apply appropriate device management applications.
For information on using SysMan Station, see the
sms(8)
reference page, the
System Administration
guide, and the online help volume.
To
access the online help volume, start SysMan Station, then select Help.