| Hey all,
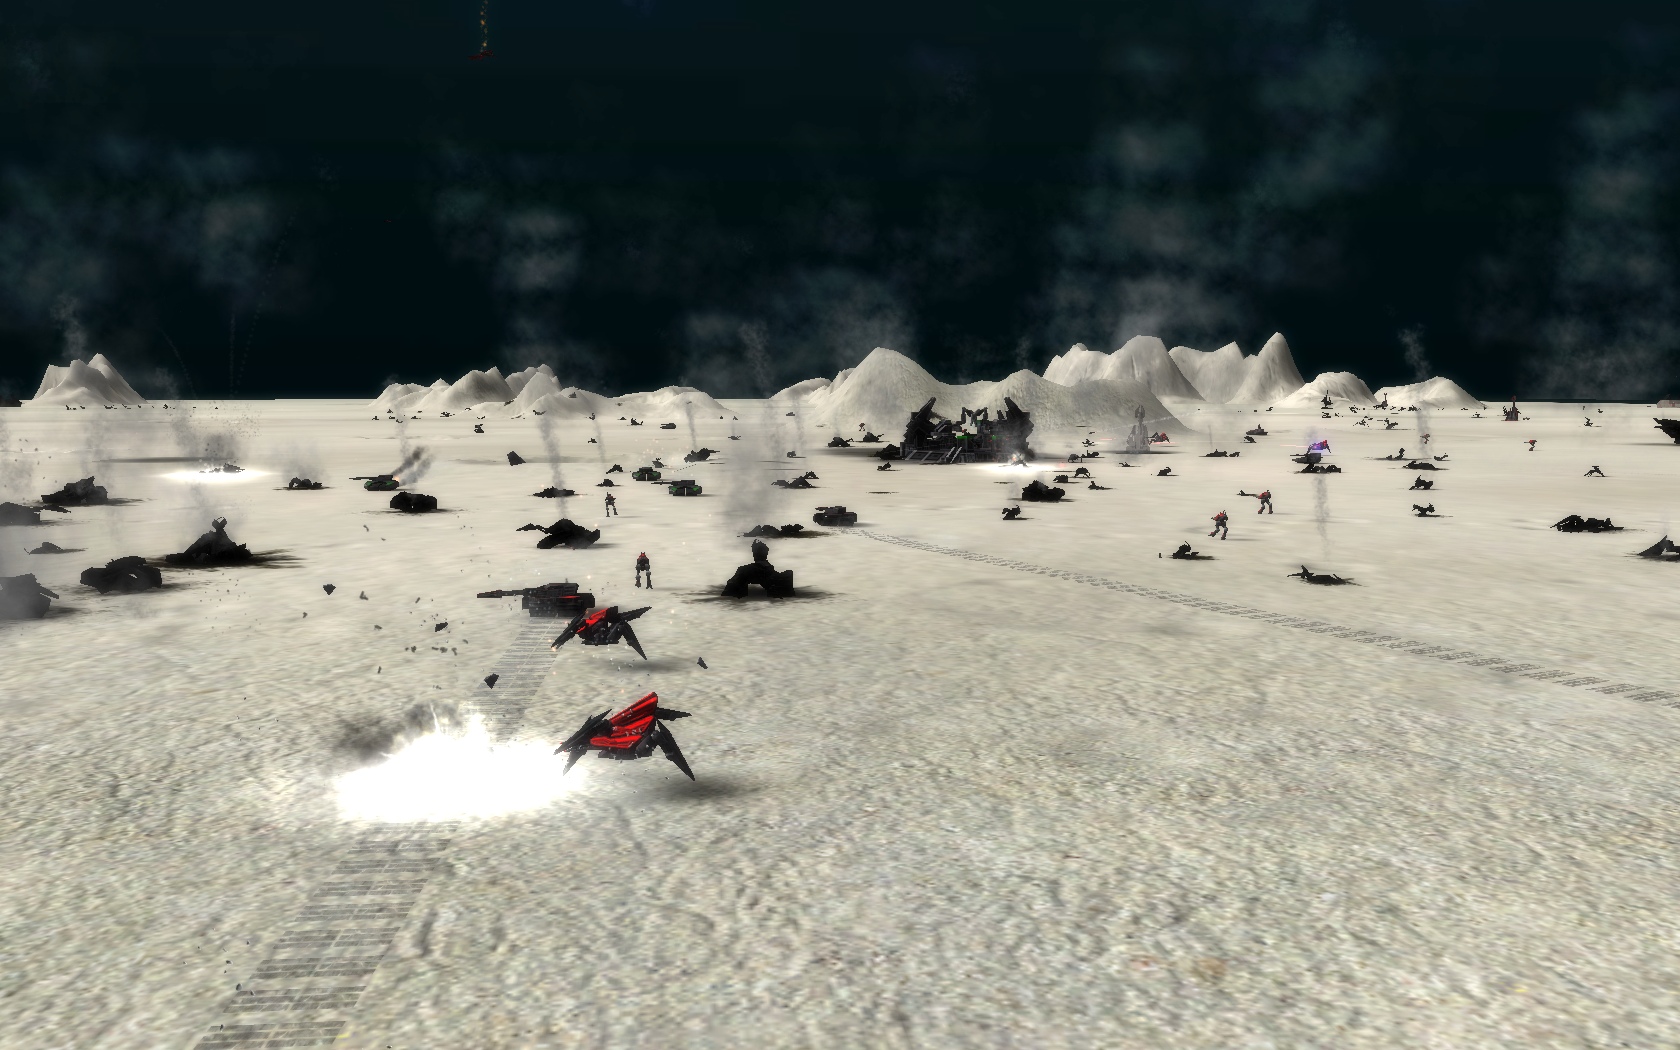
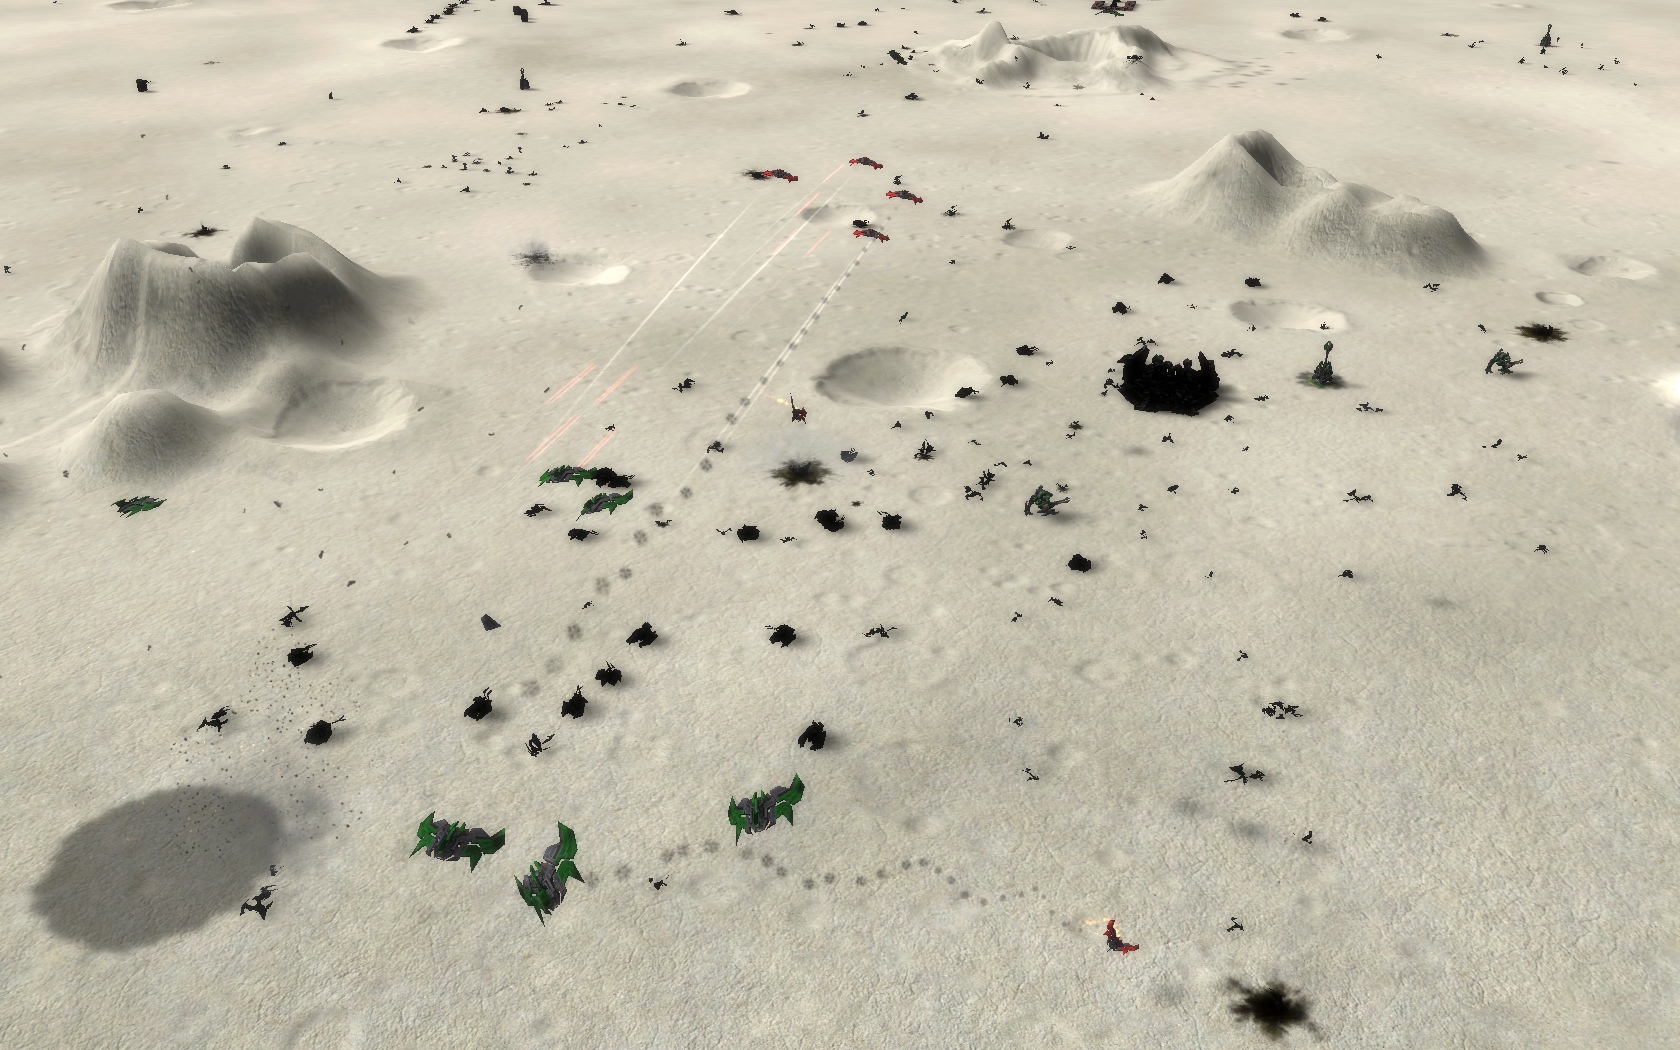
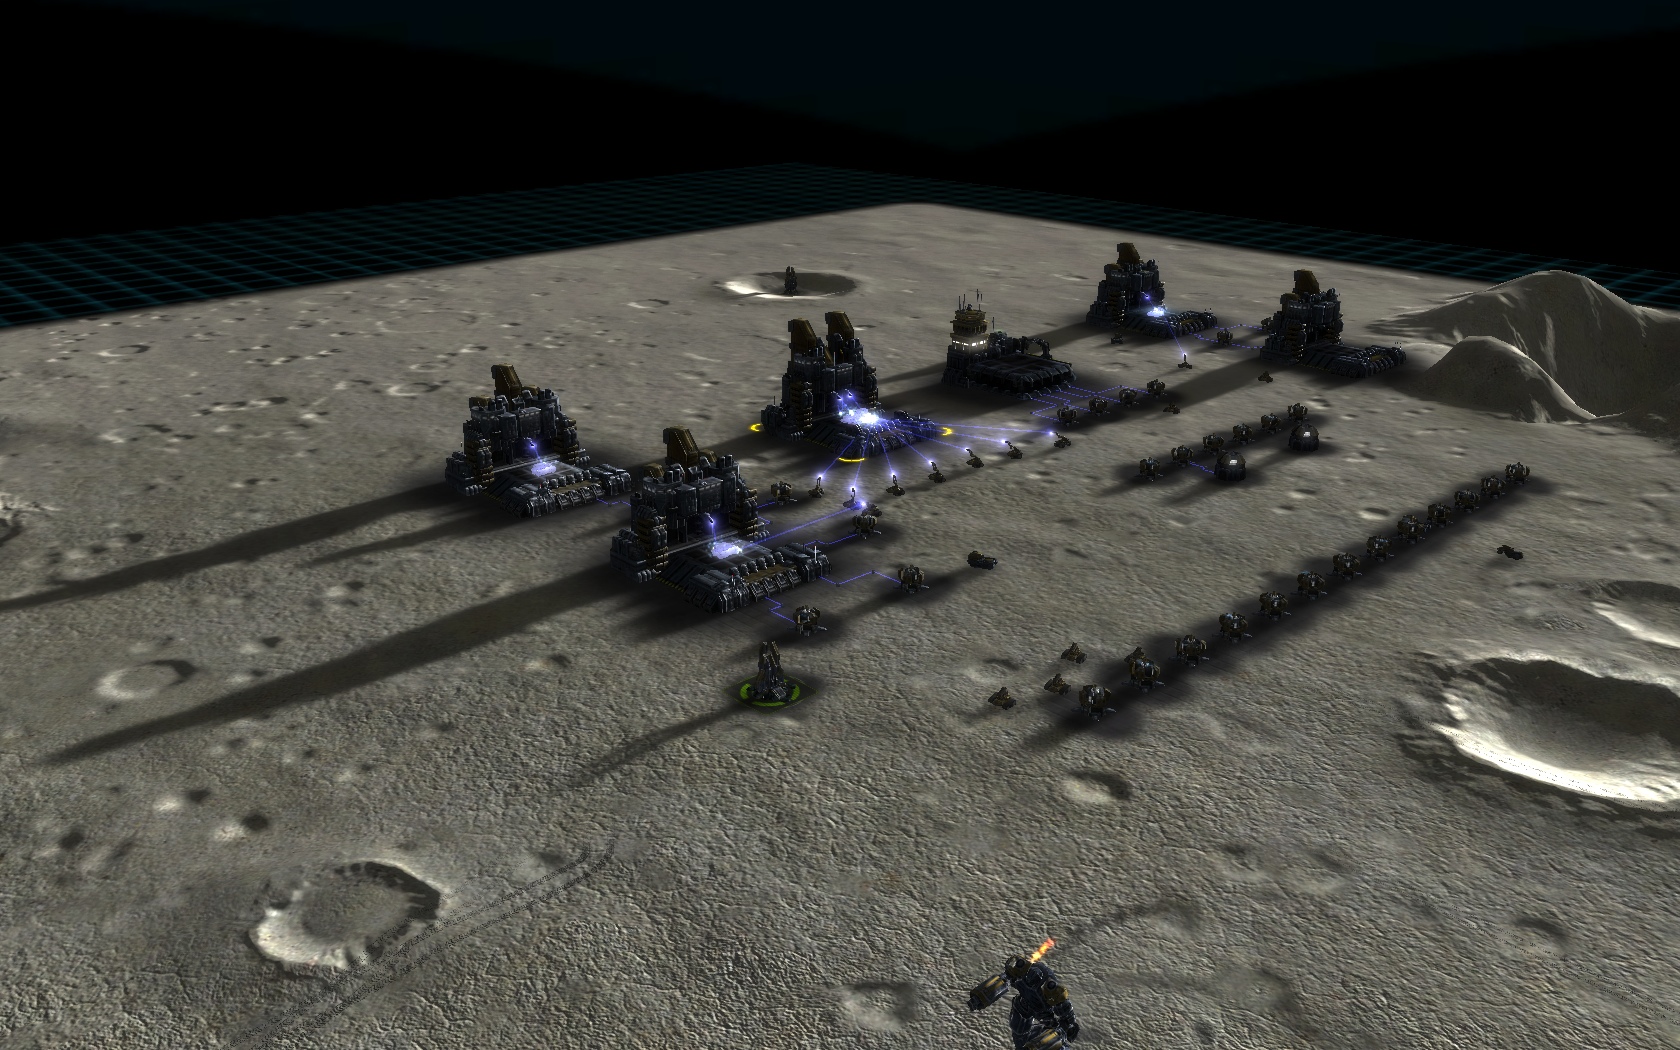
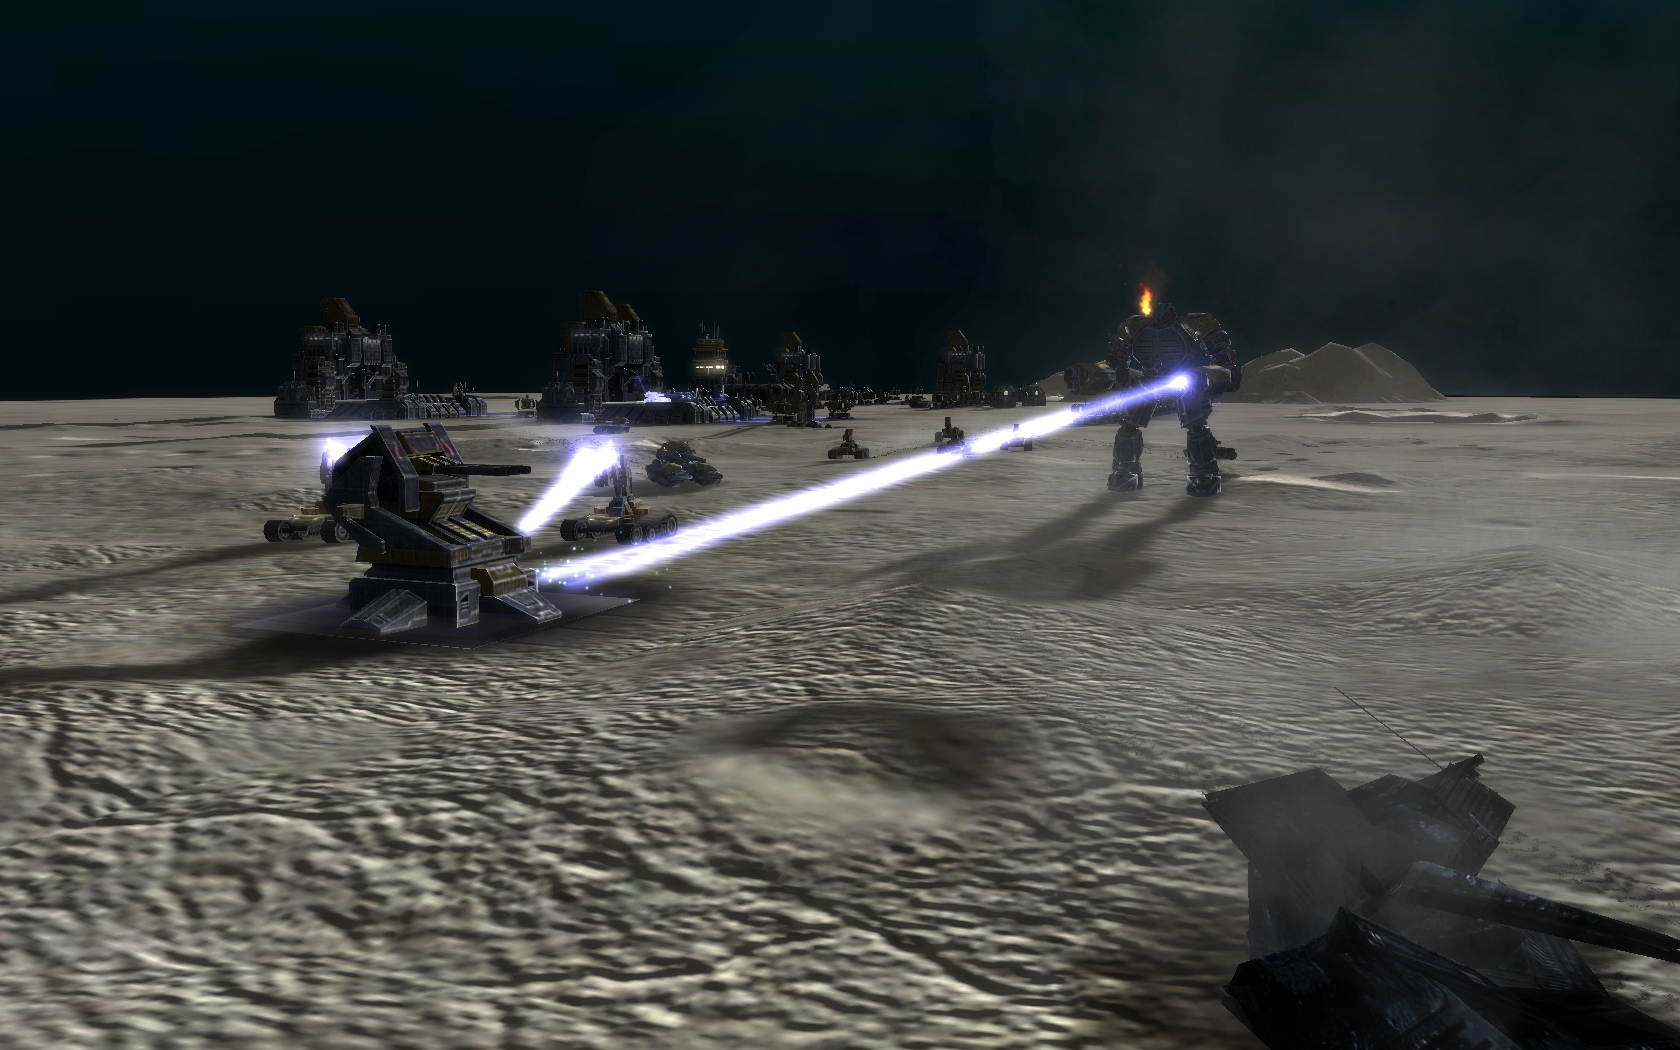
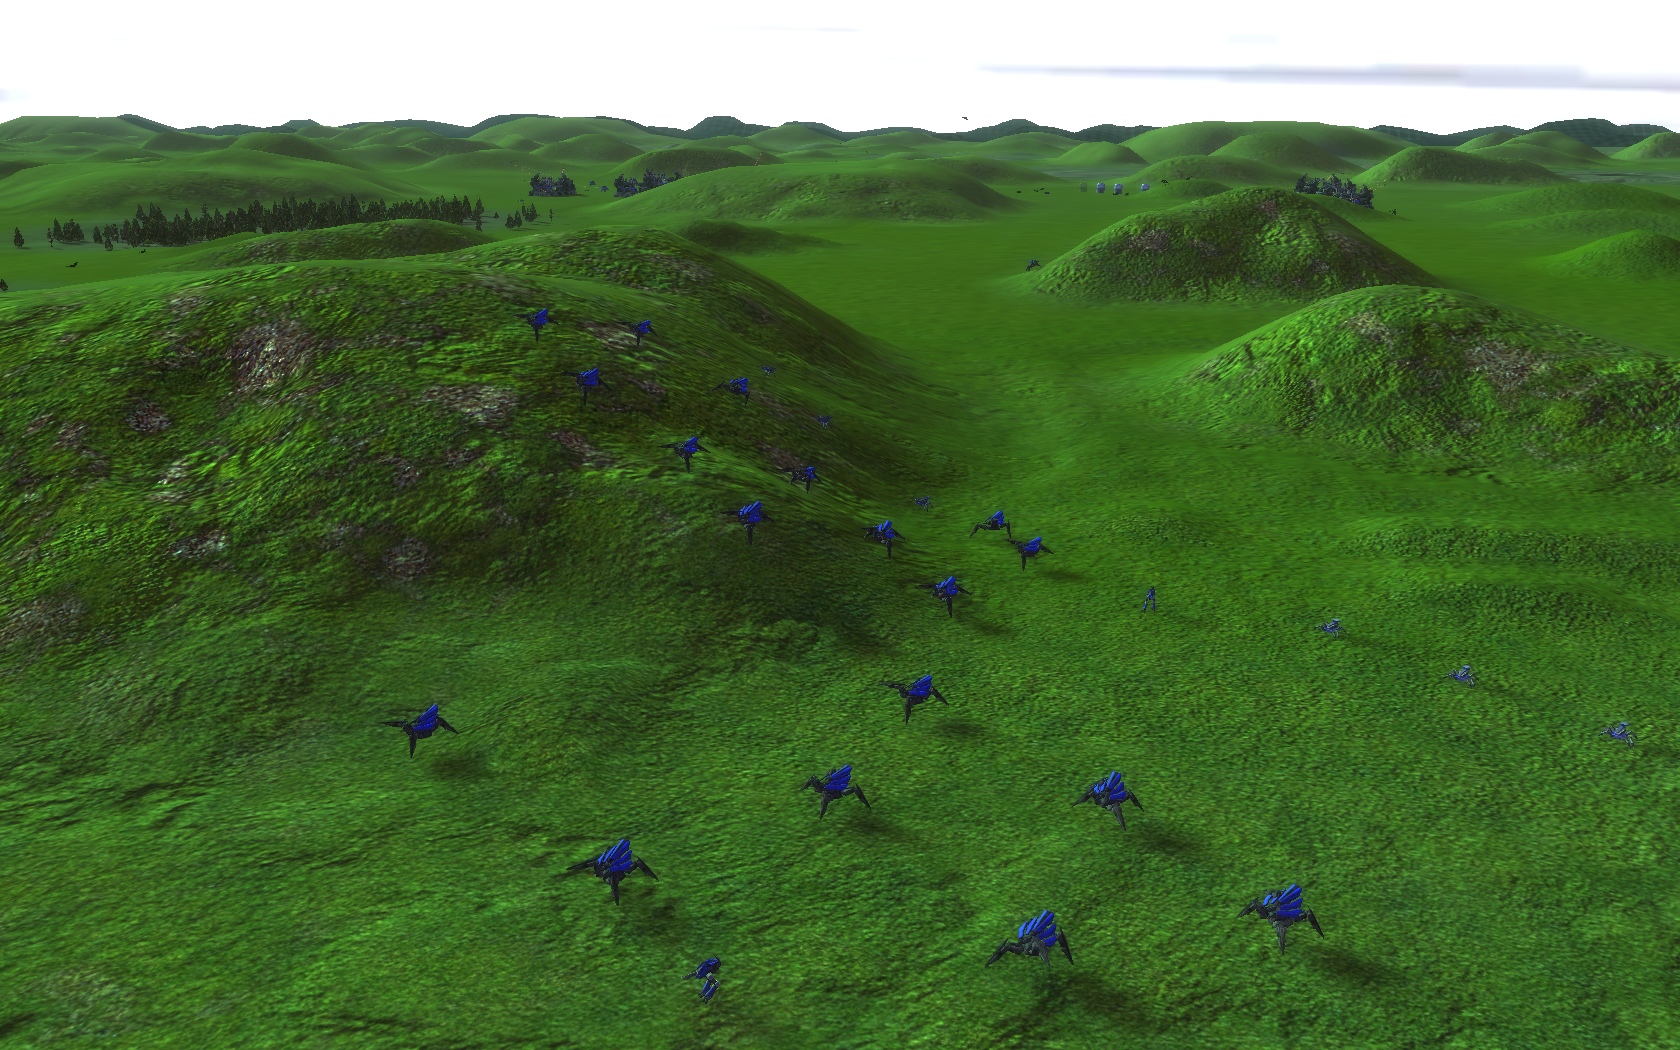
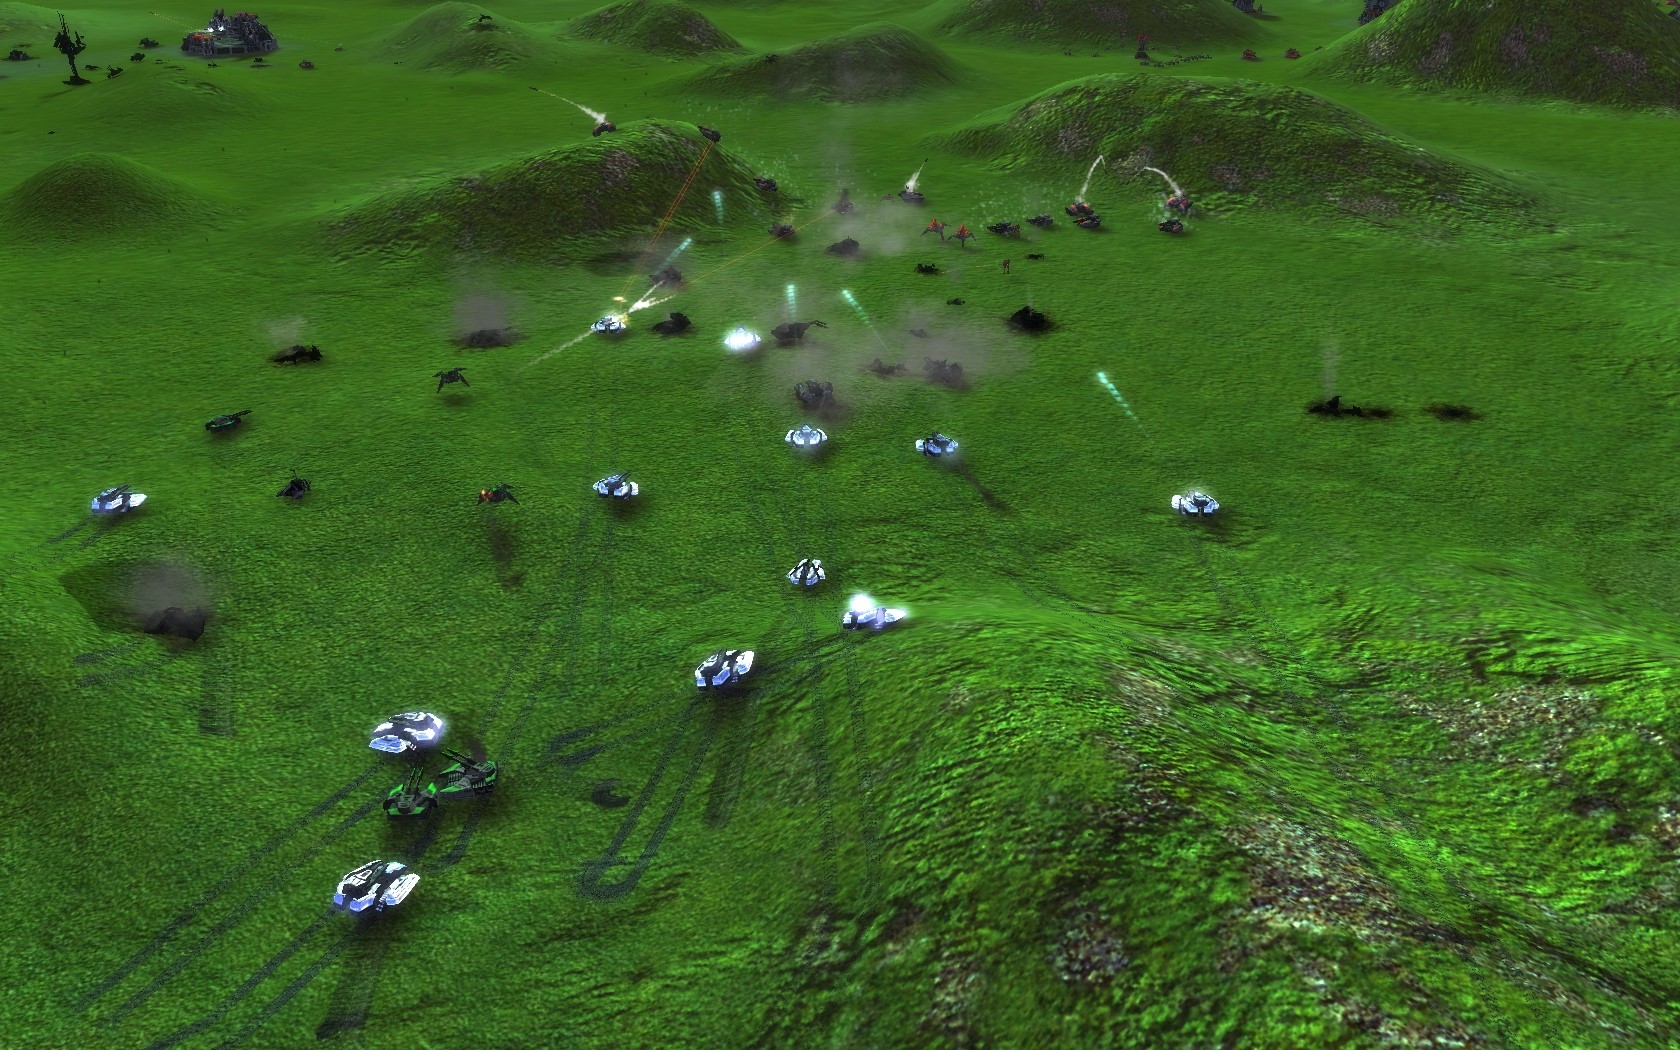
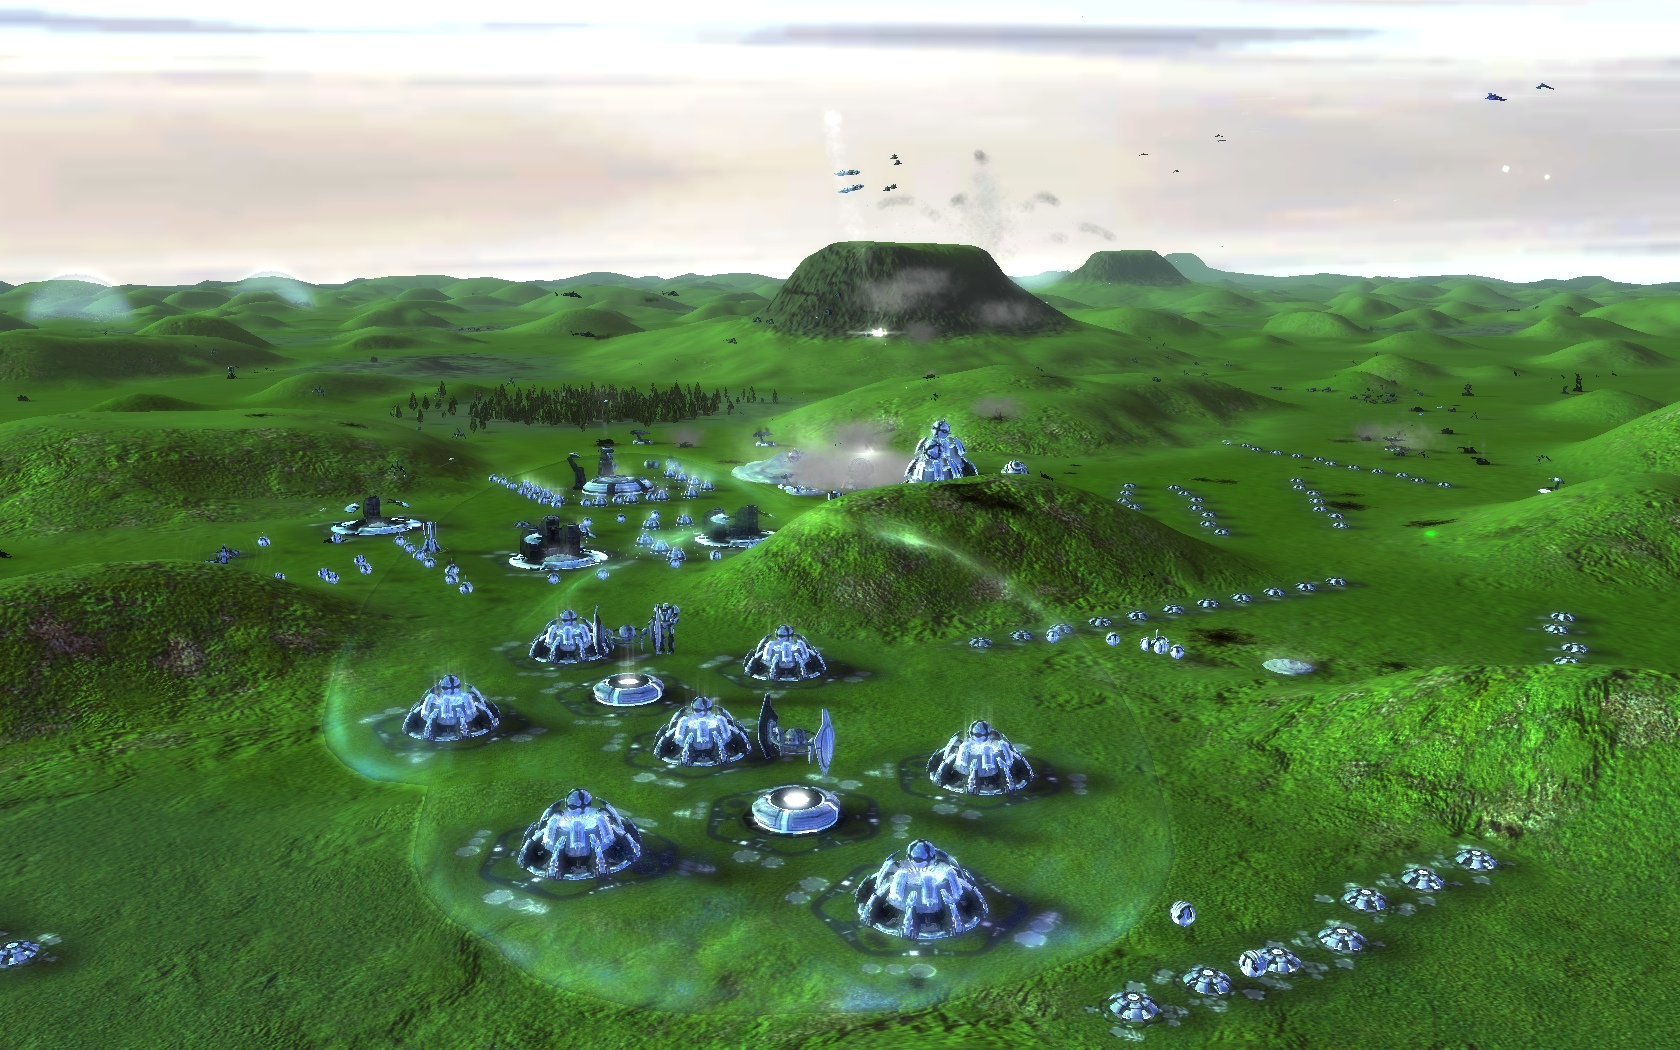
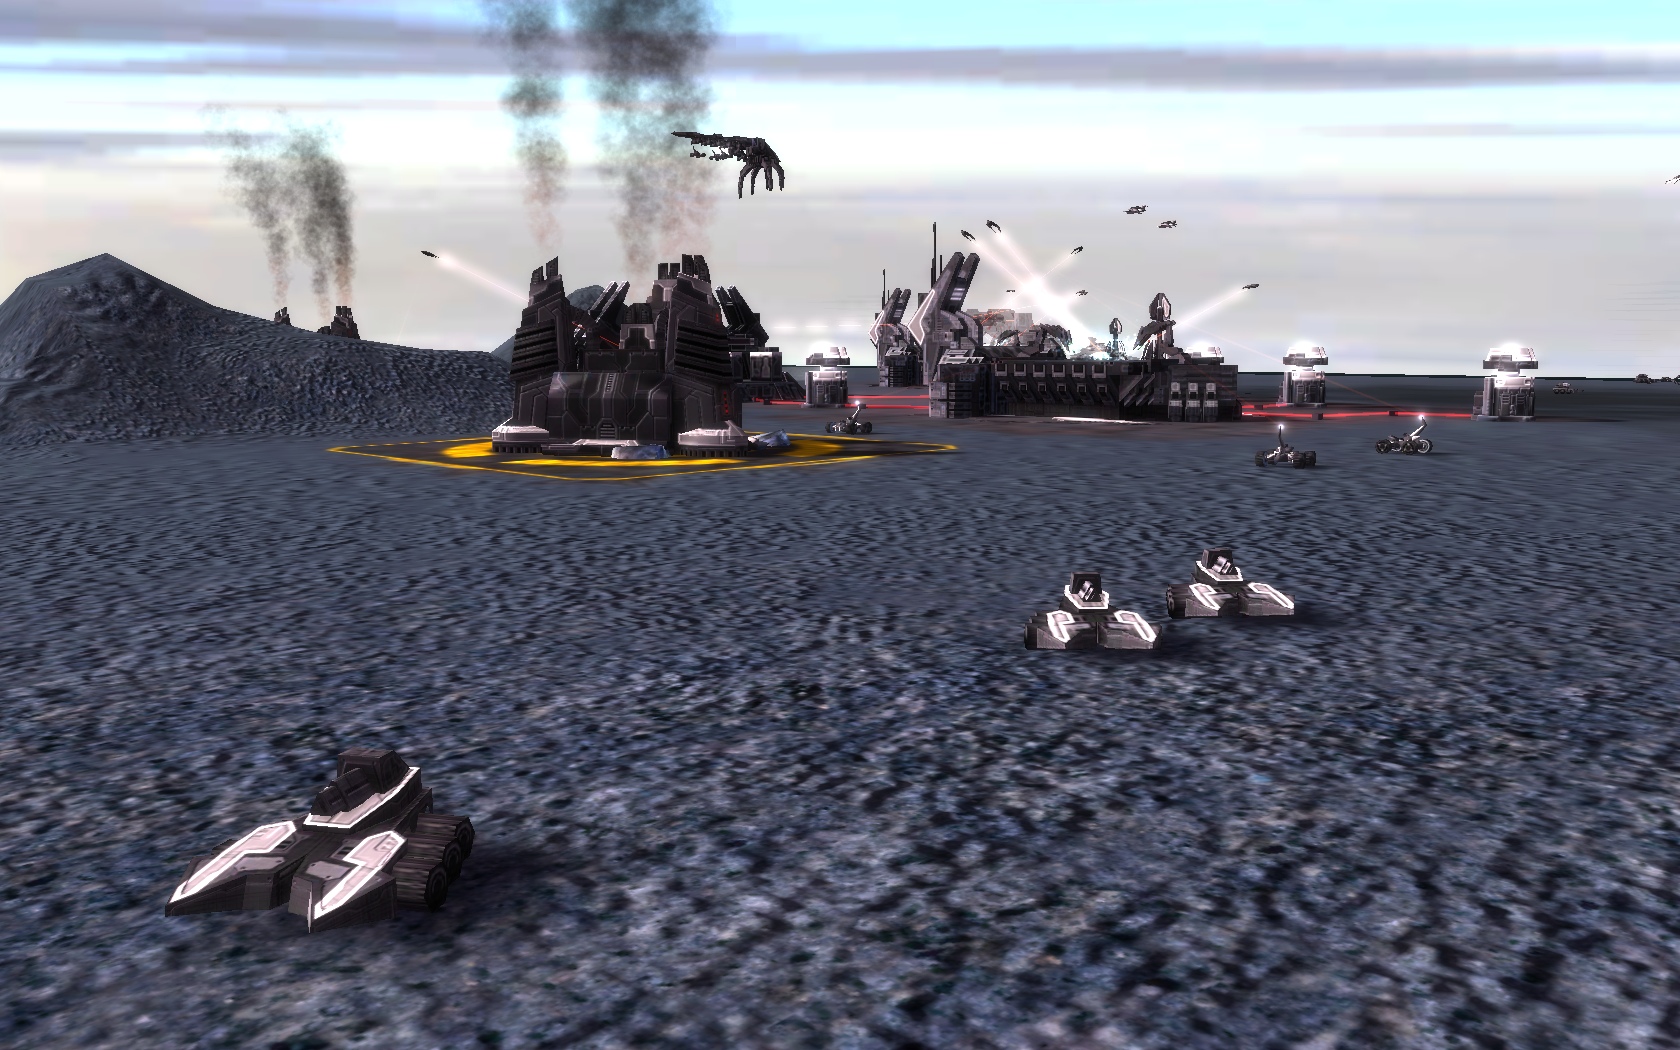
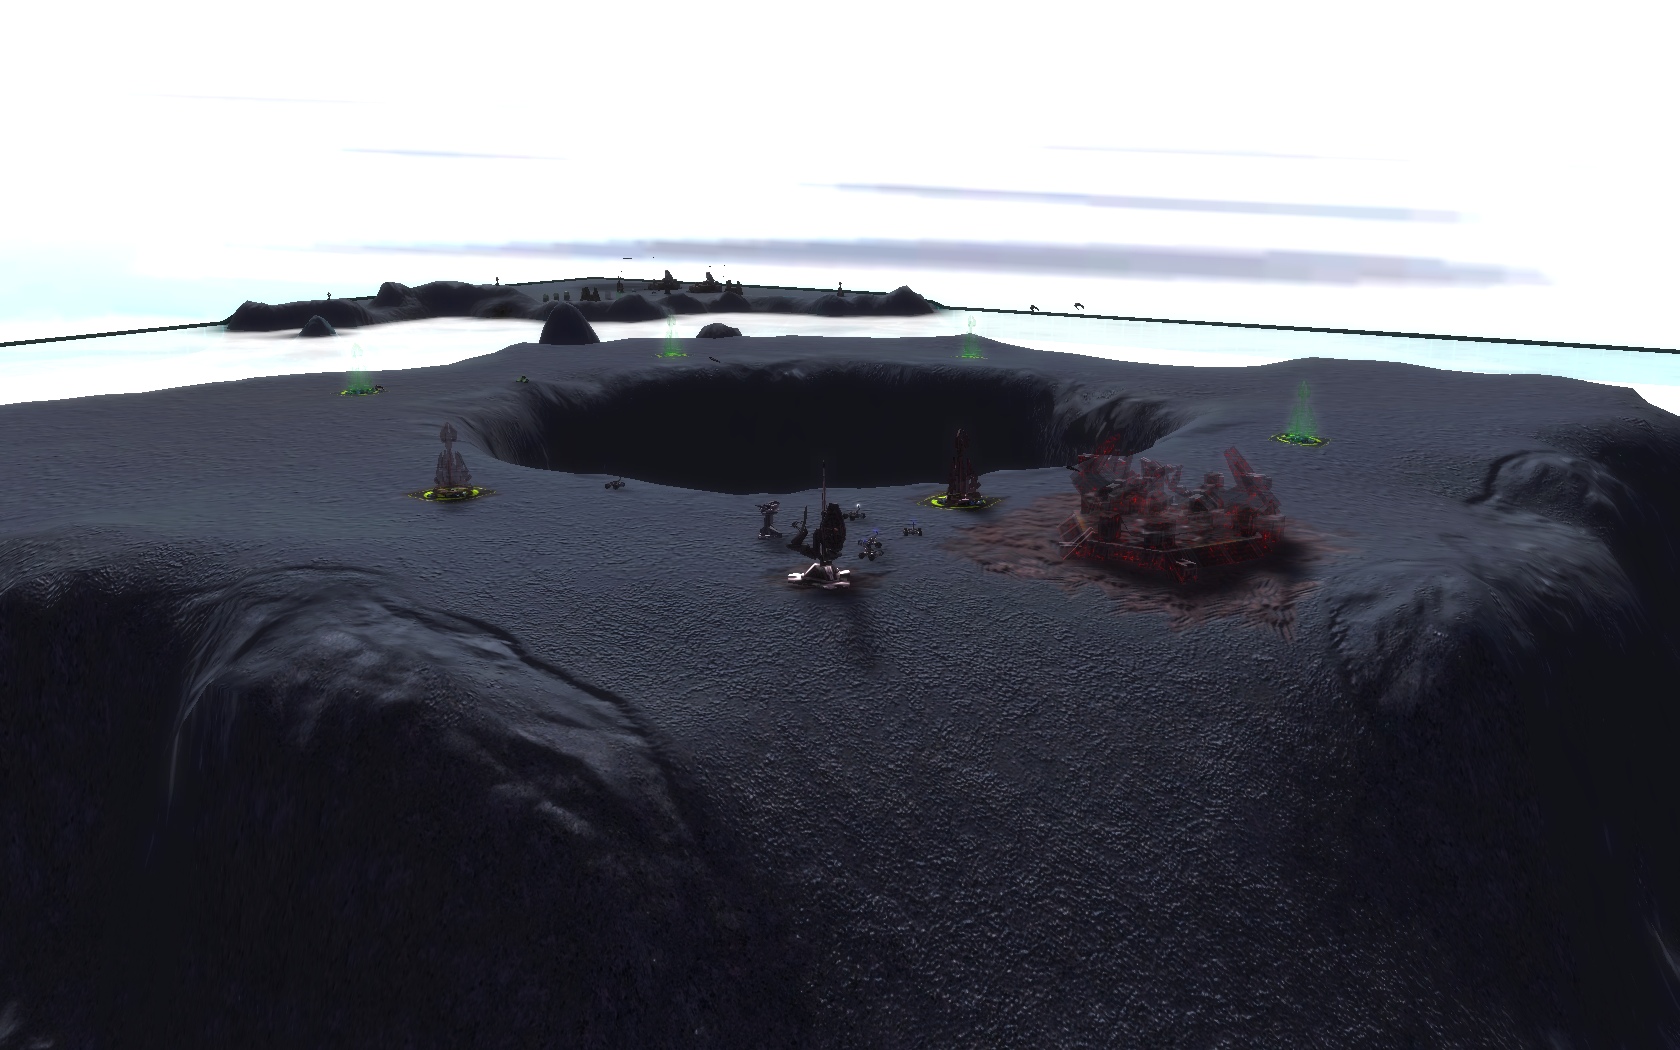
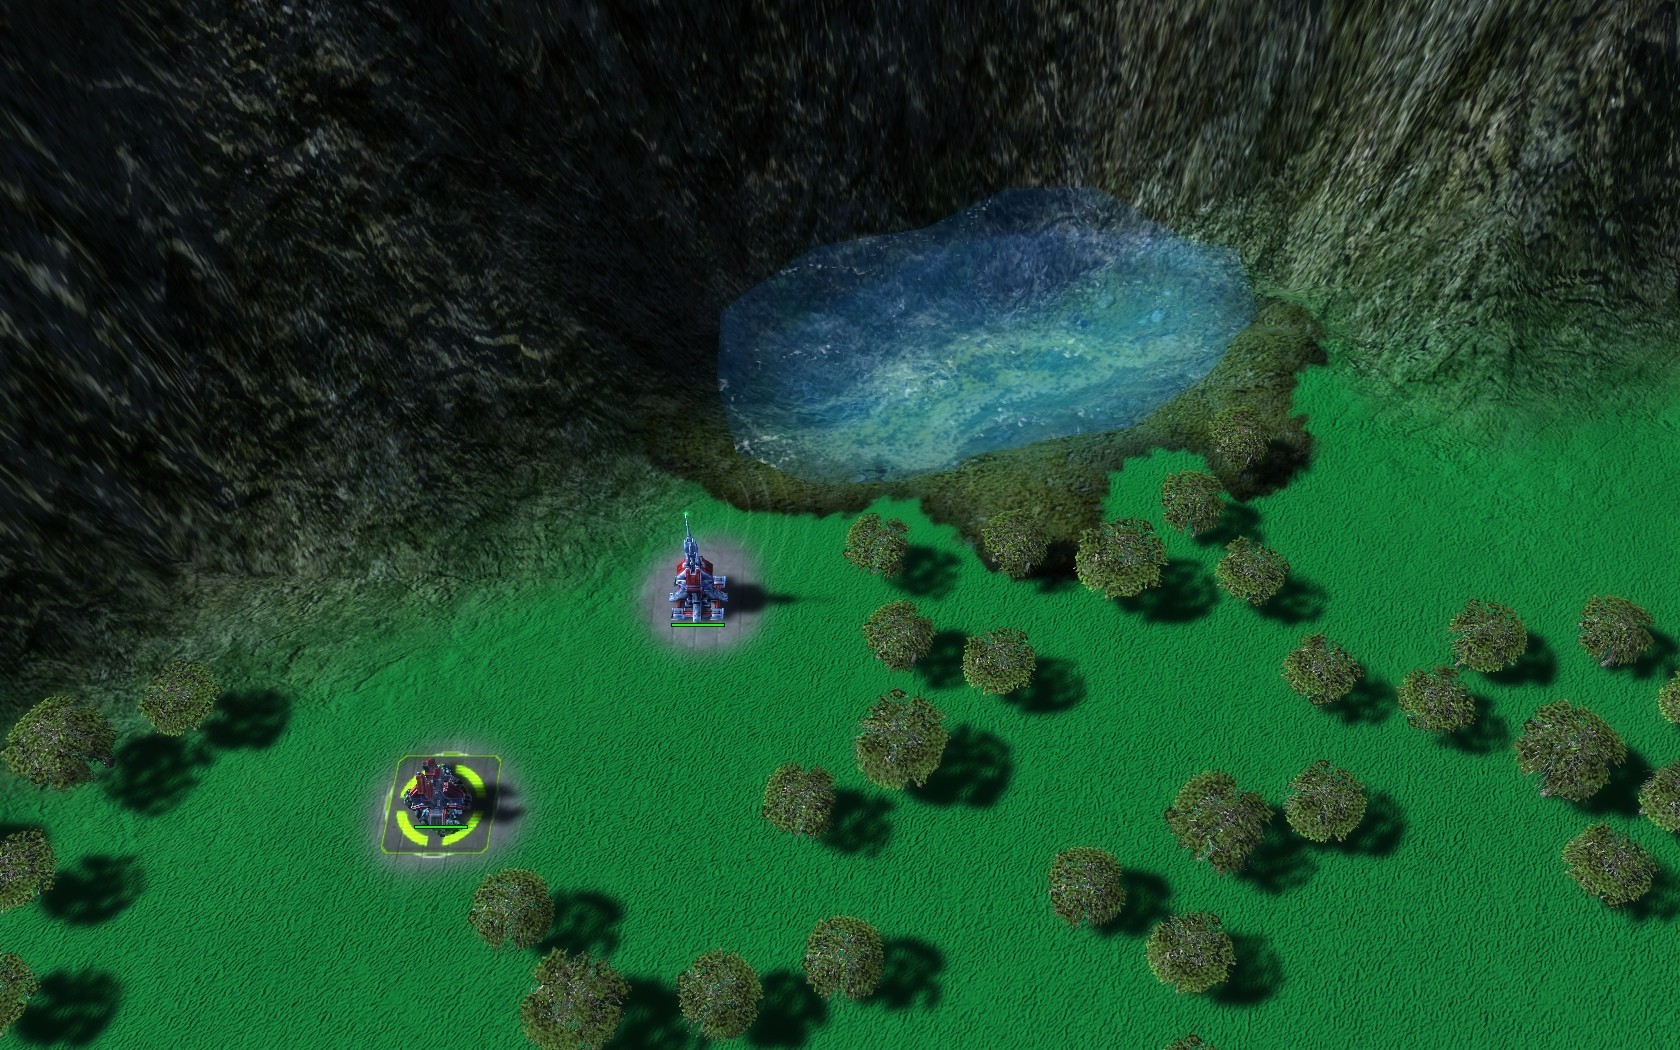
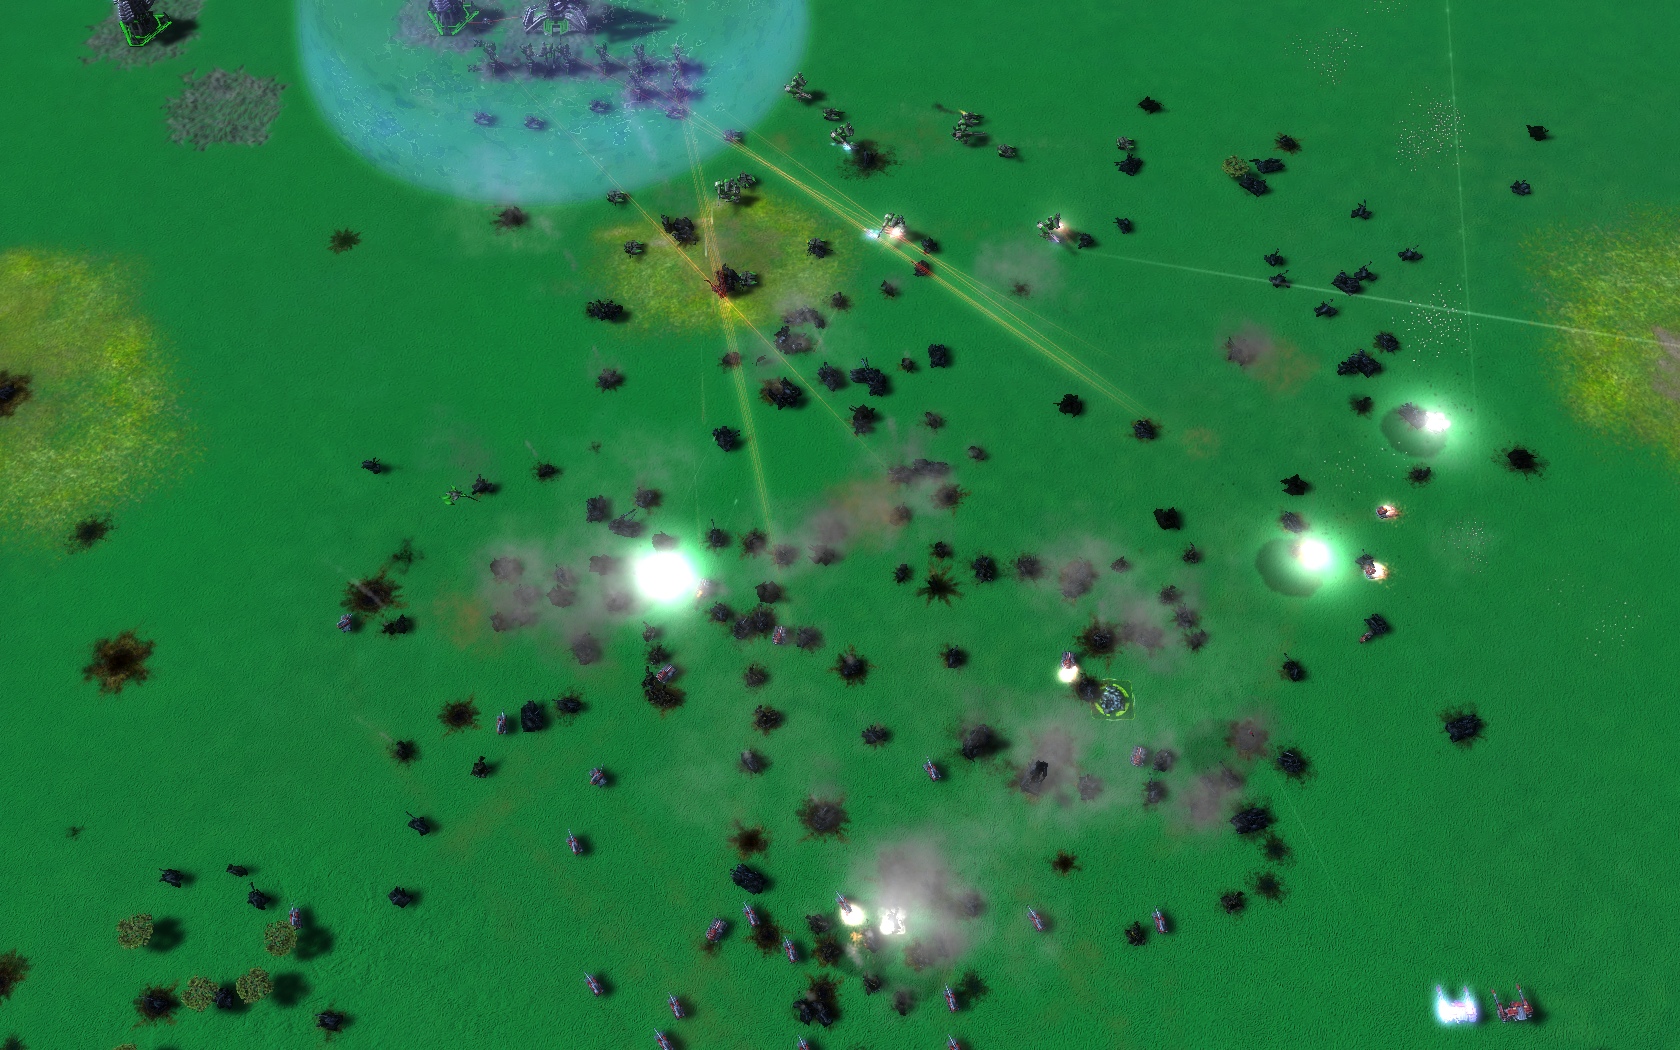
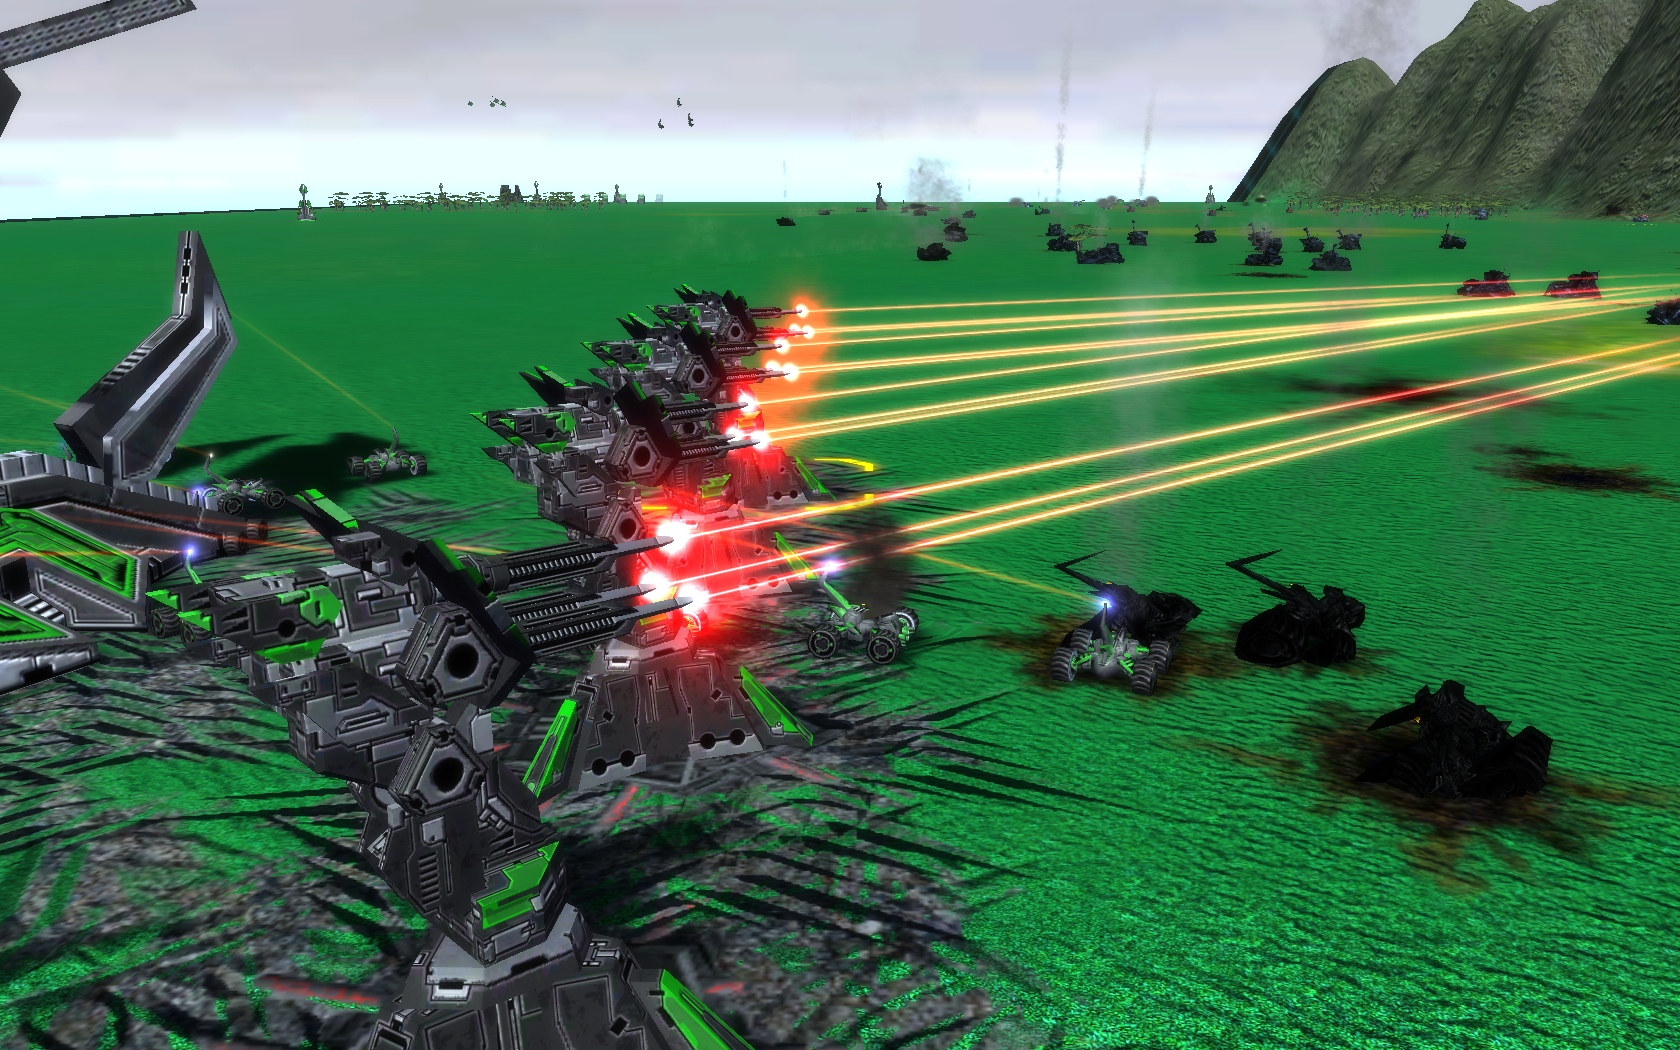
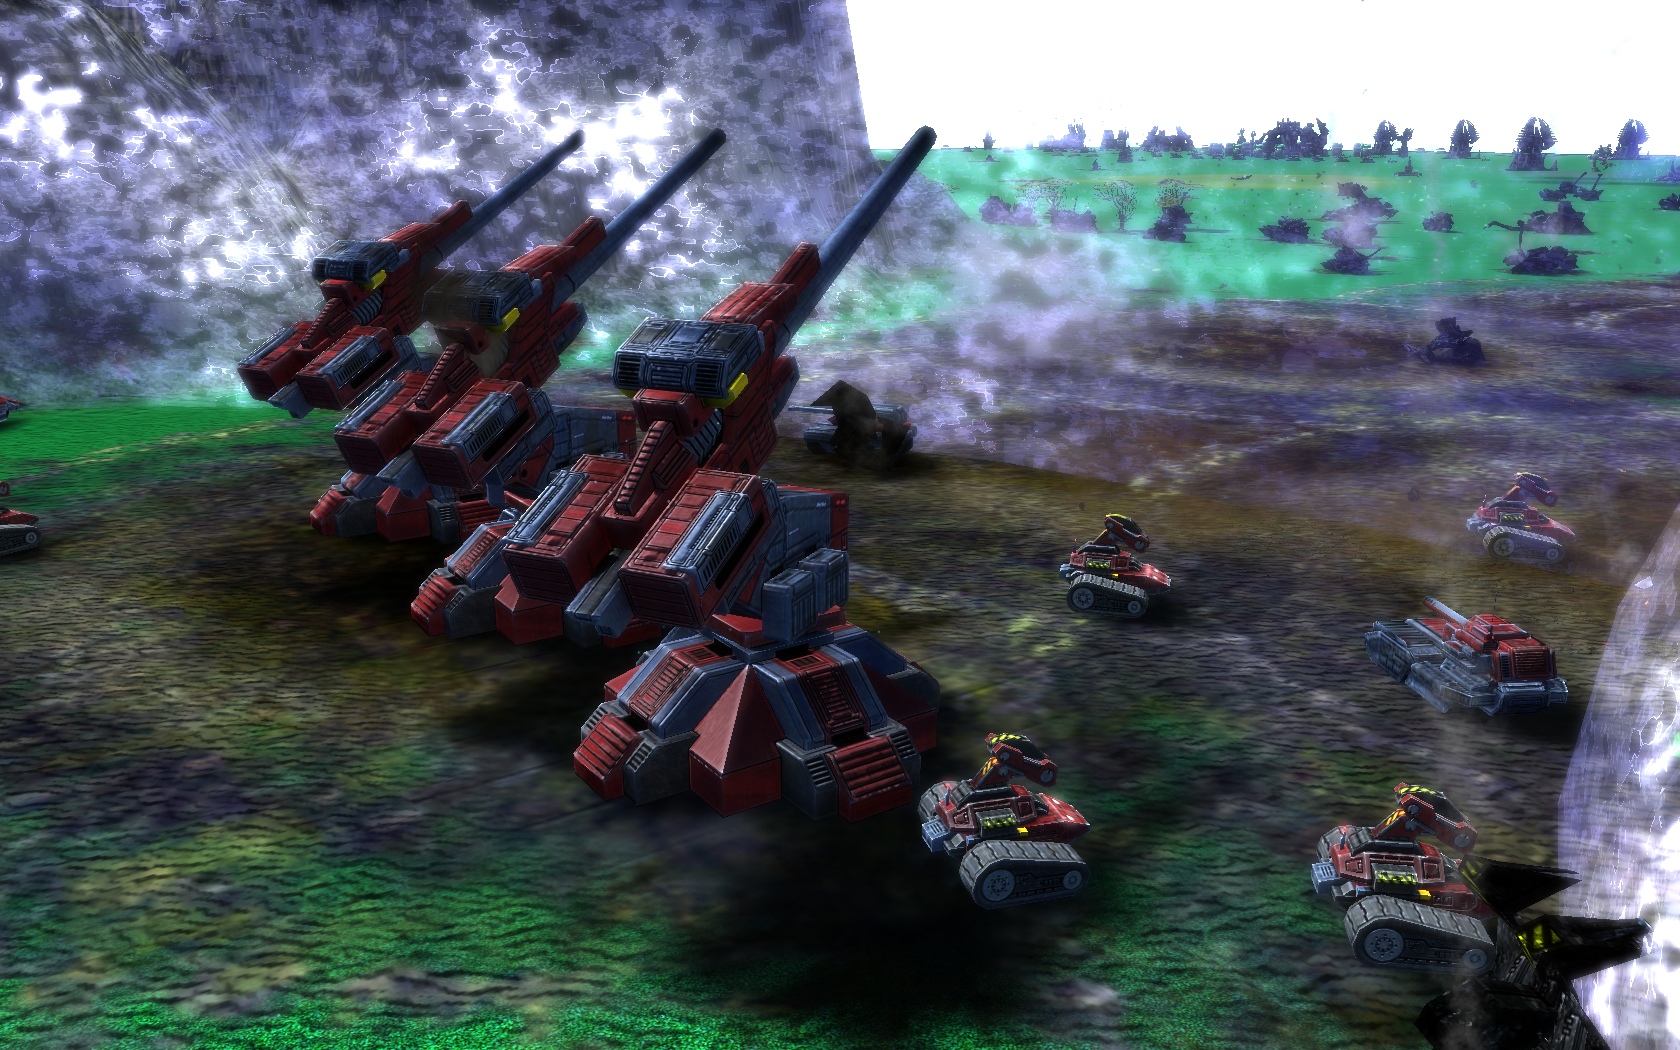
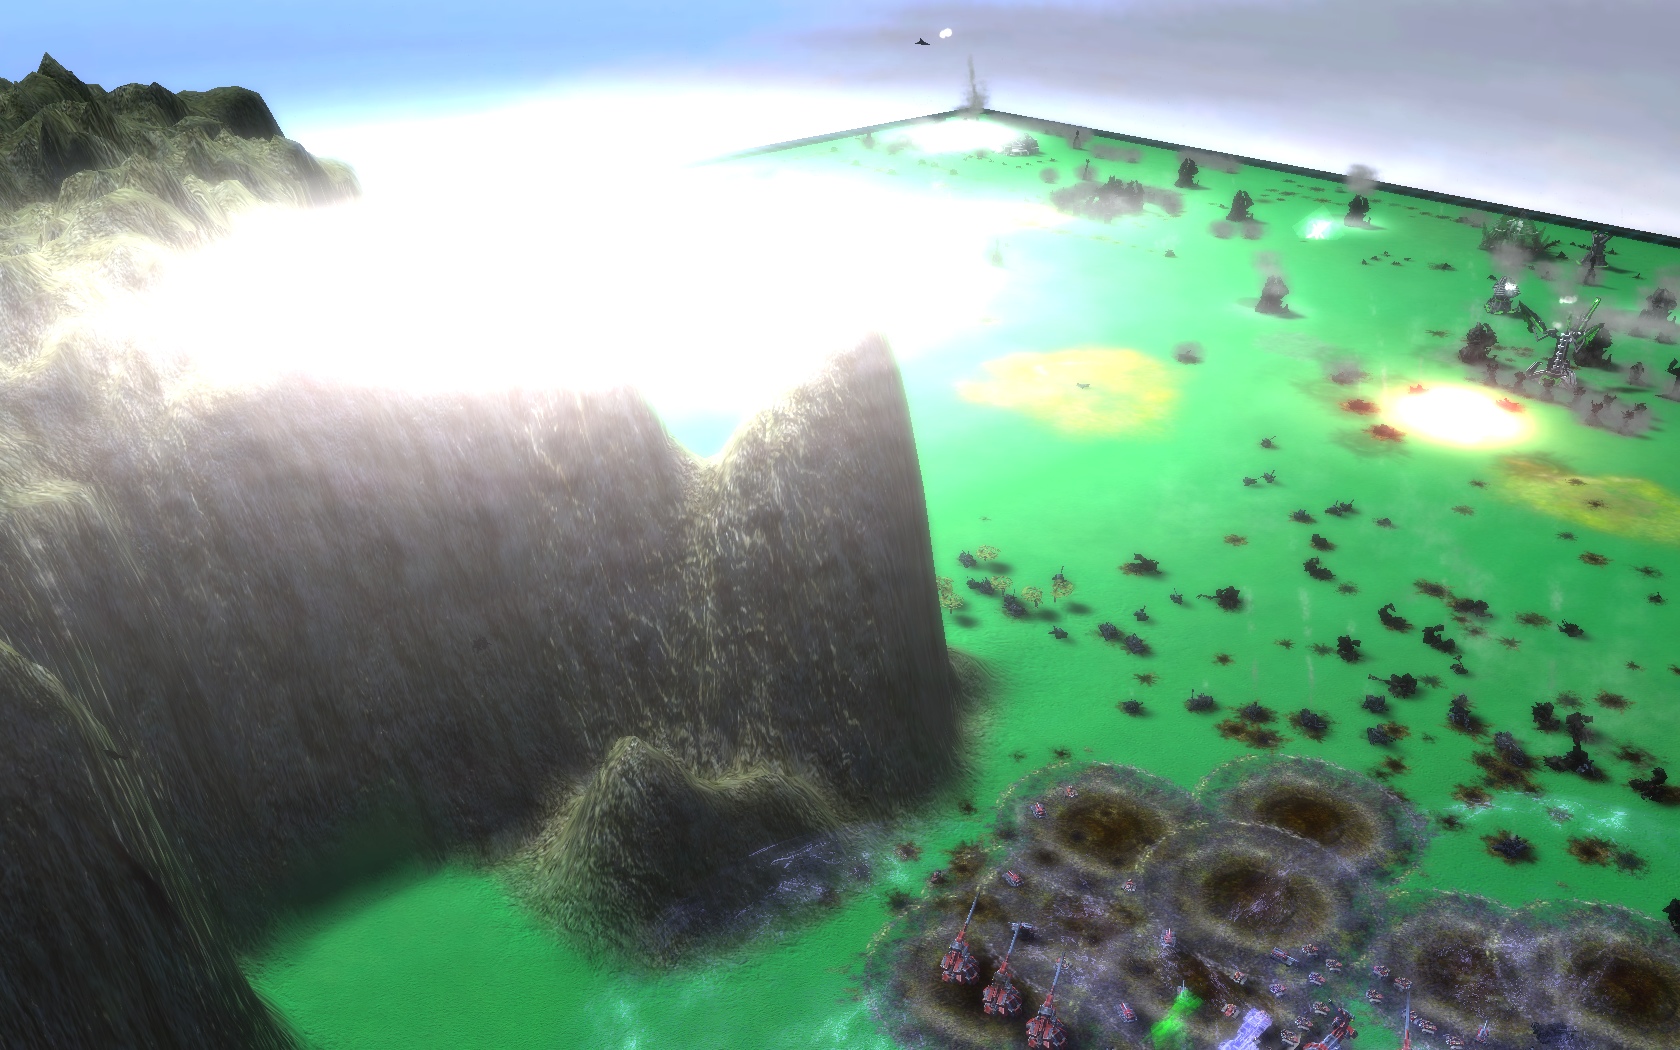
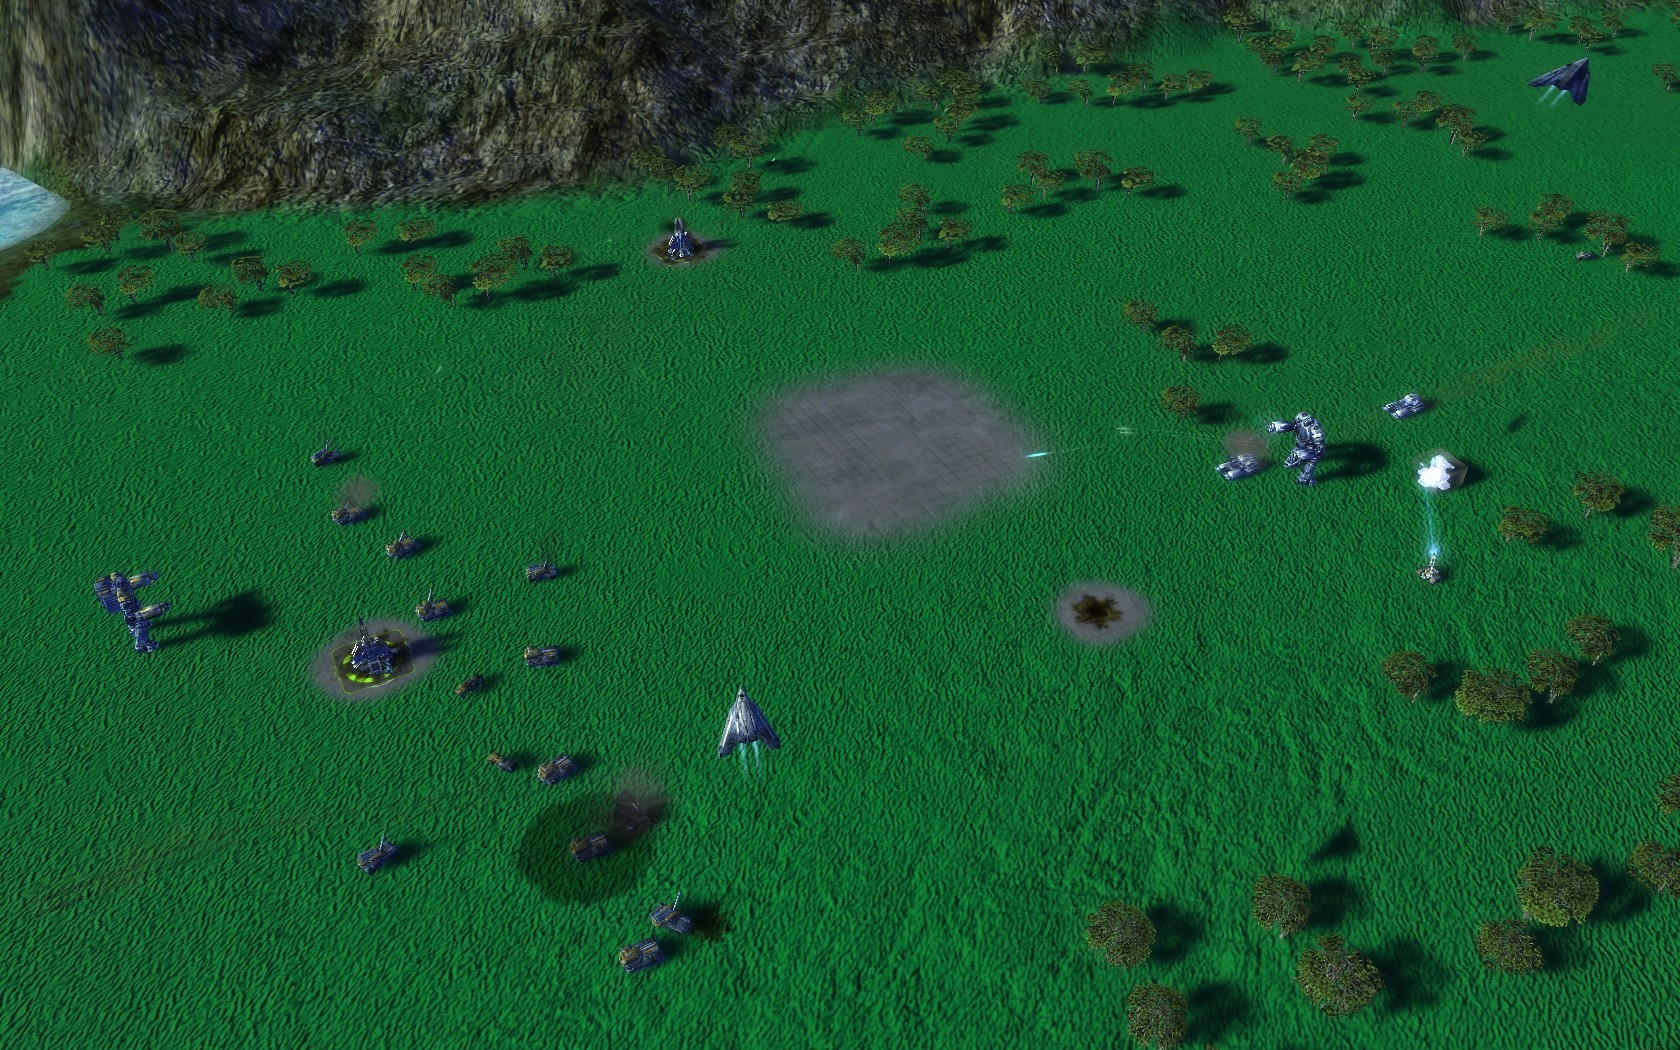
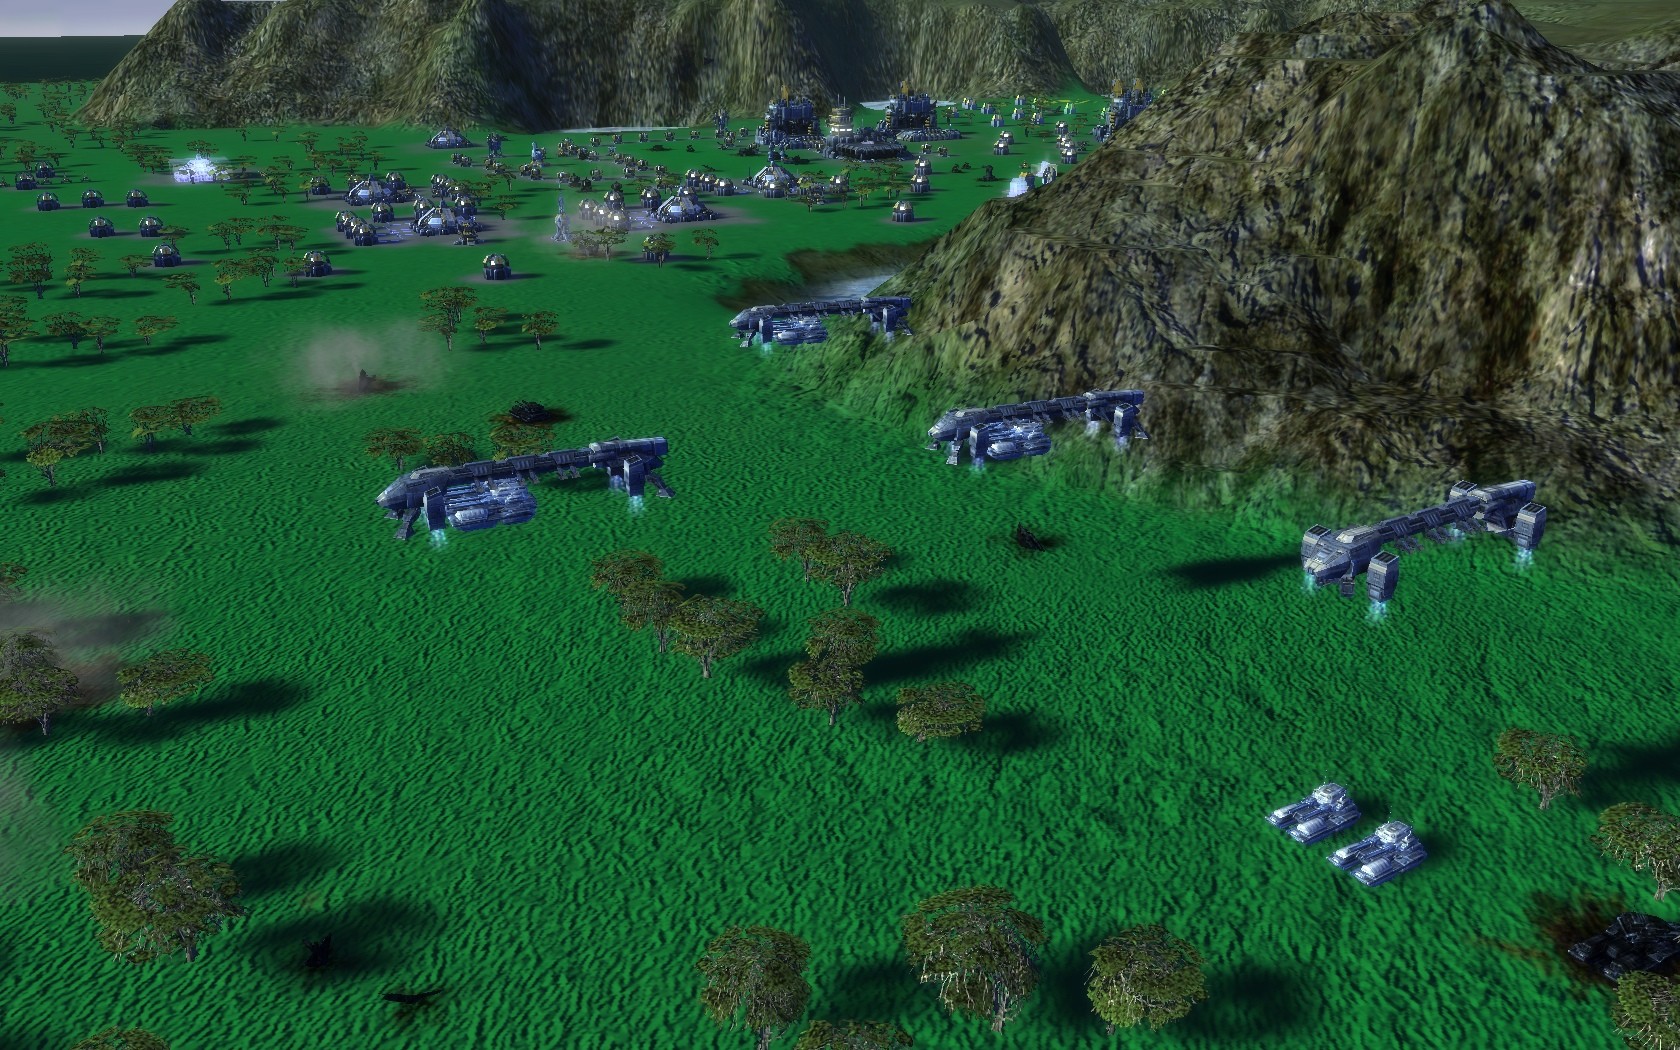
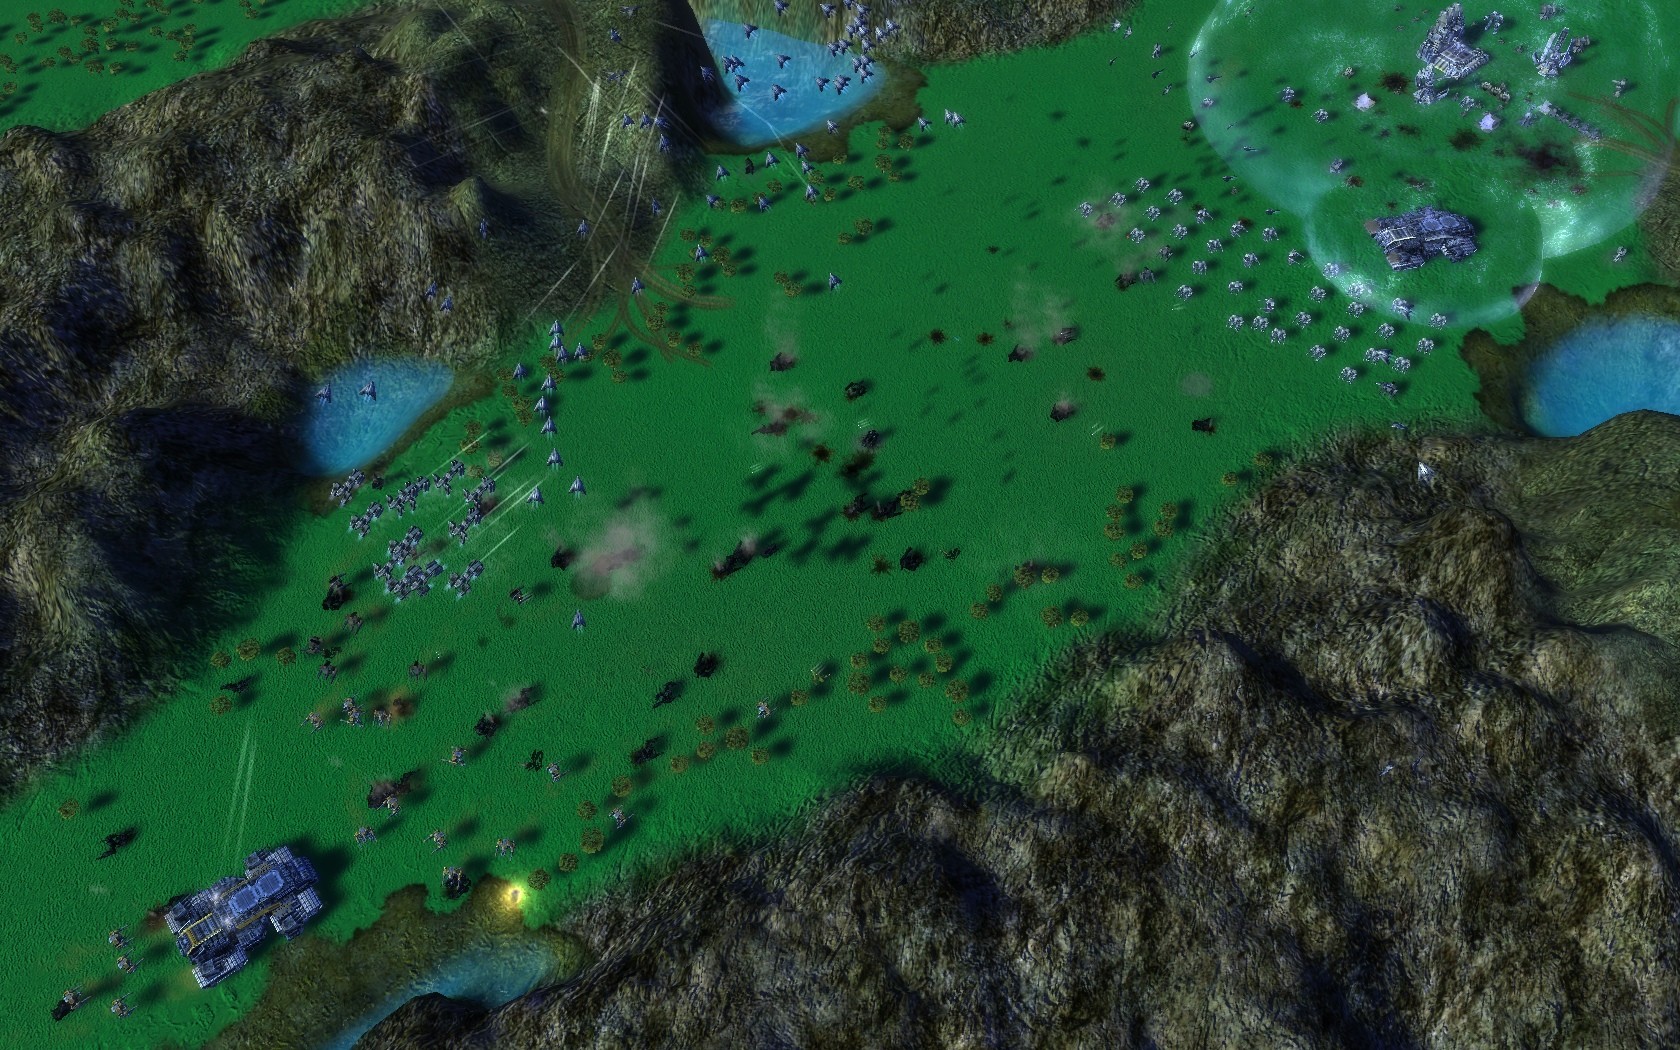
I would like announce the release of the first version this personal project: The 'remastered' Total Annihilation map pack for SupCom! Important legal stuff: The maps shall be considered 3rd party, because it is a personal project for the community, thus GPG cannot support them in any way. Me and Arm Commander will continue to update/rebalance them as needed, and of course to try to add a few more in next versions. Balance and gameplay: All maps are balanced in such a way that they mimic how they were played in TA, even though some have major changes. All are carefully balanced and all are symmetrical when it comes to start positions, mass spots and props. And yes, I know some of you TA purists are gonna throw rotten eggs at me for making Gods of War 100% symmetrical but, the style of gameplay remains and thats what matters. GoW might even get an extra asymmetrical version in the if time allows for detailed testing. Original map imbalances: Let's take Comet Catcher for example, top had about 10%-15 more metal spots and the start point ones arranged quite close to the comm, while the bottom were miles away. All these imbalances are fixed in these 'remastered' TA maps to assure good, fun, casual and high competitive play. The Vault The easiest way to get the maps should be the vault but you'll have to download one at a time like with all maps. For convenience all maps shall have the common keywords of TCC, TAC, TA and MapPack So search only via the keyword field using any of those 3 terms and all the maps shall be listen. Installation for the the non-vault pack: Simply Unzip to: C:\Program Files\THQ\Gas Powered Games\Supreme Commander\maps Links and mirrors for the TA MapPack HERE: FileFront Mirror --- download more mirrors up soon! IThe Map previews and screenshots in this topic: For those wondering what's with the green minimaps next to the normal ones; those are the buildability maps and they work like so: green - any units can can build and walk here red - units cant build or walk here transparent - units can walk over but not build big structures here (PDs and wall can though) All pictures are click-able and and in 1680x1050 resolution I've included a TA picture and a SupCom one from the same angle for comparison Comet Catcher  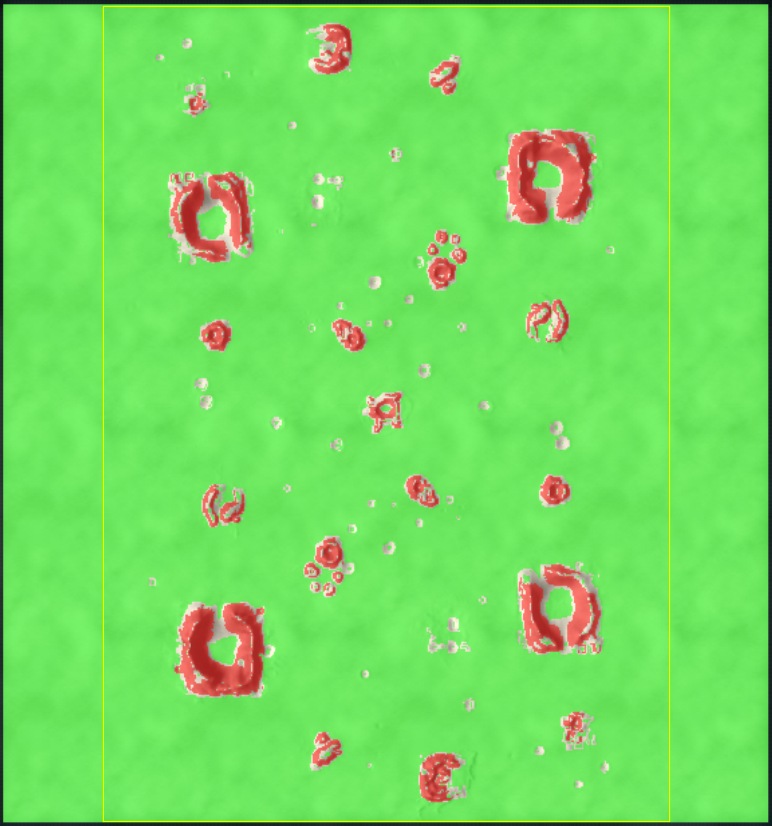
Ingame Description: "Large scale battles liven up this desolate and crater filled landscape. Were these craters actually caused by comets and asteroids or by... something else?" Detailed Description: Medium sized moon map, with mass spots scatered all around the map but not in 4 mass spots clusters like on Open palms. This effectively makes territory control essential for the first 15-20 mins, until T2 Power Generators + fabricators usually take over. Very dynamic map, as a player can switch from 75% map controll to 30% with a few well timed raids by his enemy. The 2 mass spot start points makes it have a unique and calm flow, as you 5 or so engineers and start expanding in all directions. Very similar to TA where the first few minutes were pretty calm, only to be followed by an intense 'protect your engineers while raiding your opponent's' micro battle. Because its such a big open field, a really fast 5 min T2 rush won't really work at all since 5-10 T2 tanks can't really cover all the map, while 50 or so T1 units (considering the T2 factory cost As in TA, this is one of the most intense and hard to master maps in this pack. Screens:  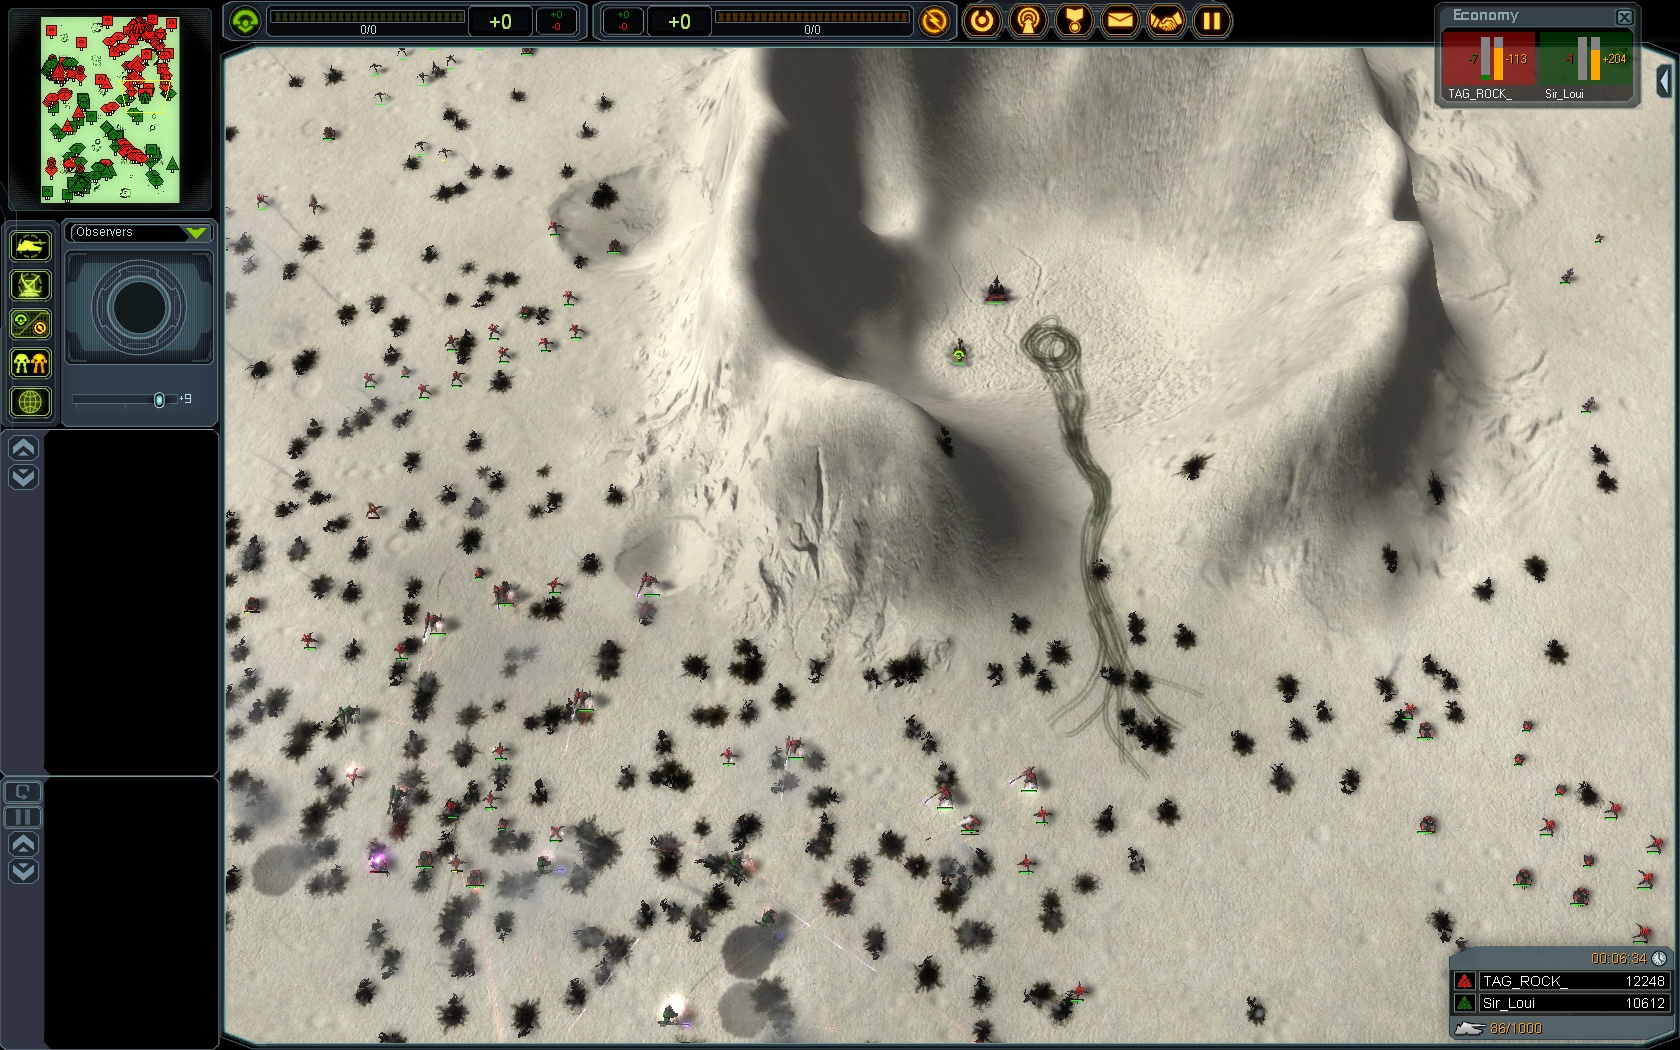 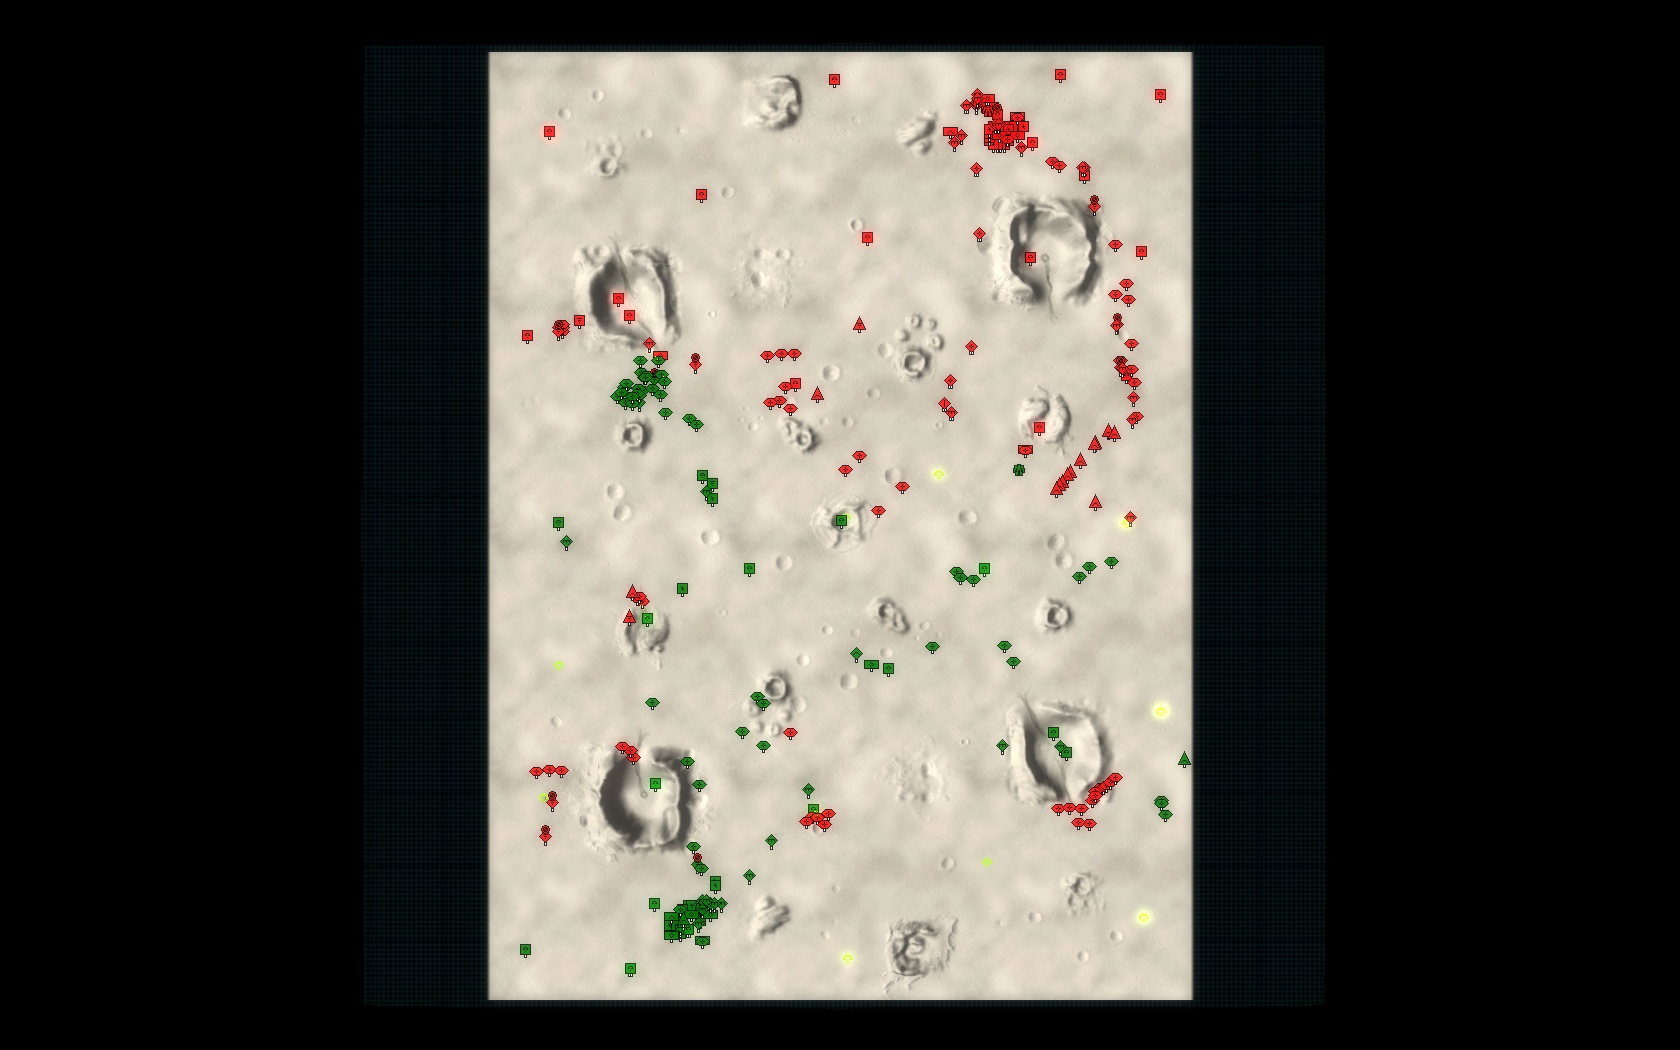
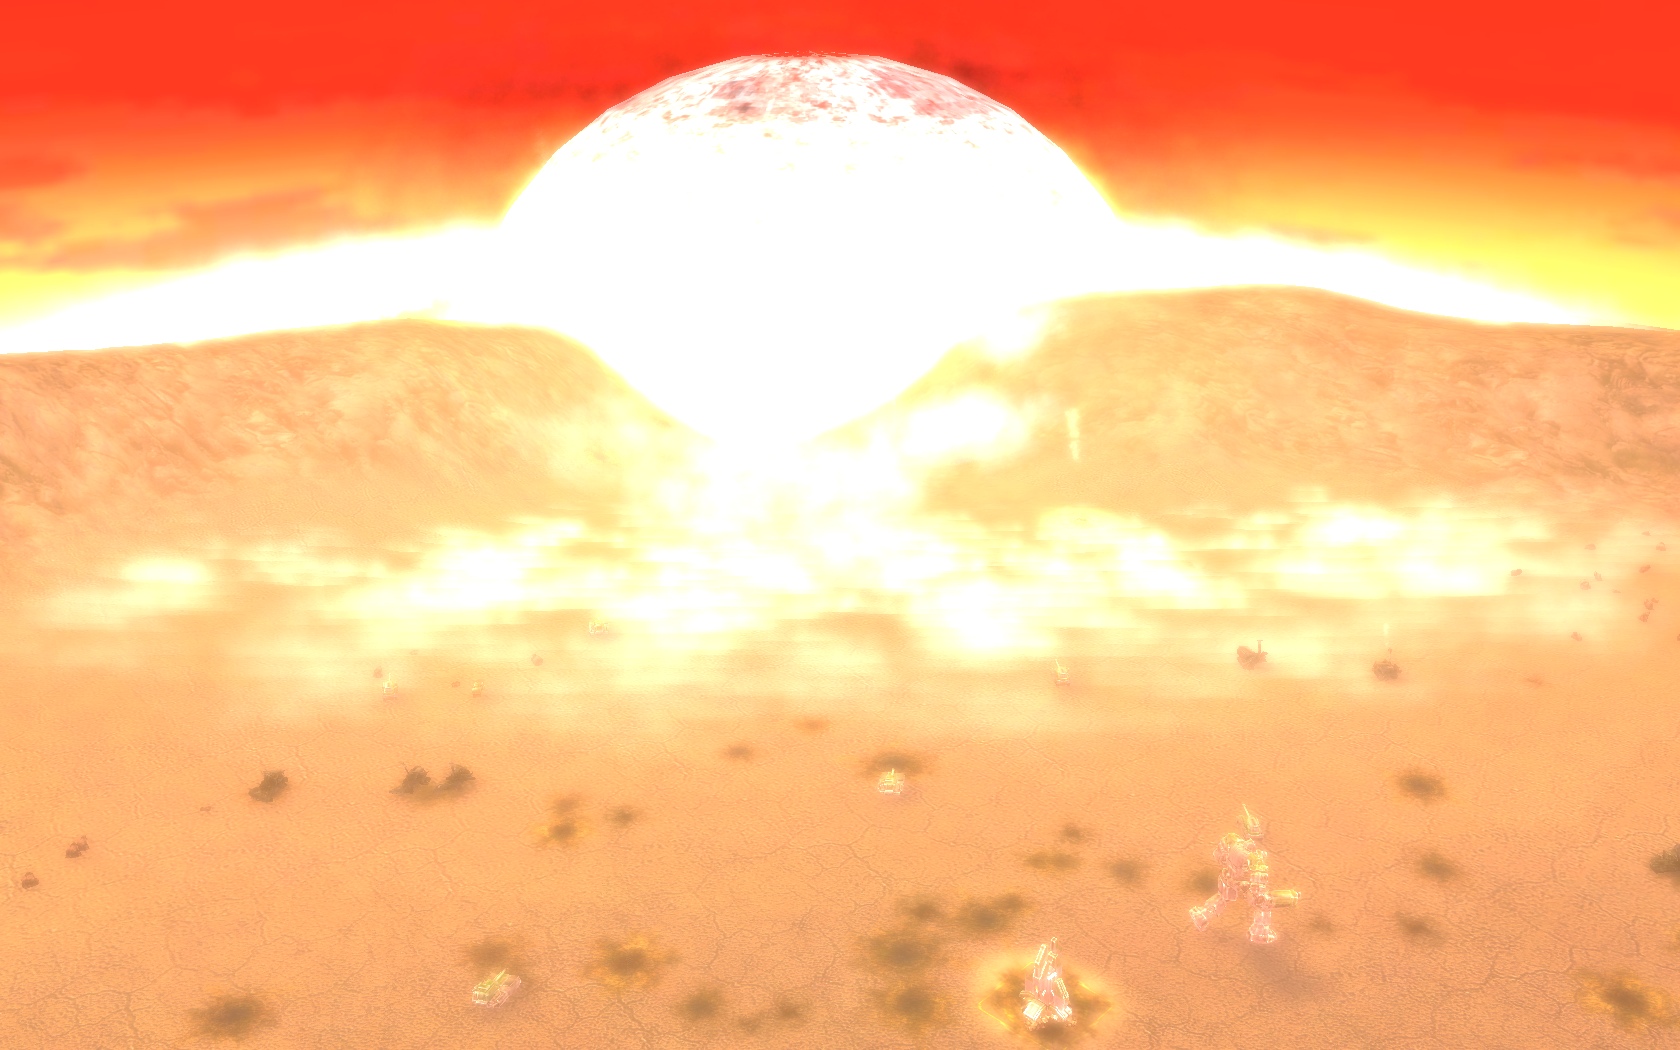
Dark Side 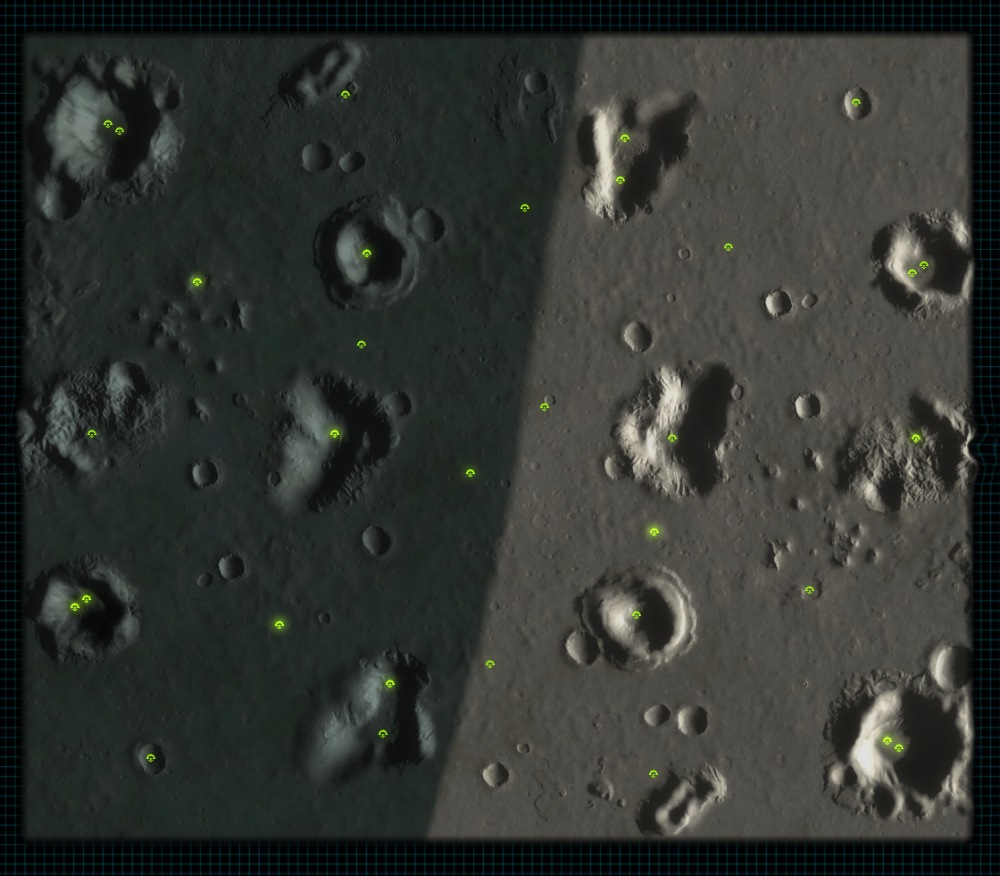 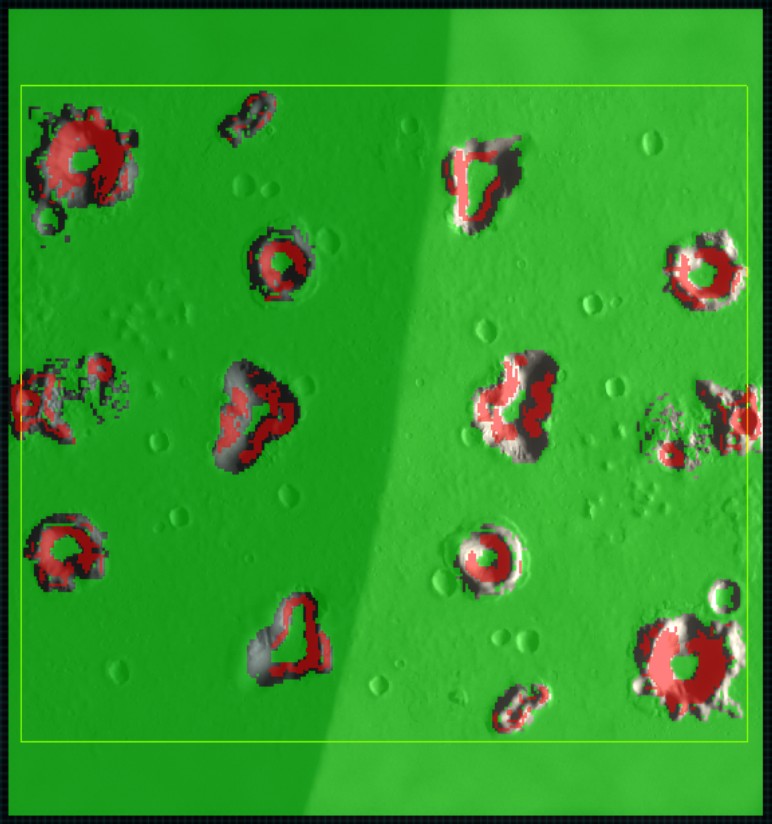
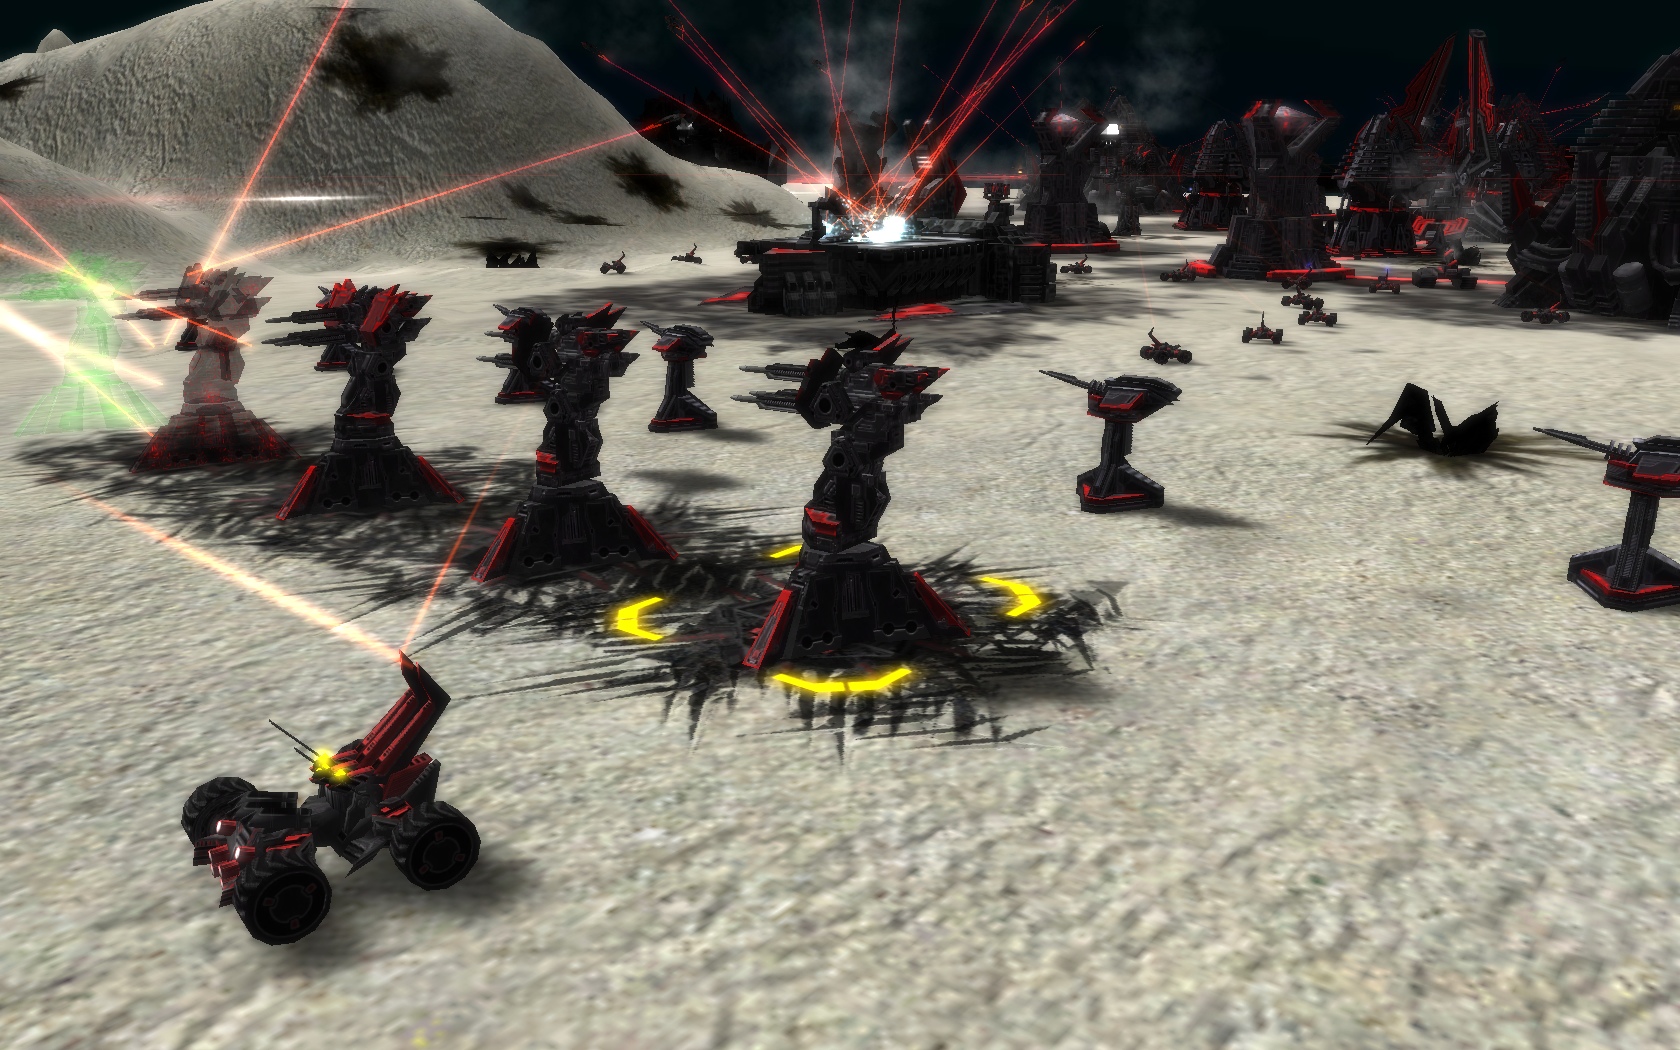
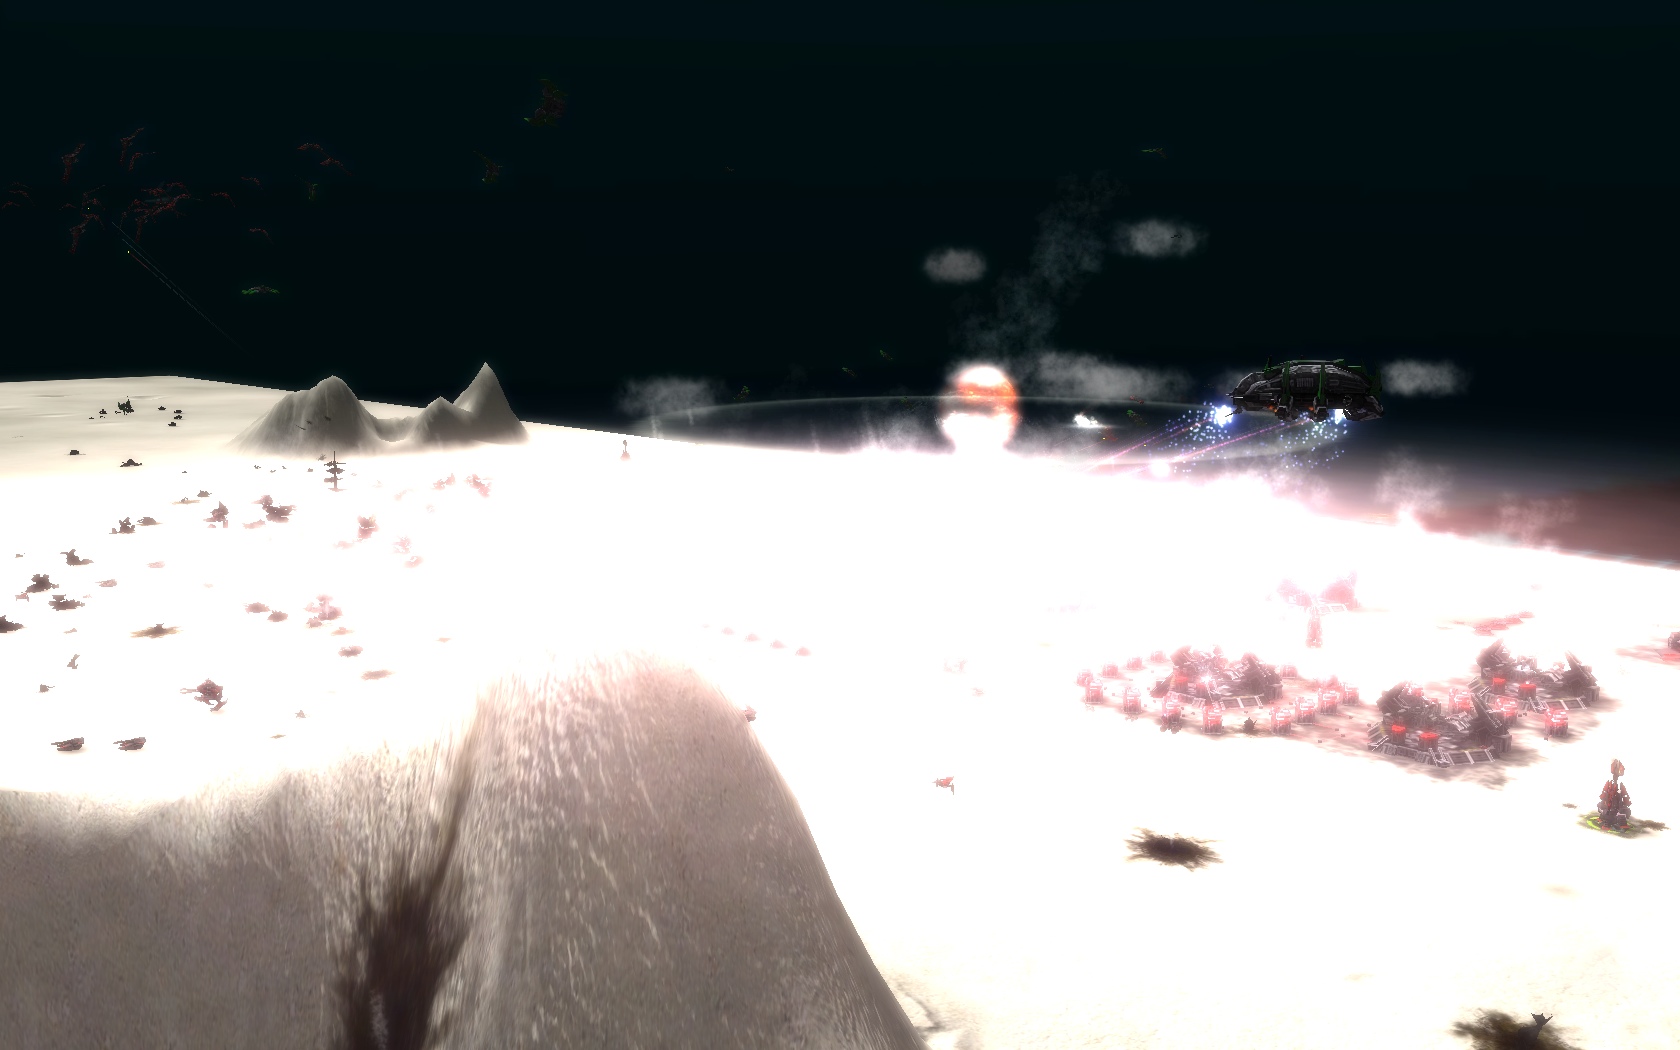
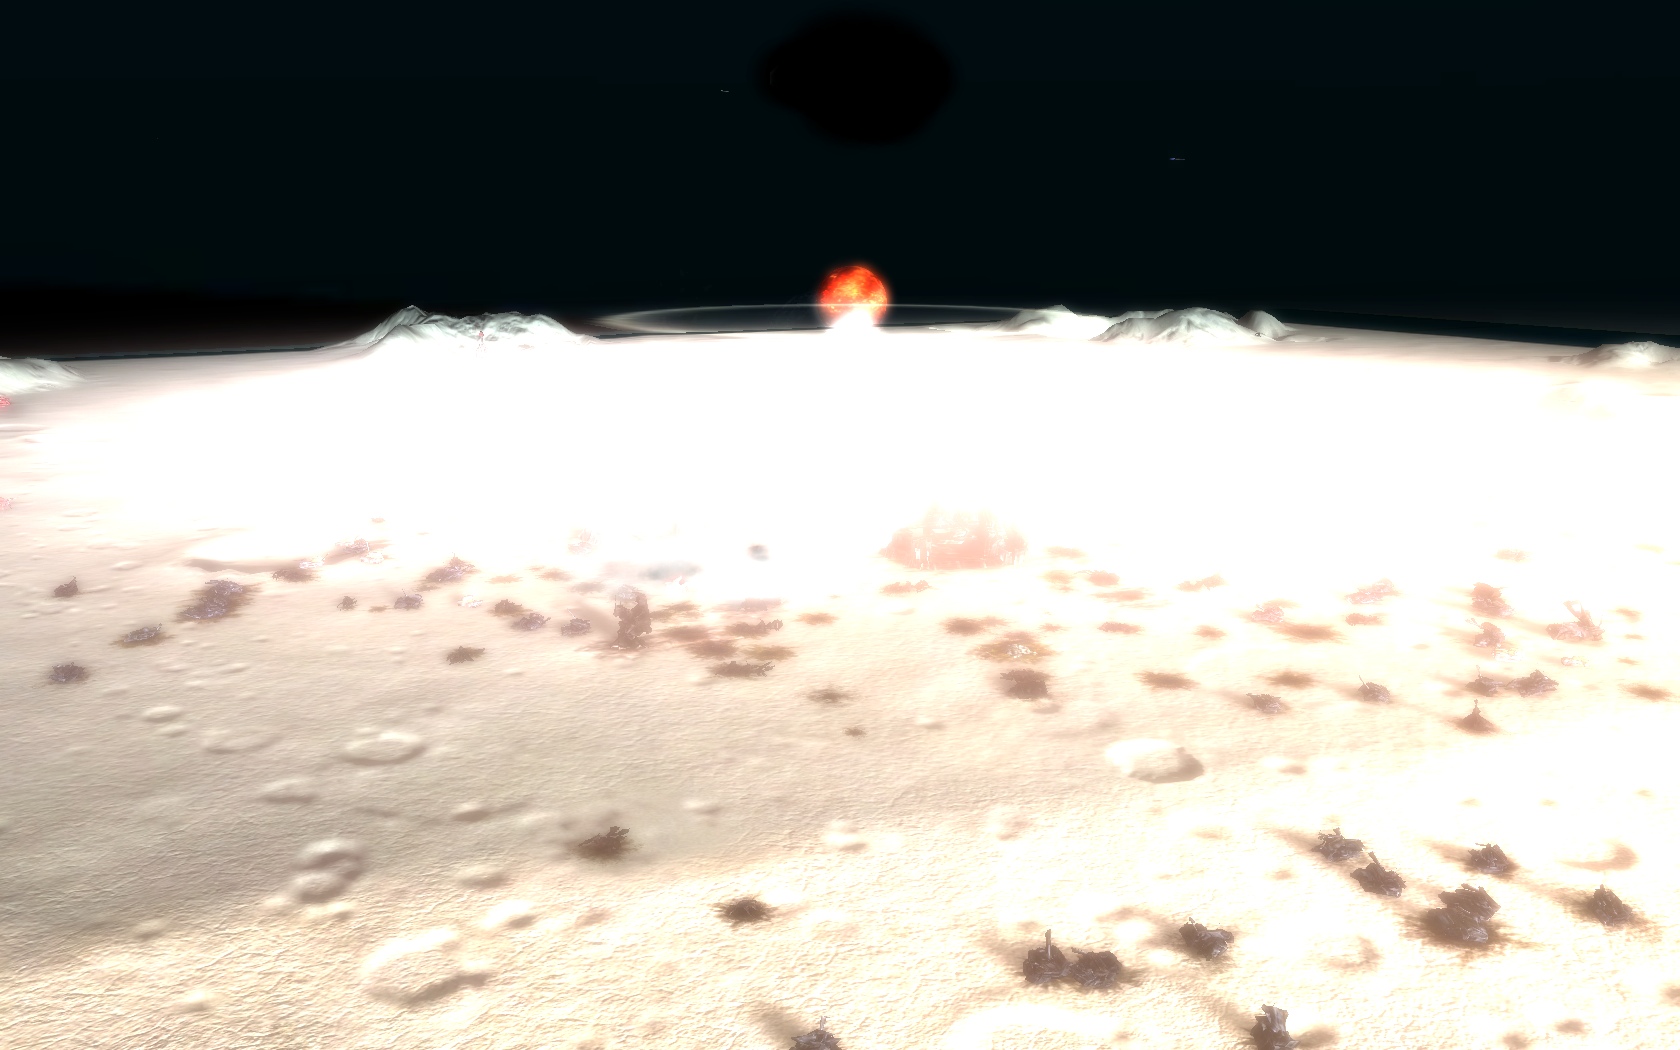
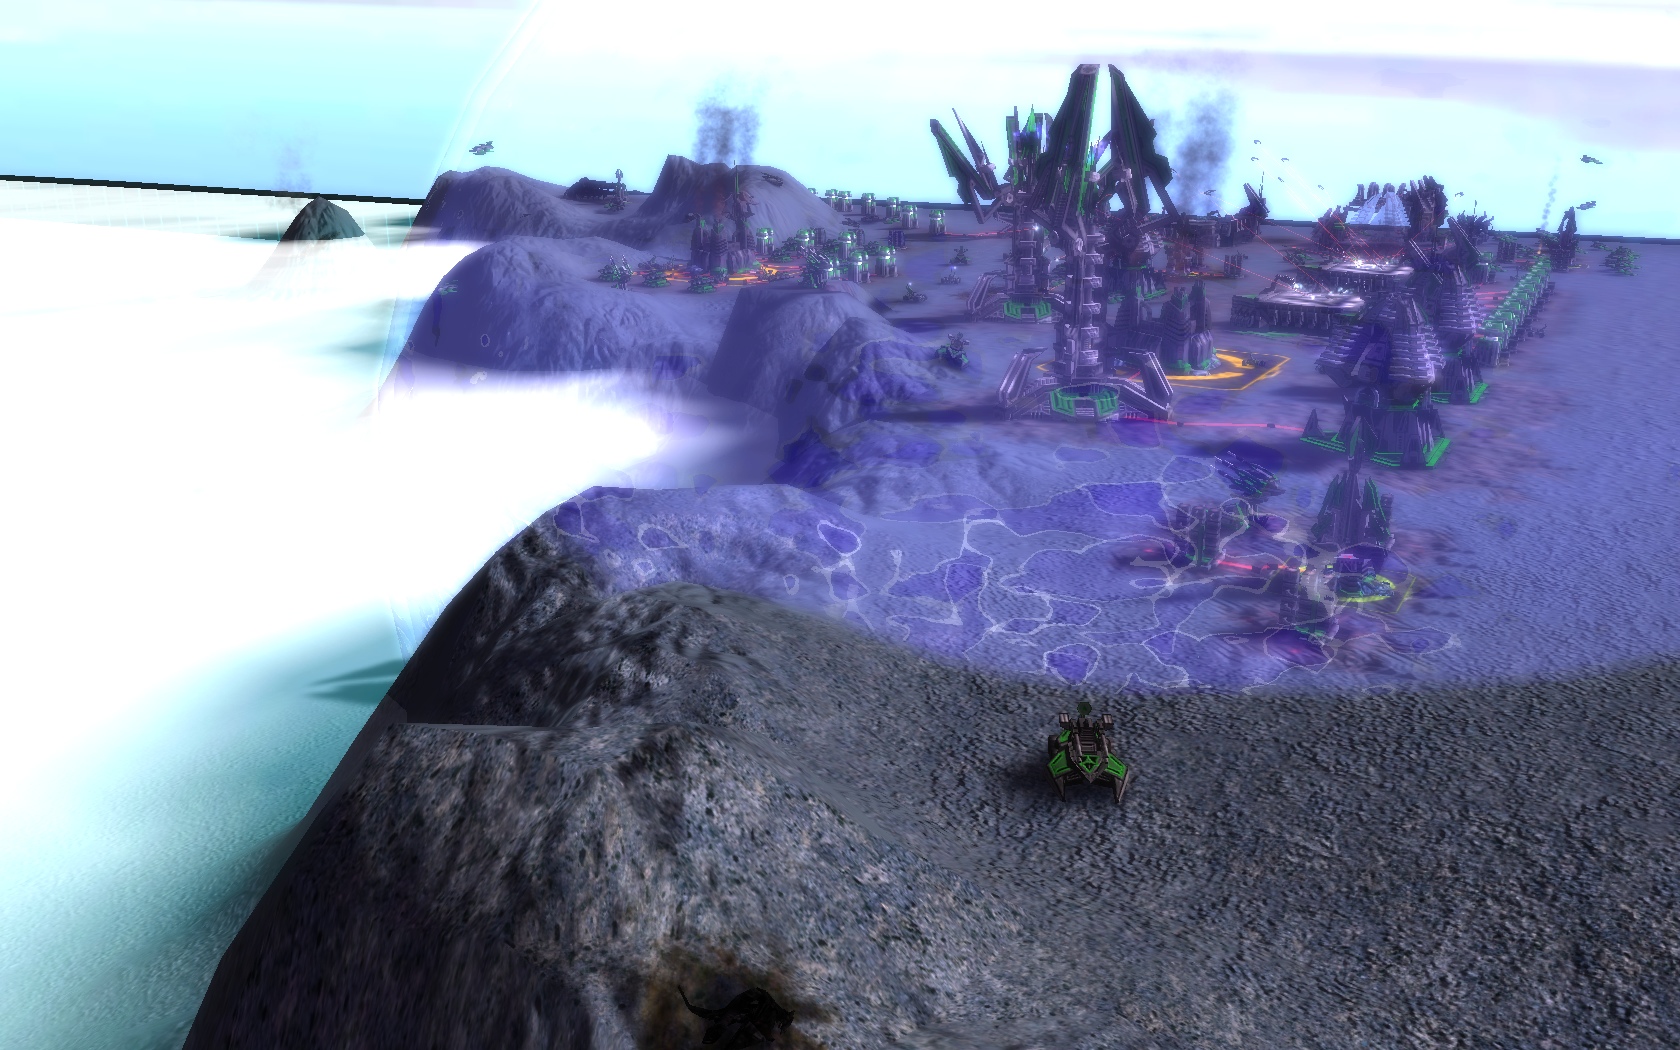
Ingame Description: "On this small moon, solar eclipses occur every day. The same can be said about the frequent battles as commanders try to capture this resource rich world." Actual description: Small moon map that provides some really fast paced action. Lots of comm walking, raiding and trying to hold more mass spots while teching for some T2 PDs. While its symmetric and properly balanced, its asymmetrical visual style with the shadowy side gives it an unique look. All you TA players that have played darkside should know it usually ended with a guardian cannon and in SupCom the T2 PDs is basically a guardian if you scale it with the mobile unit ranges in both games. Radar towers are vital here! That being said, a T2 rush to PDs while holding the middle with your comm is quite effective for a T2PD crawl. The medium sized craters serve more than just an artistic role, because their elevation is just slightly below the rest of the. When combined with PDs and walls around the ridges, they become Mantis/Aurora/Rhino killing machines (100% protected from all but those really rare lucky Aurora shots. So of course you will need T1 artillery or fast T2 and some missile launchers. This is why UEF has a good advantage here, as Strikers 100% shoot over these 'natural entrenchments'. Lots of comm rushing for killing well placed PDs that can cause a lot of problems, just be careful not to your ACU cornered. Screens: 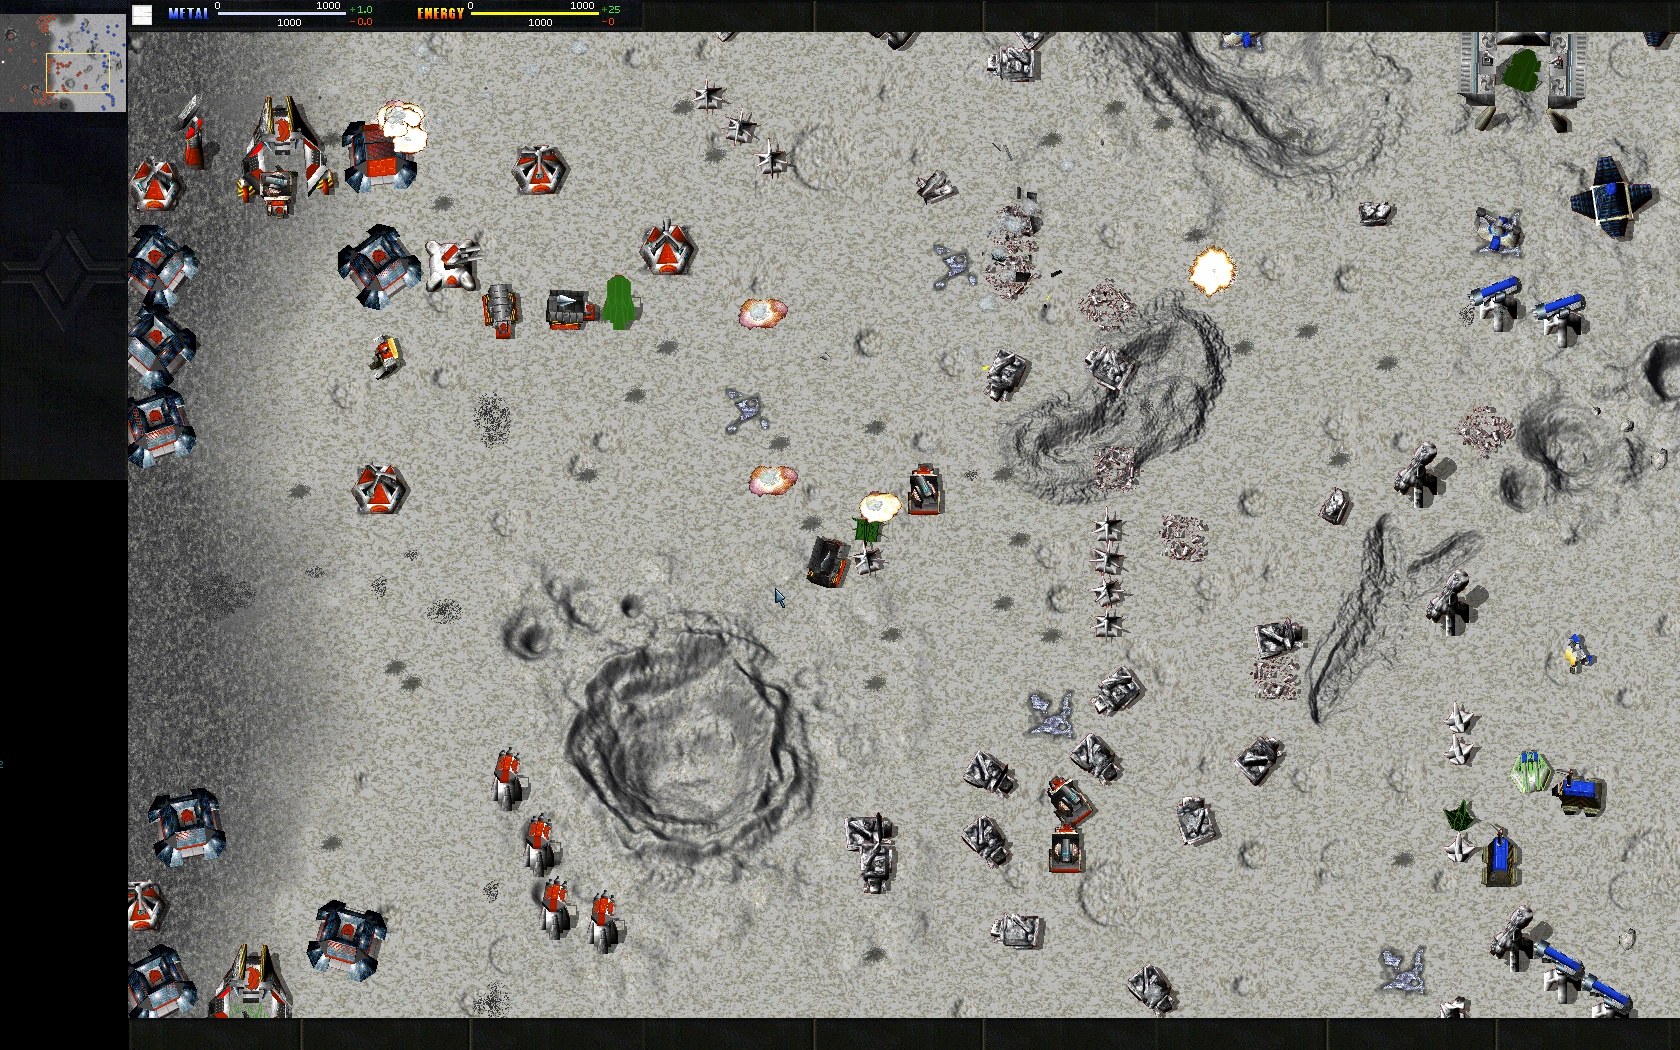 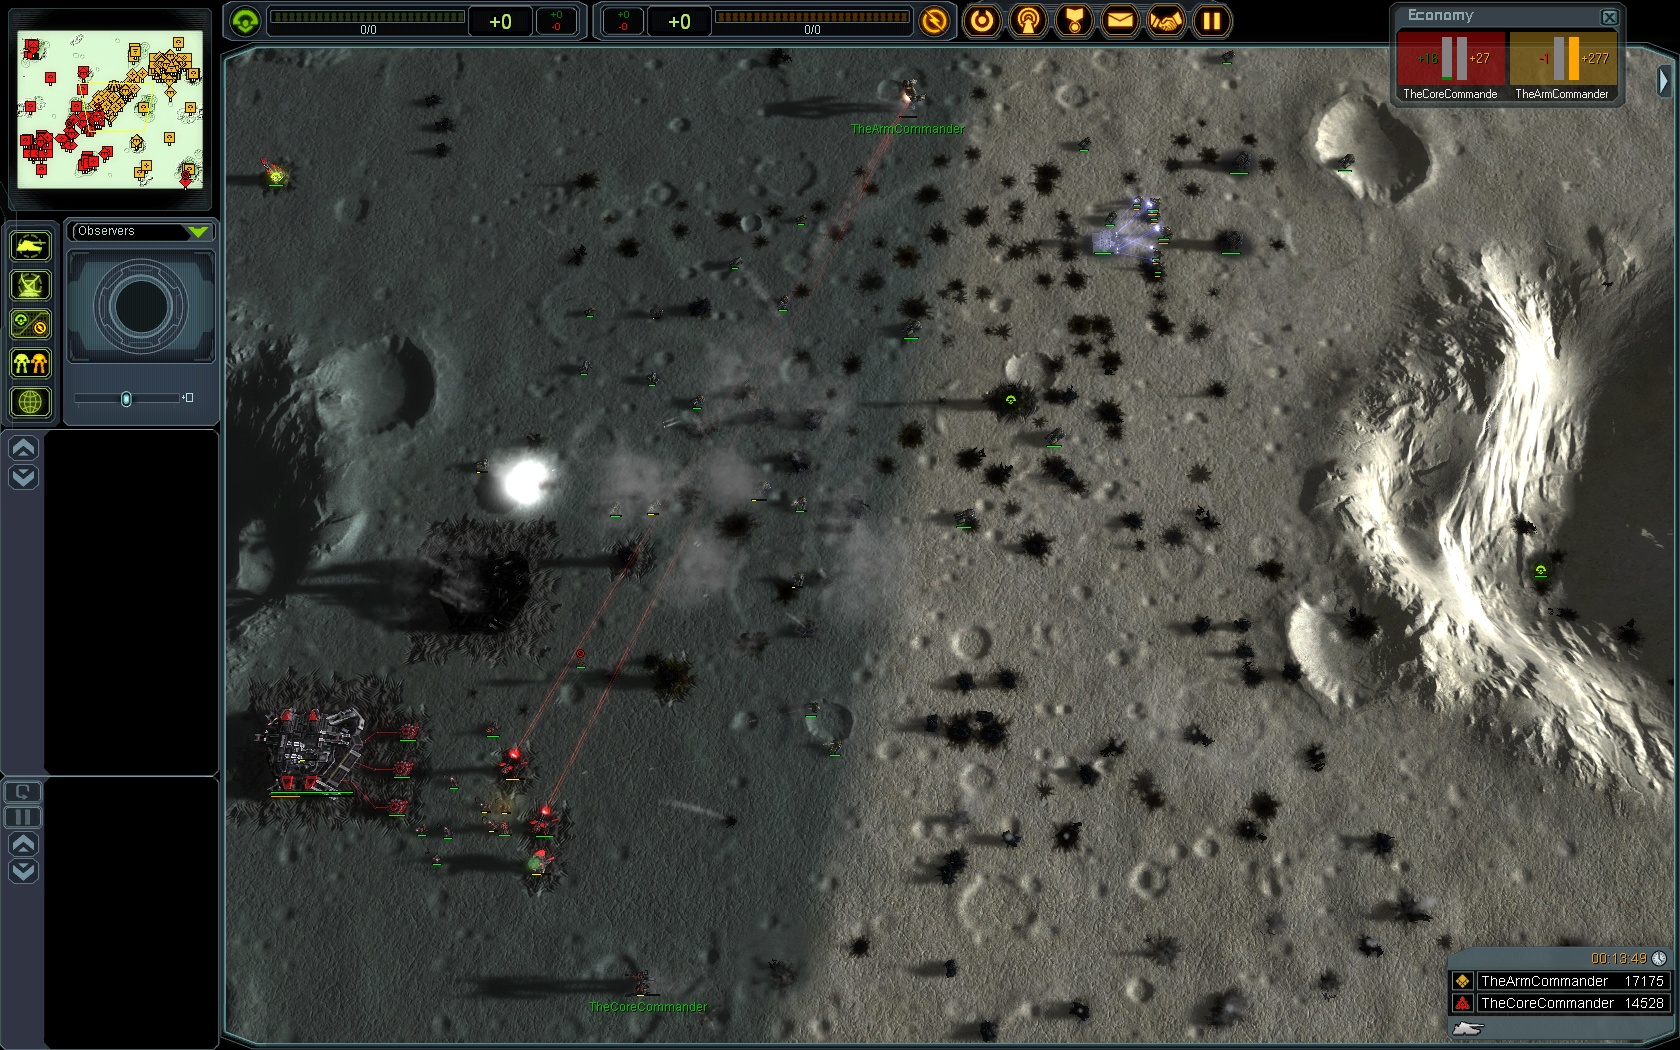 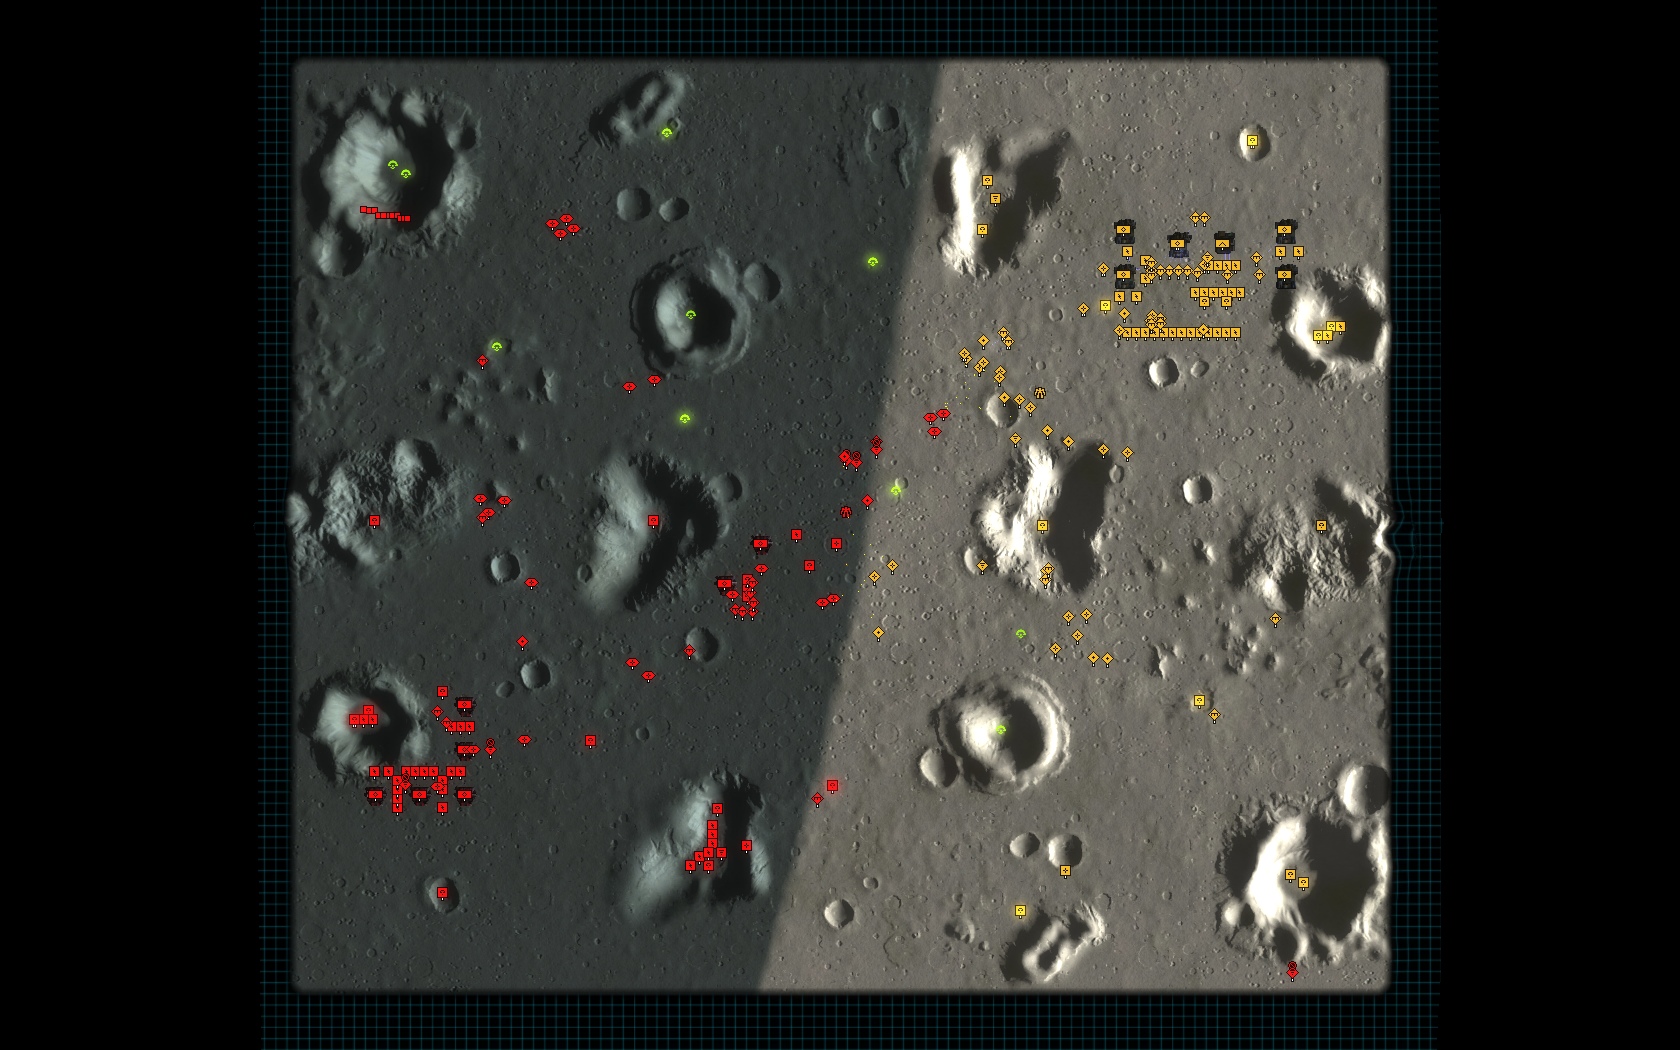
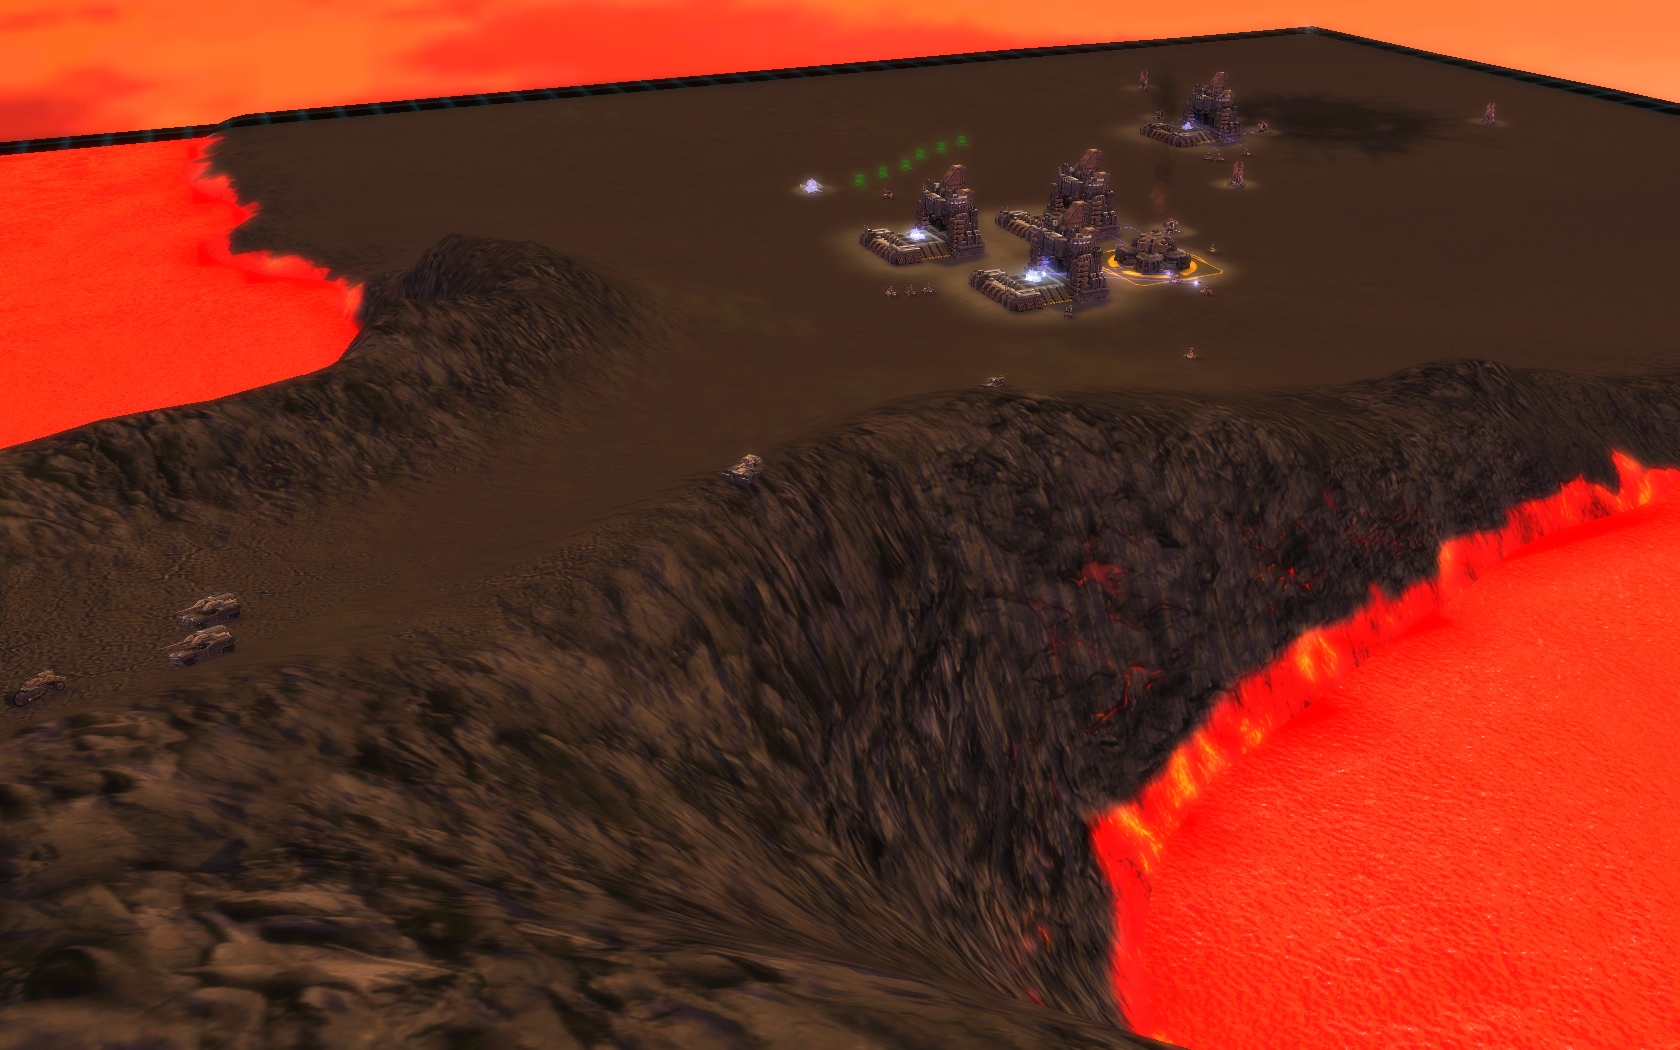
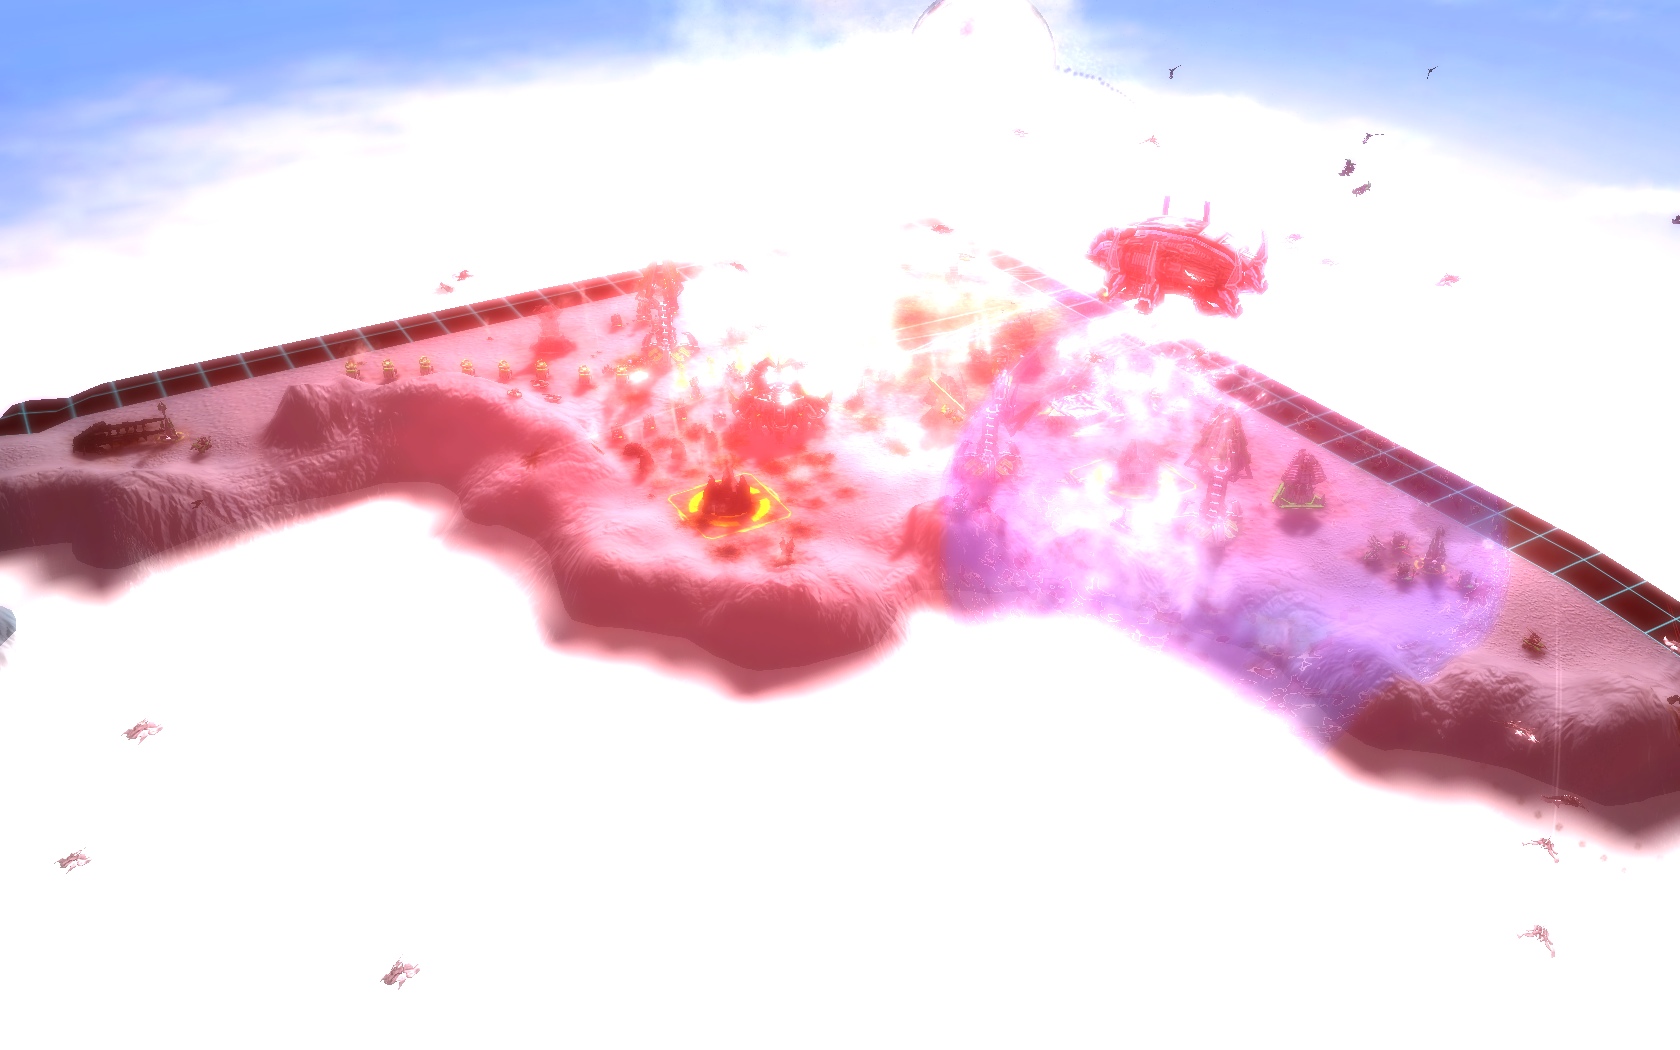
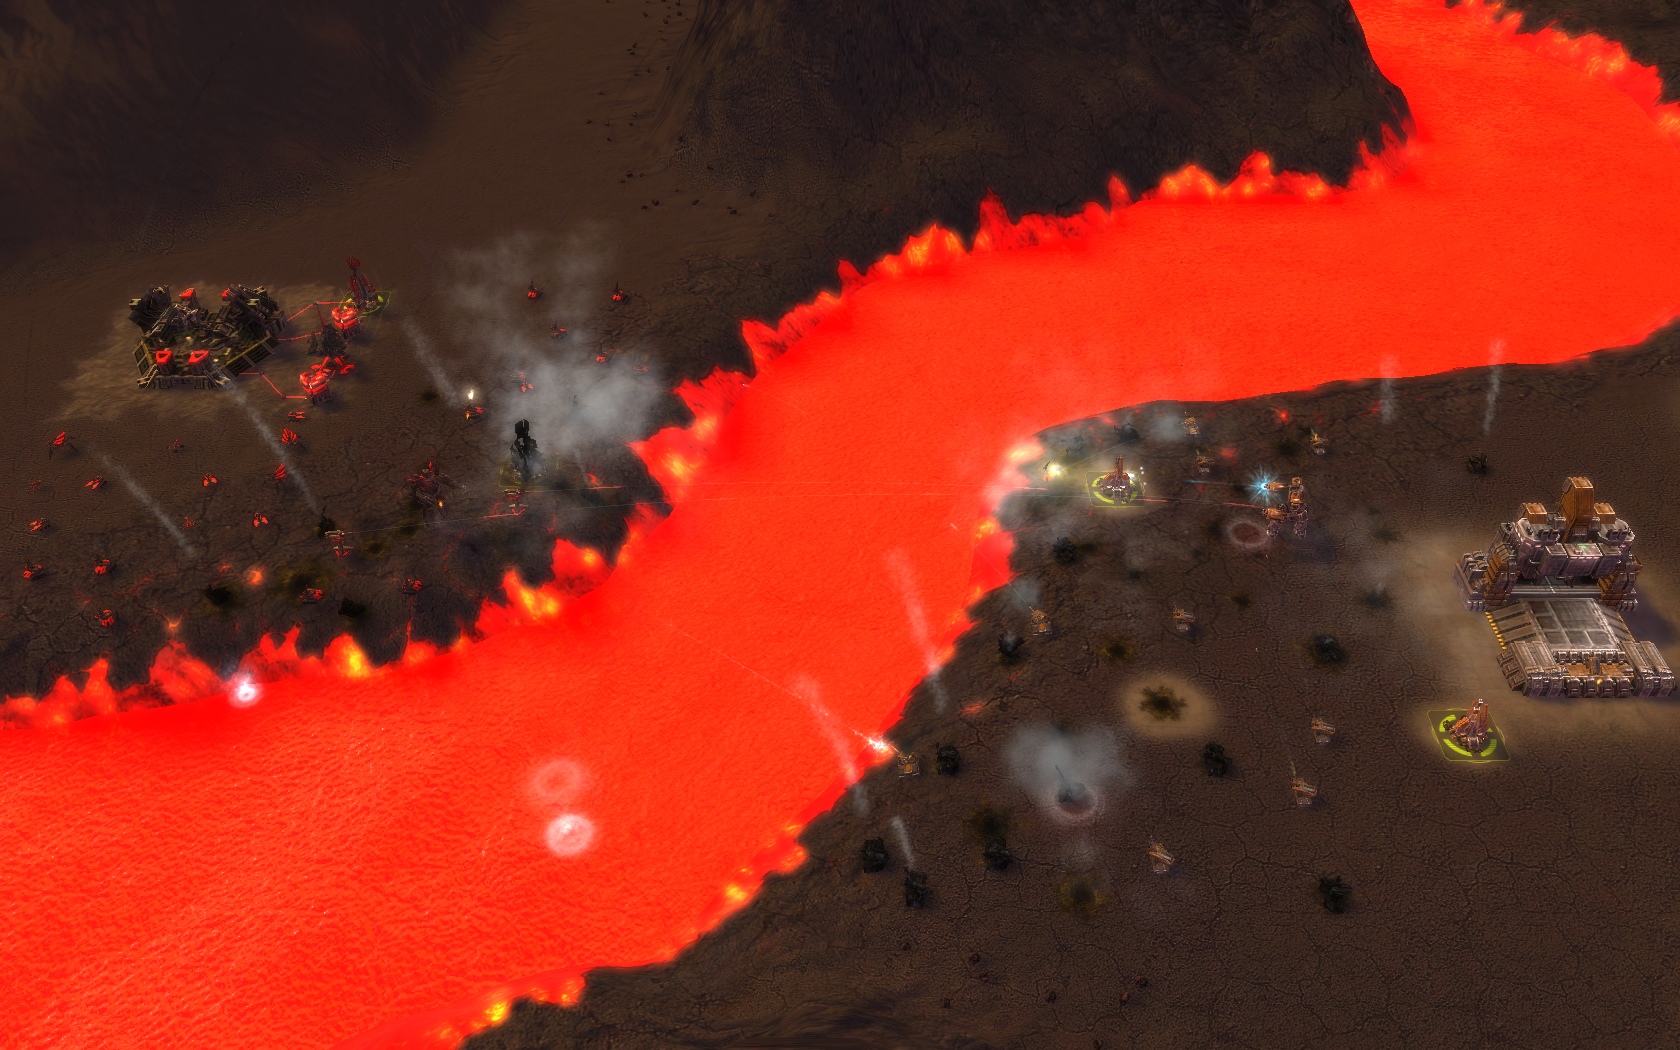
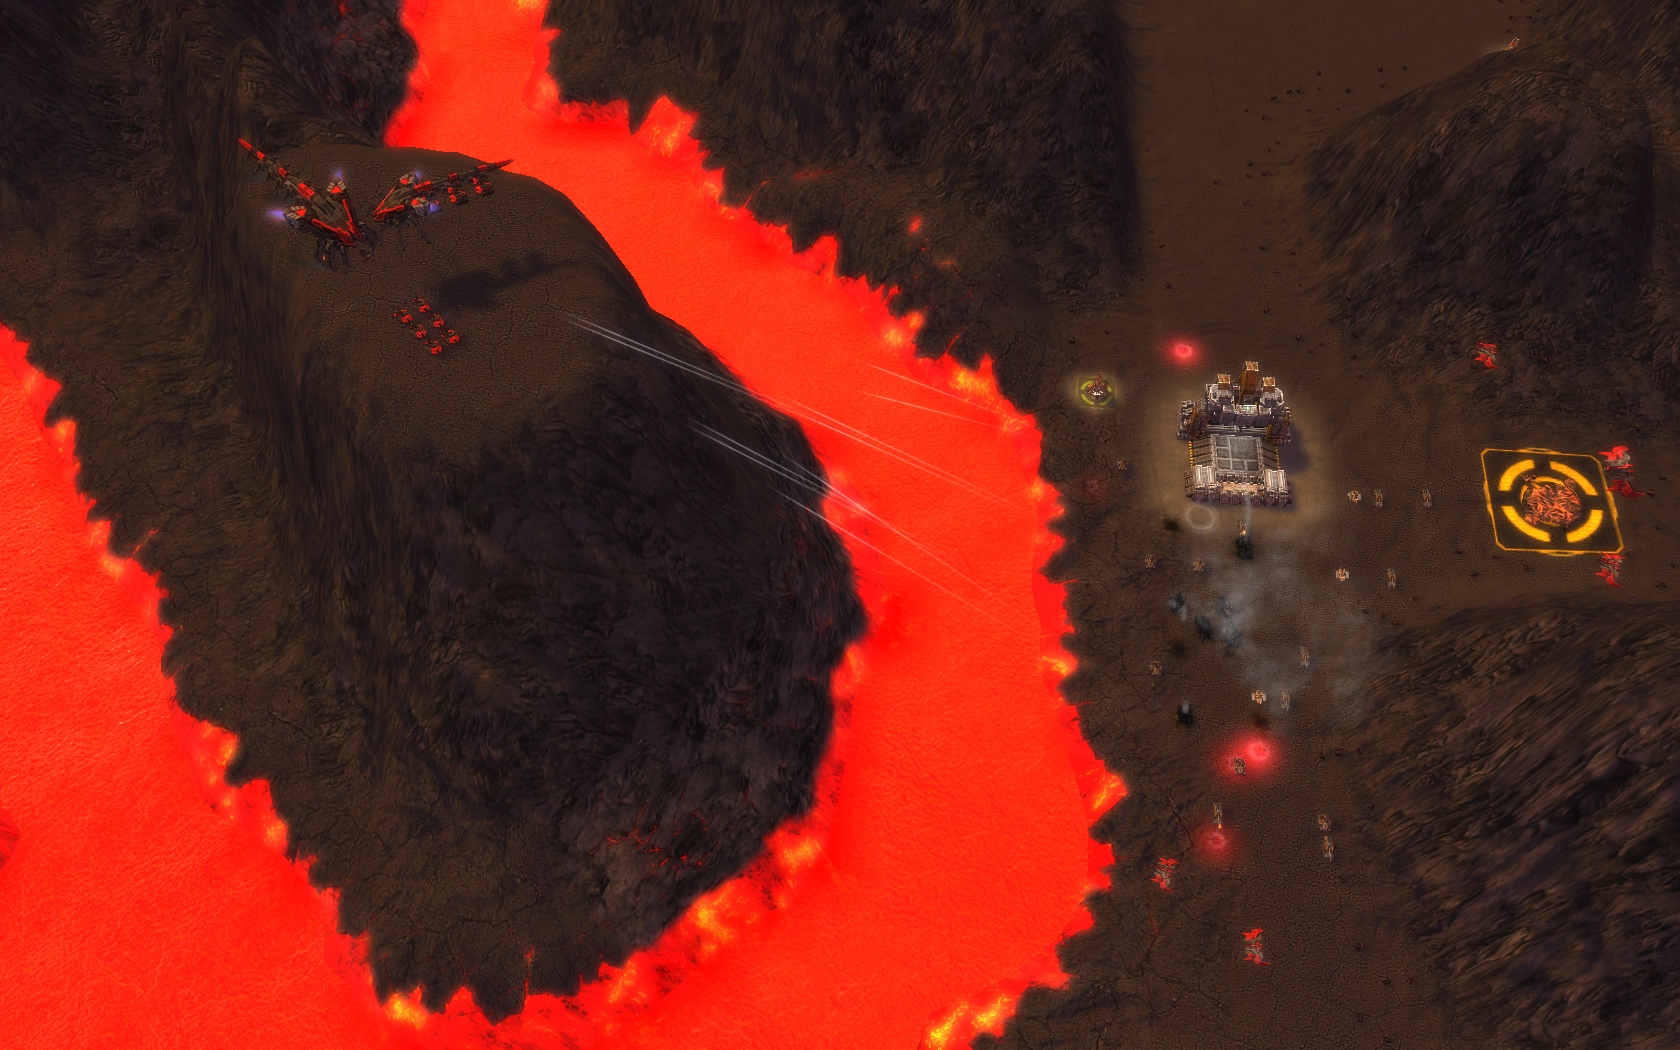
Lava Highground 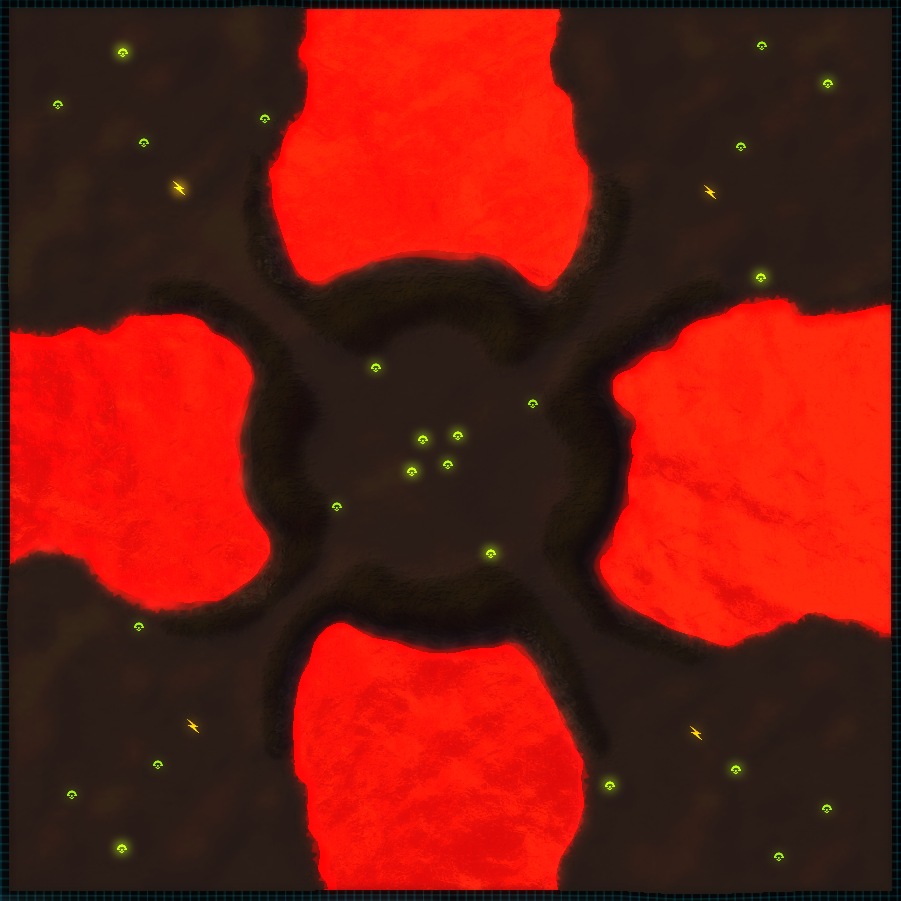 
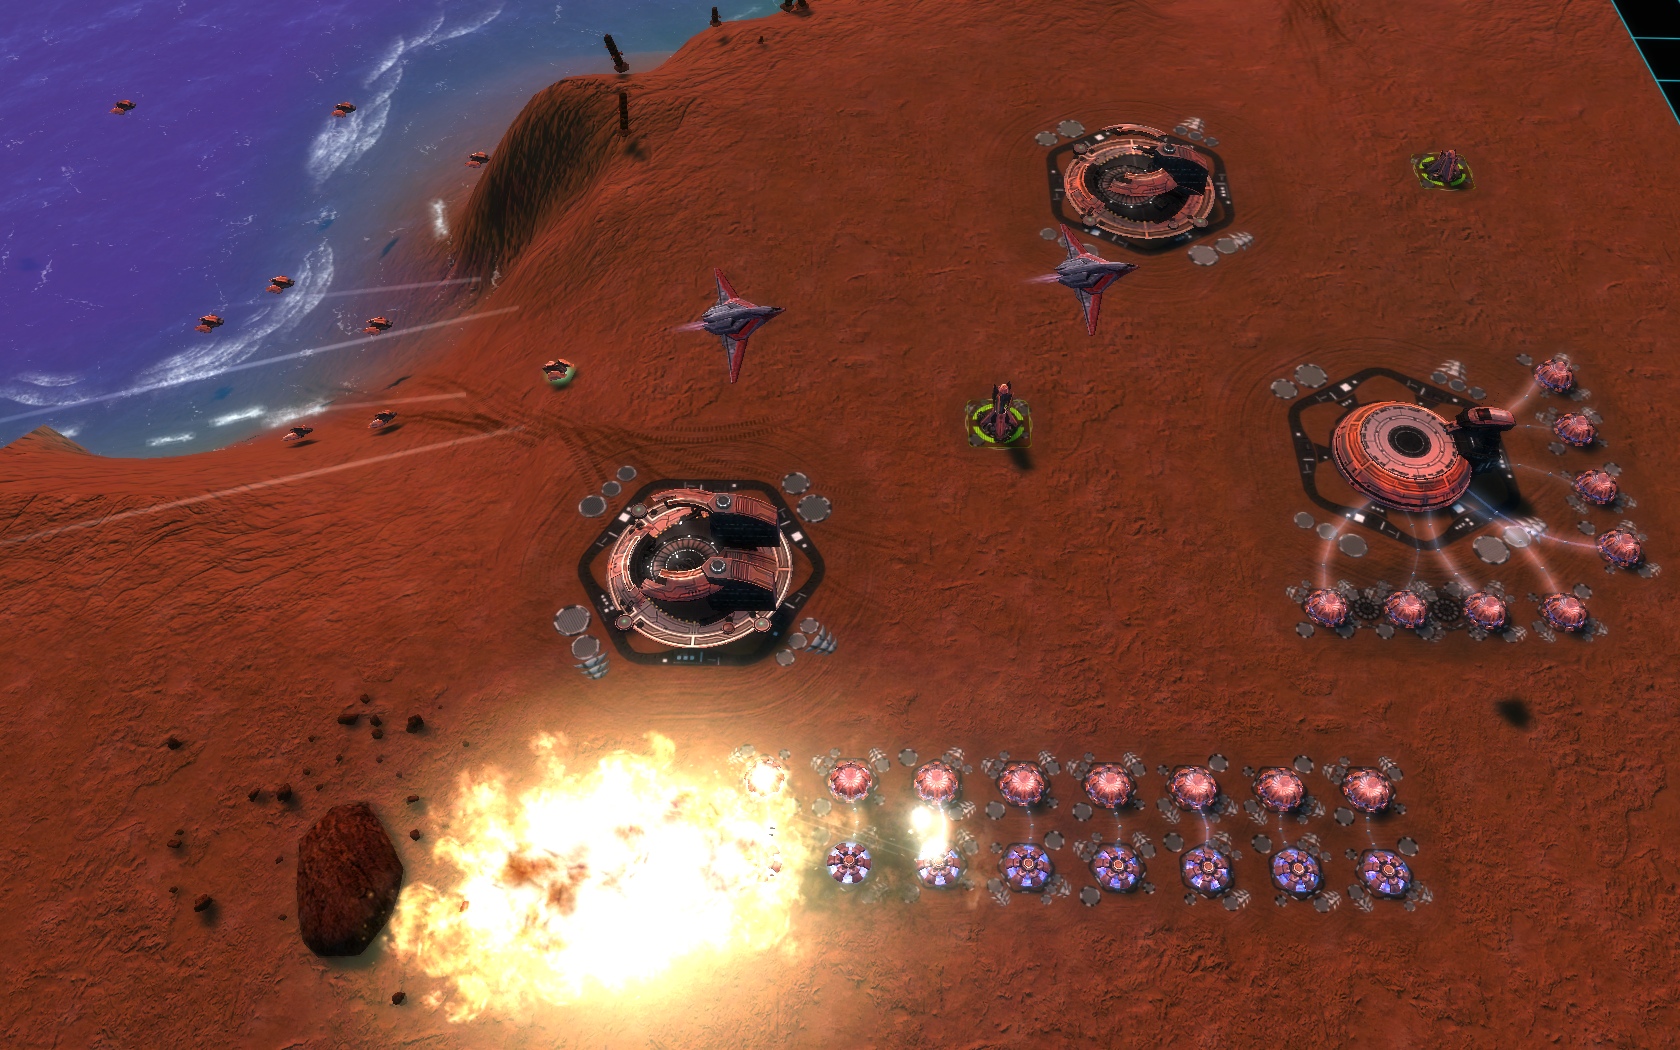
Ingame Description: "Wherever you've come from, be it 'a galaxy far far away' or just gated in from the nearest planet, 'I have the Highground!' really takes on a new meaning when dueling in this harsh environment." Detailed Description: Similar to winter duel, this map's narrow passages make T1 artillery the weapon of choice as they are quite effective. Rush to T2 is quite risky if done really early but sometimes can work if you get some fast T2 PDs to keep the middle. This is a map where getting middle usually means a clear win. The middle has 8 mass spots, 4 in a cluster in the very middle and 1 on each of the 'entrance' ramps. On the rocky cliffs in middle theres also a ton of small reclaimable rocks, about 600 mass on each of the 4 sides, so thats 2400 mass in middle just in the rocks. Its the combination of comm dancing, artillery microing, getting some PDs up to keep the enemy comm at bay, trying to keep your engineers alive while they suck up the rocks/wrecks and fighting to get to the other 2 start points or just getting them back via drops just sum up the map in 1 word: INTENSE! Just watch out for draws, getting 2 or more PDs when you have a clear advantage in the middle and retreating comm if hes hurt should do the trick. Usually the battles here last around 10-15 minutes, but after losing the middle a player can still turtle for a bit. Though if your opponent manages to get 5+ T2 PDs and shields up at the 'entrance', you'll really want to consider T3 mobile arty and drops as well as T2 arty to try to kill his T2 generators. IMPORTANT: Because the lava is just just modded water, amphibious and hover units will accept orders to go into it but they will blow up on contact. So be careful with these units as well as with comms and amphibious tanks. Screens: 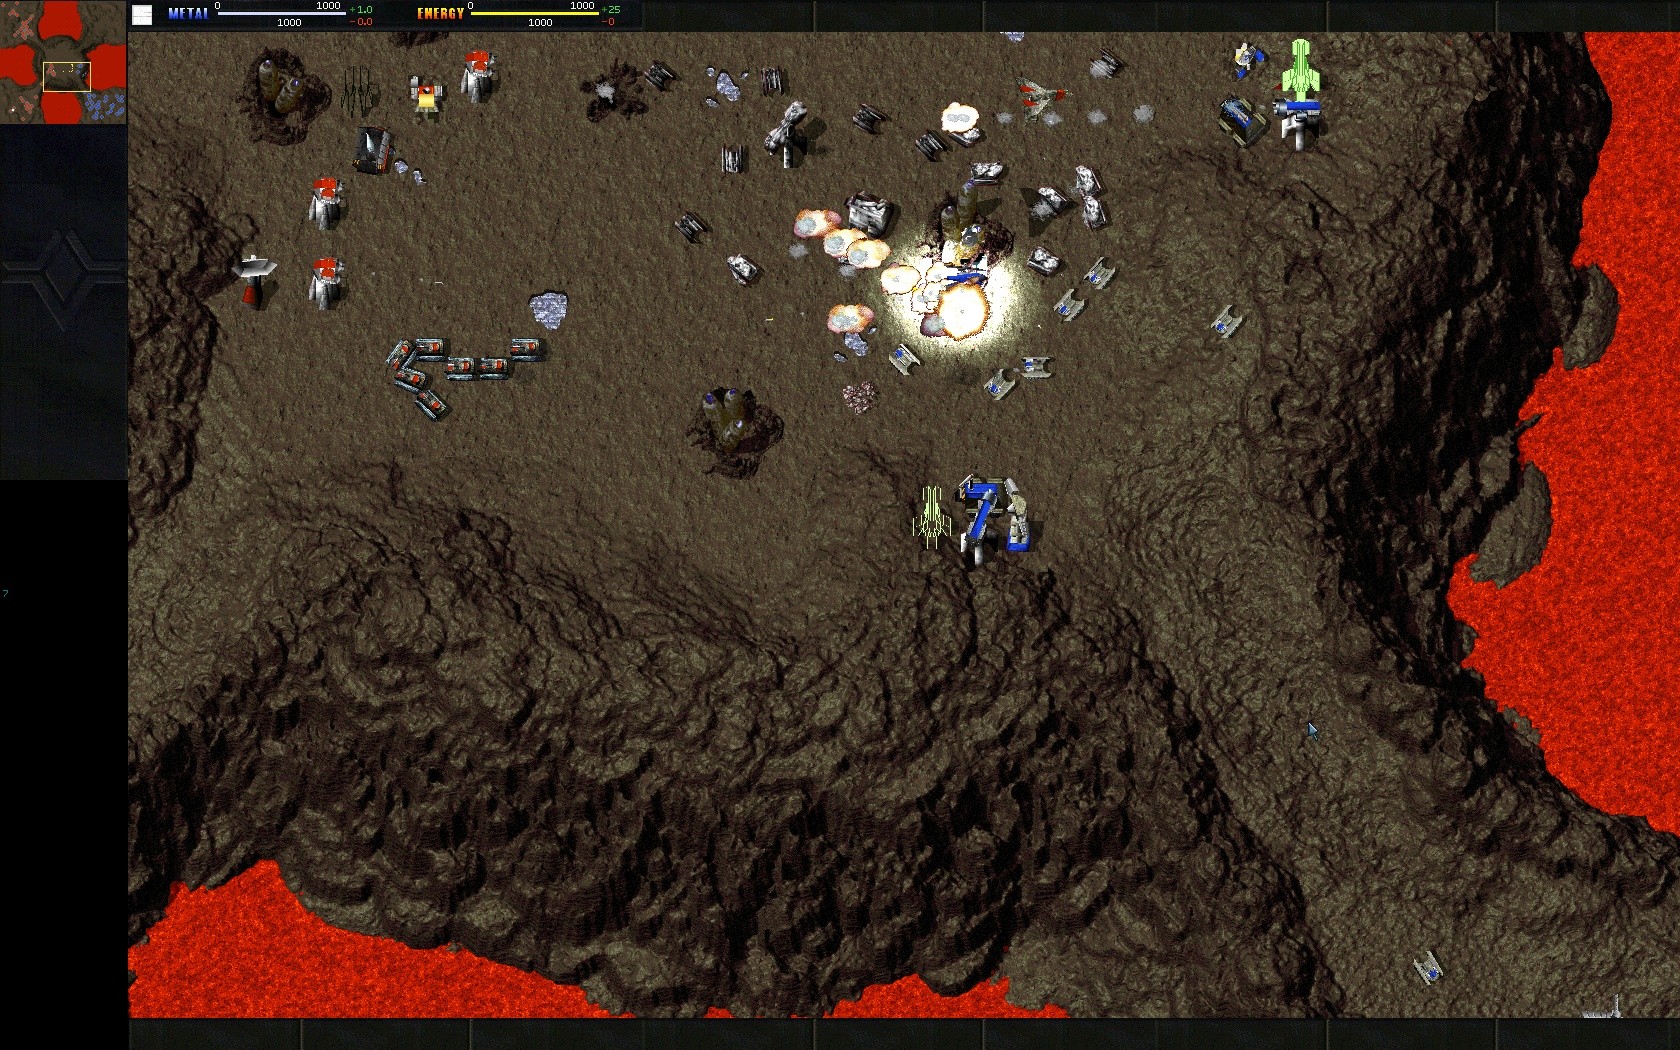 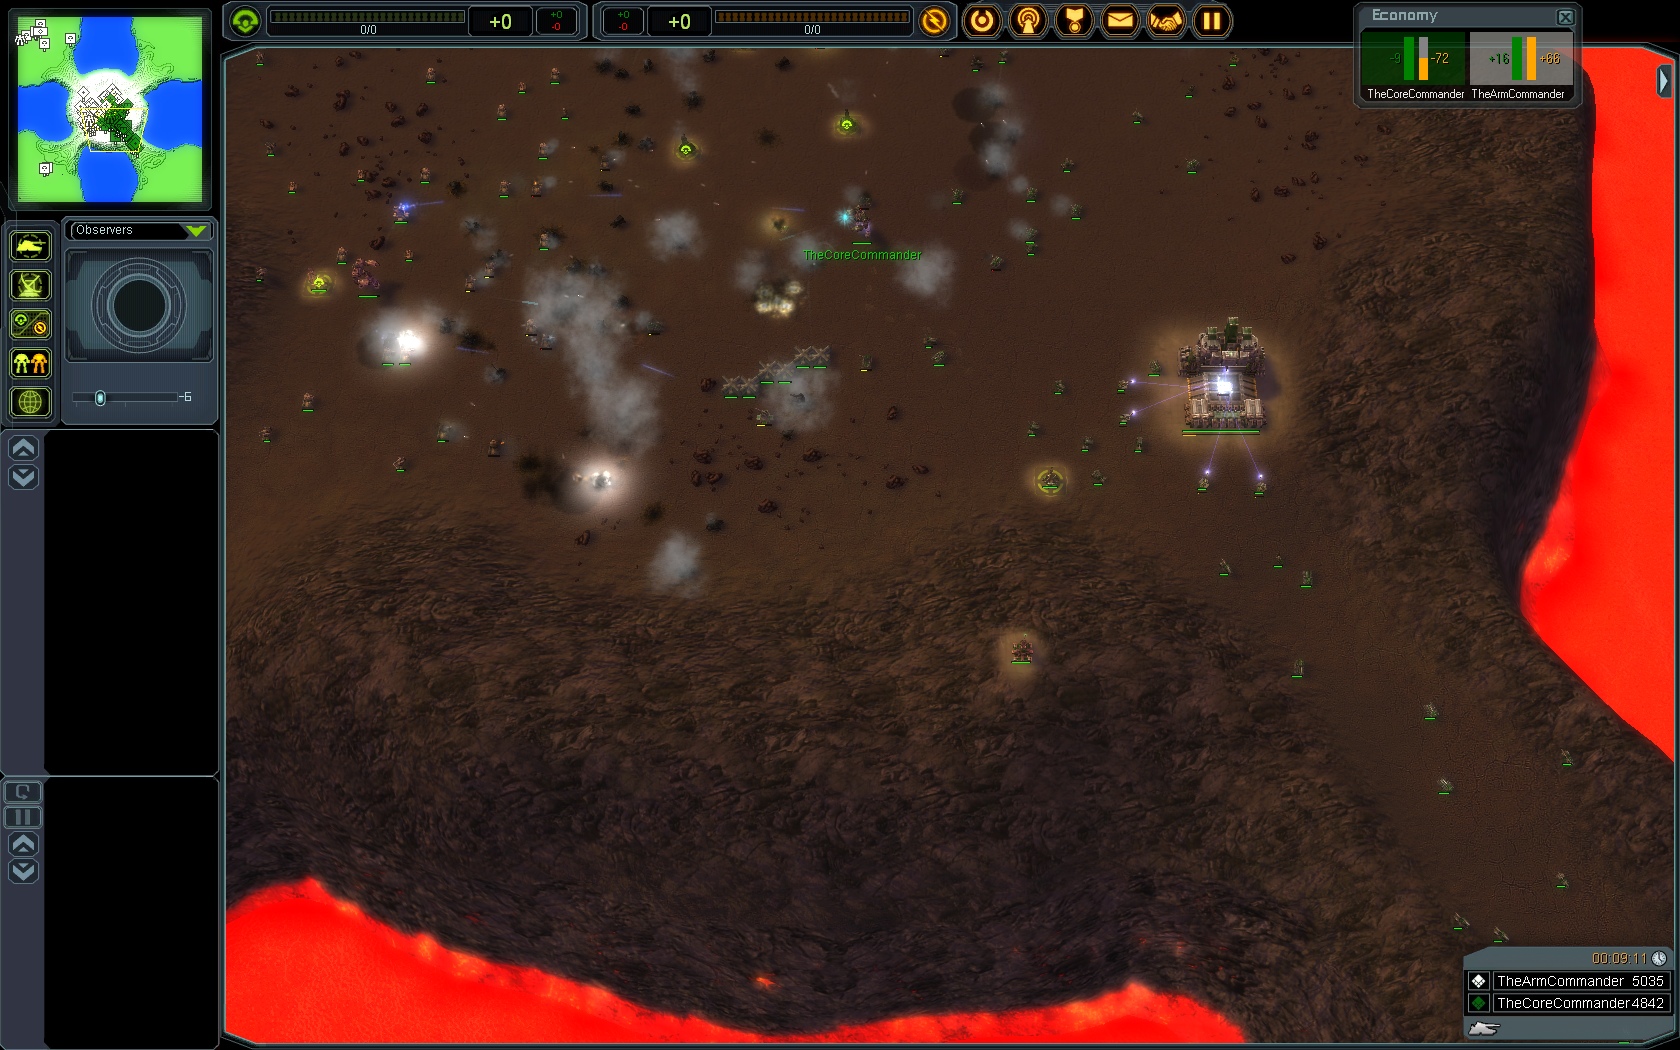 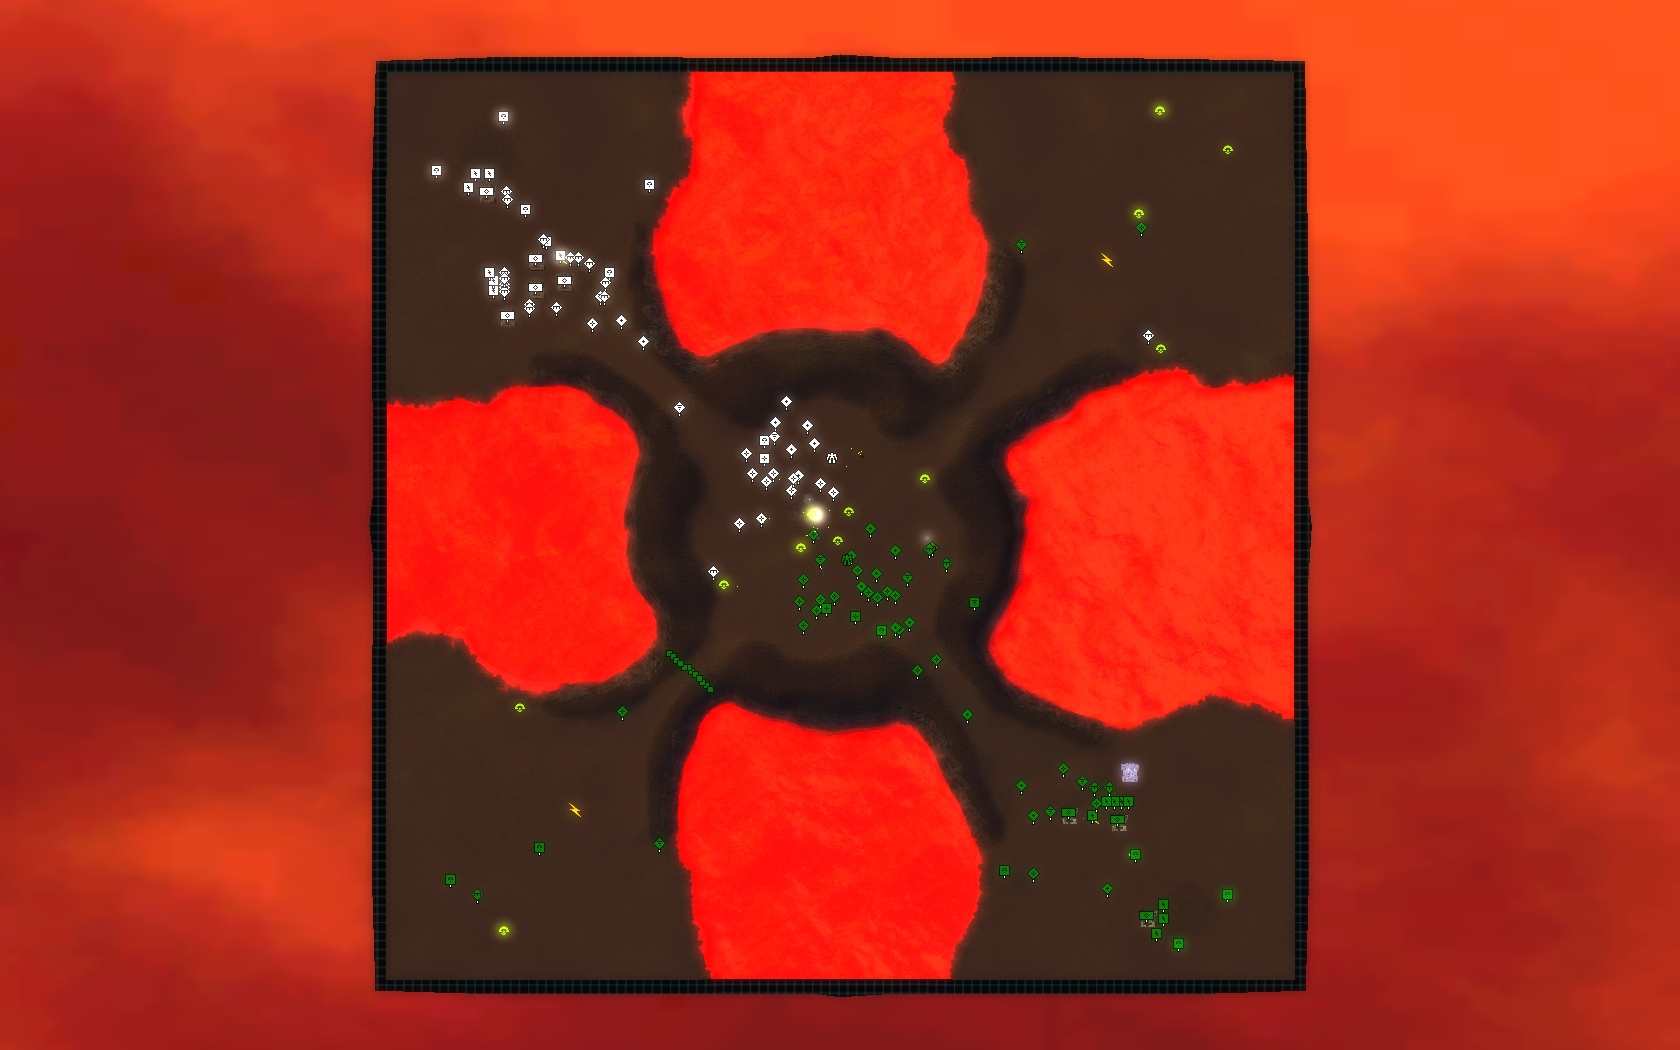
  
Greenhaeven  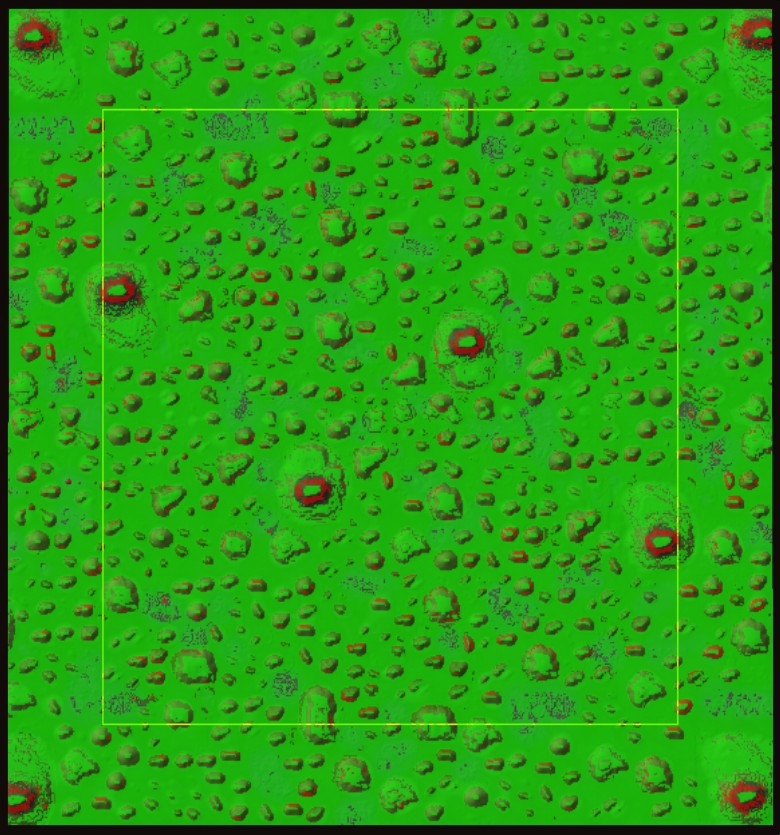
Ingame Description: "This beautiful green planet used to Seraphim asylum for ages. With its numerous hills and minor mass deposits it was hidden from the eyes of everyone." Detailed Description: A somewhat similar concept to Comet Catcher when it comes to resource placement, as mass spots are scatered around everywhere are. A 2 mass spot start forces you to start expanding quickly and makes every engineer worth it's weight in gold, so keep them safe. The start points are also in the open similar to Arctic Refuge, making flanking very easy and turting in a corner like on other maps quite hard. The hilly terrain makes defending bases a bit more complicated then drawing up a line of T2 PDs, because that way most will be shooting hills. Same goes for unit on unit action, as some can provide a shield for missle launchers. rhino lasers and more. The elevations have quite an impact on battles. Balance changes from the TA Greenheaven include mirroring, left used to have a big advantage with a larger number of mass spots closer to his base as well as 2 big hills near base (for firebases etc). Epic games and lots of T1 and T2 spam trying to hold as many mass spots as possible, while teching up to get superiority. 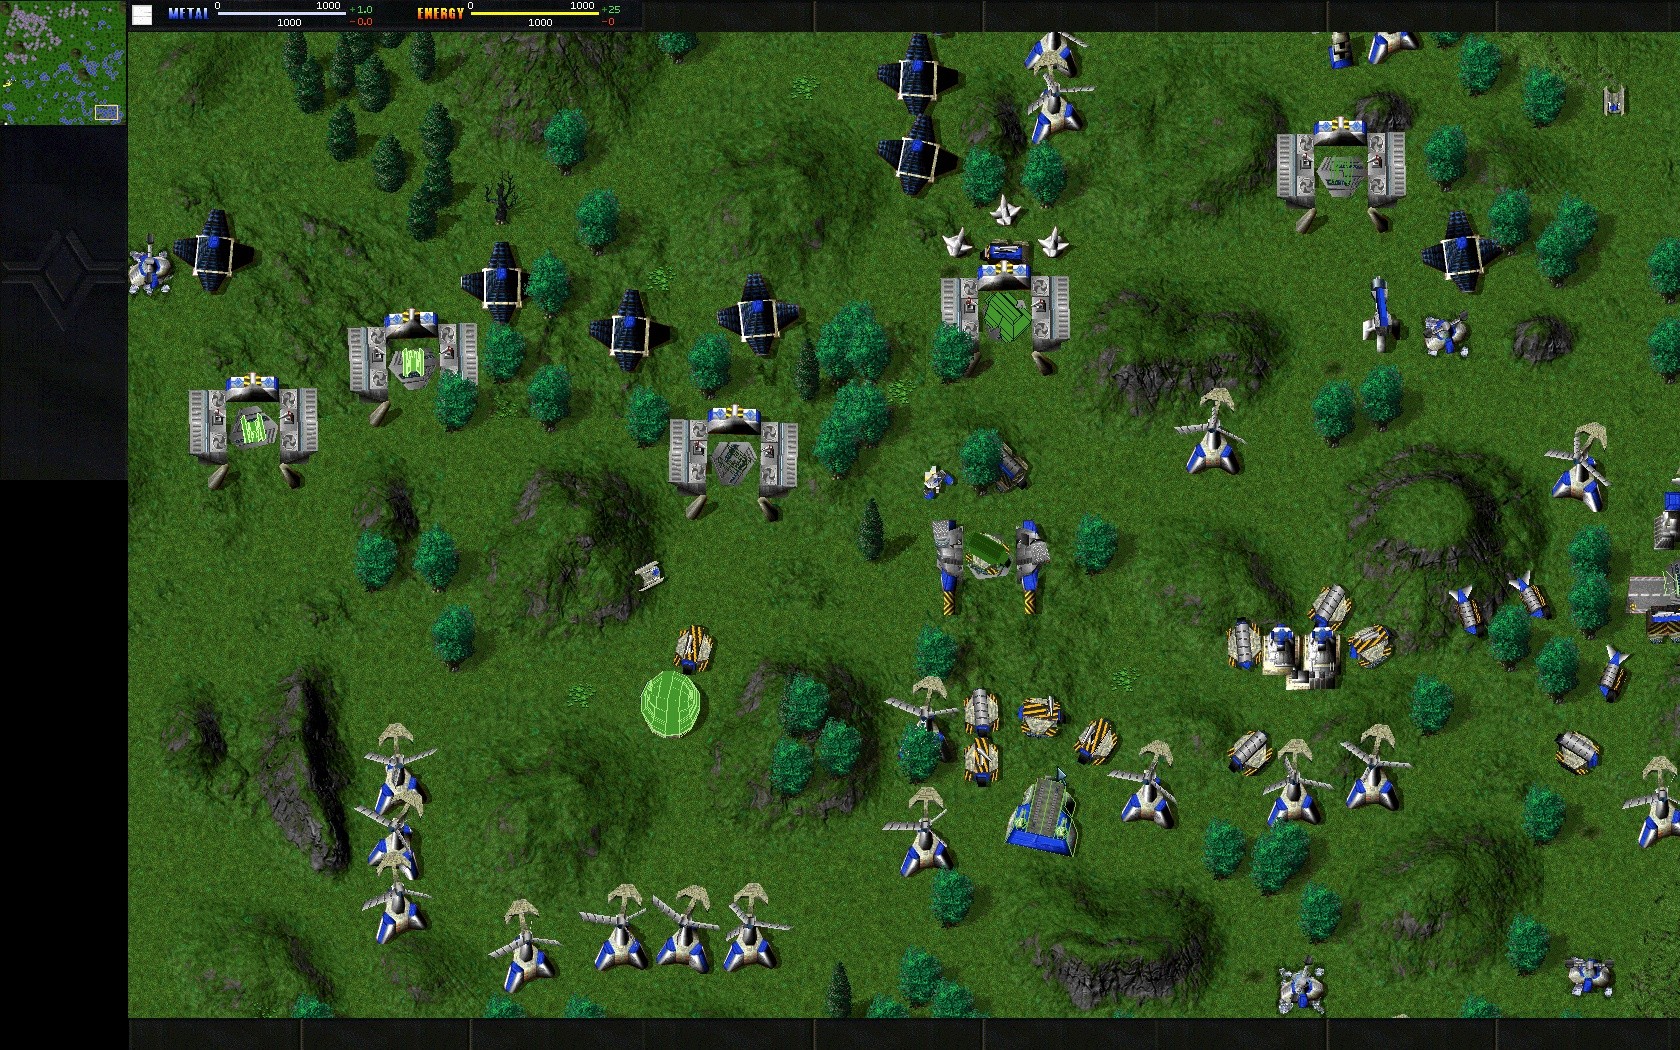 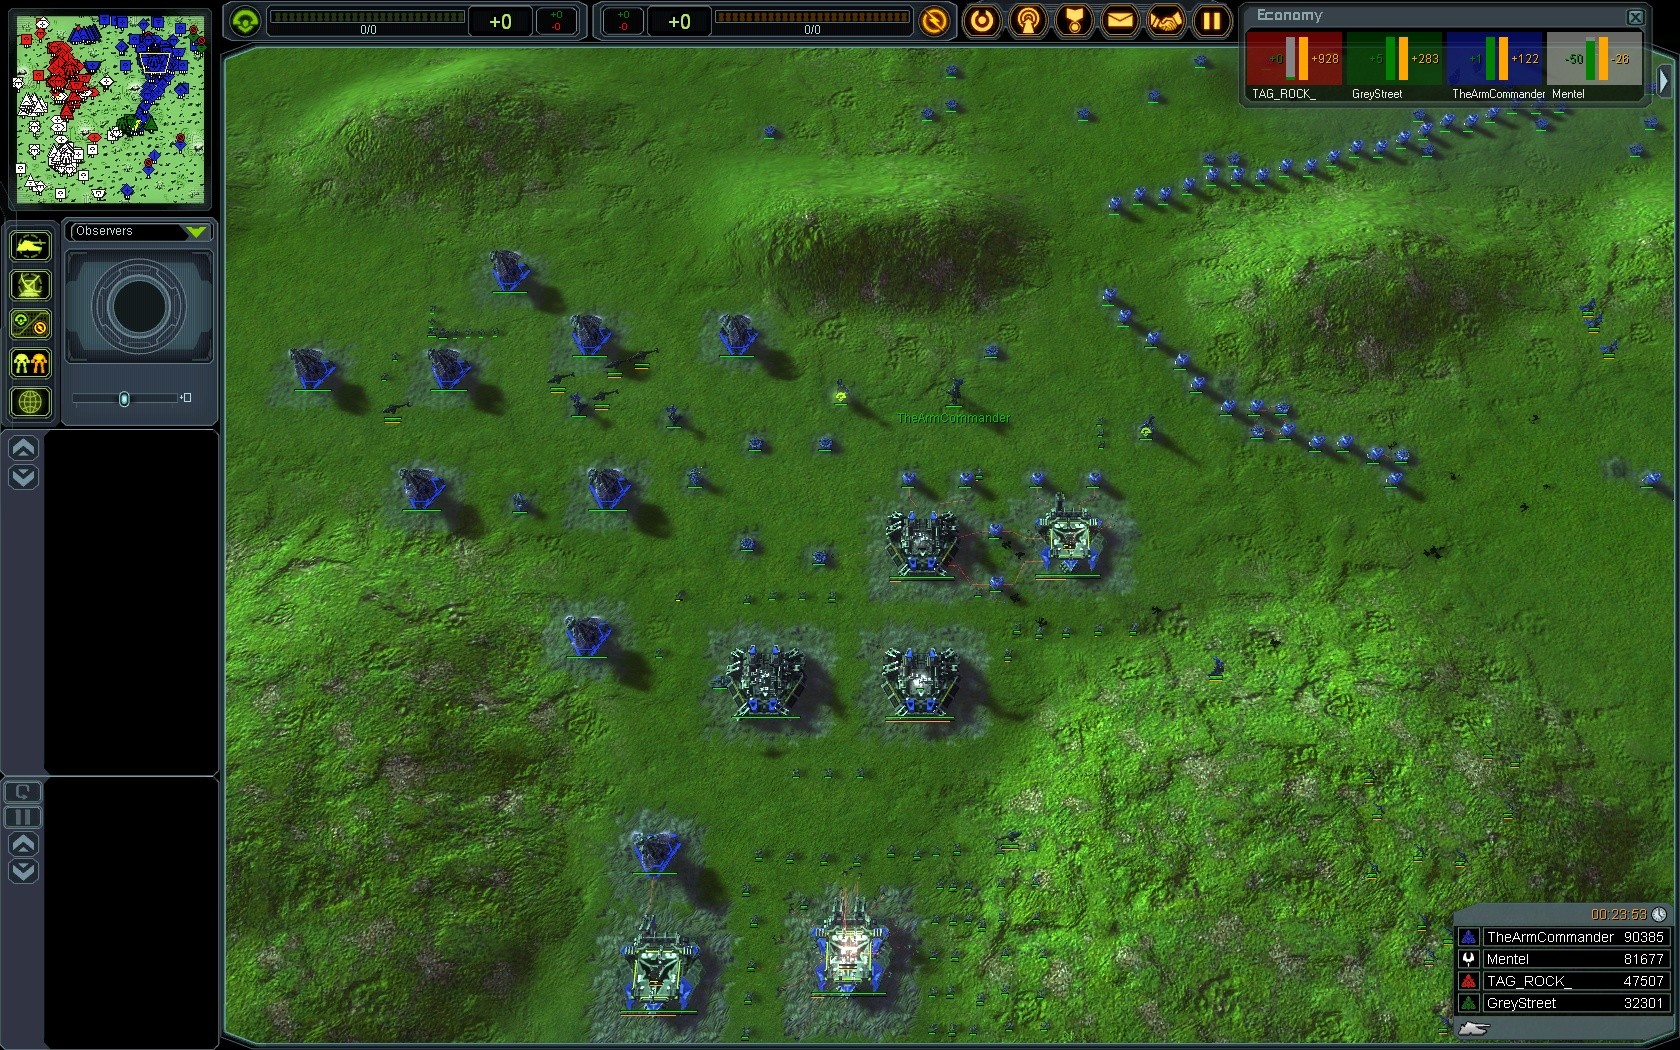 
Cluster Freak 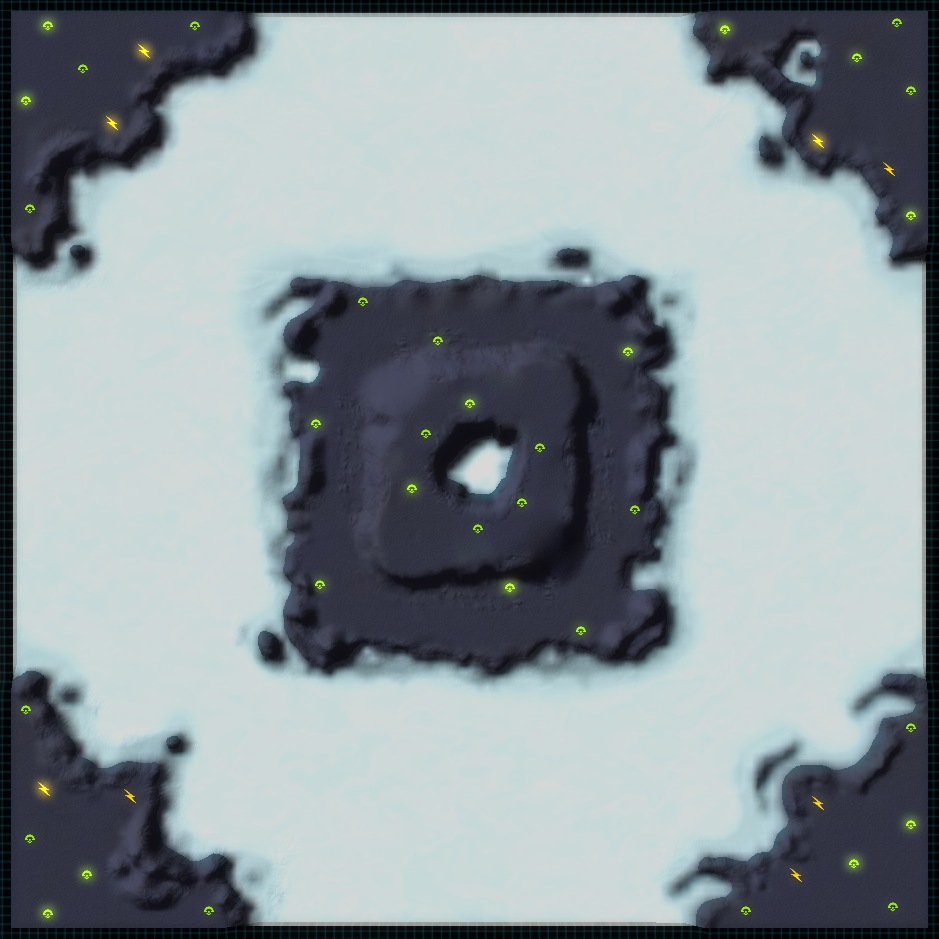 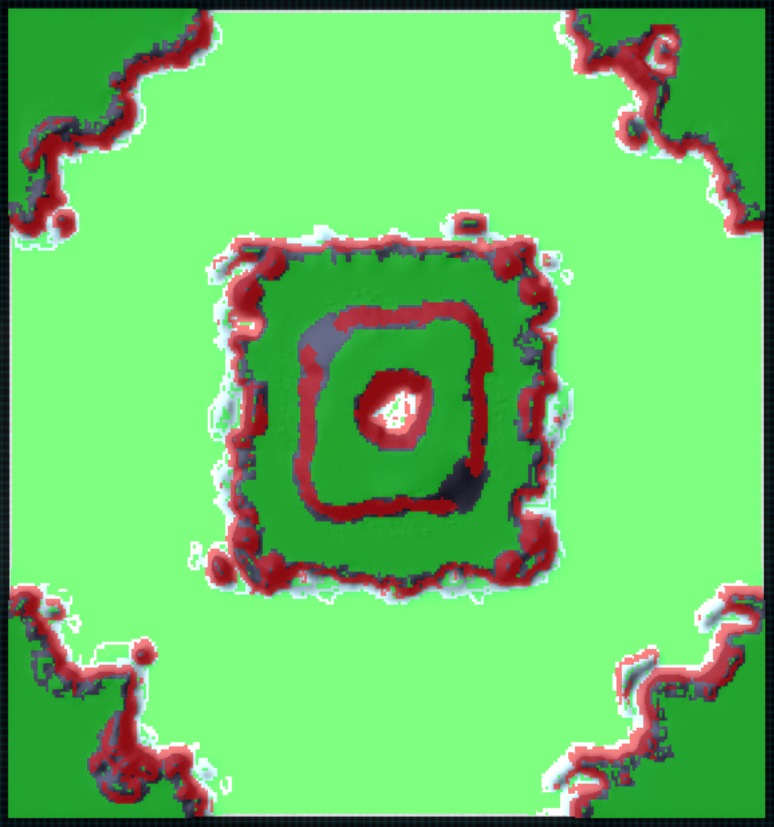
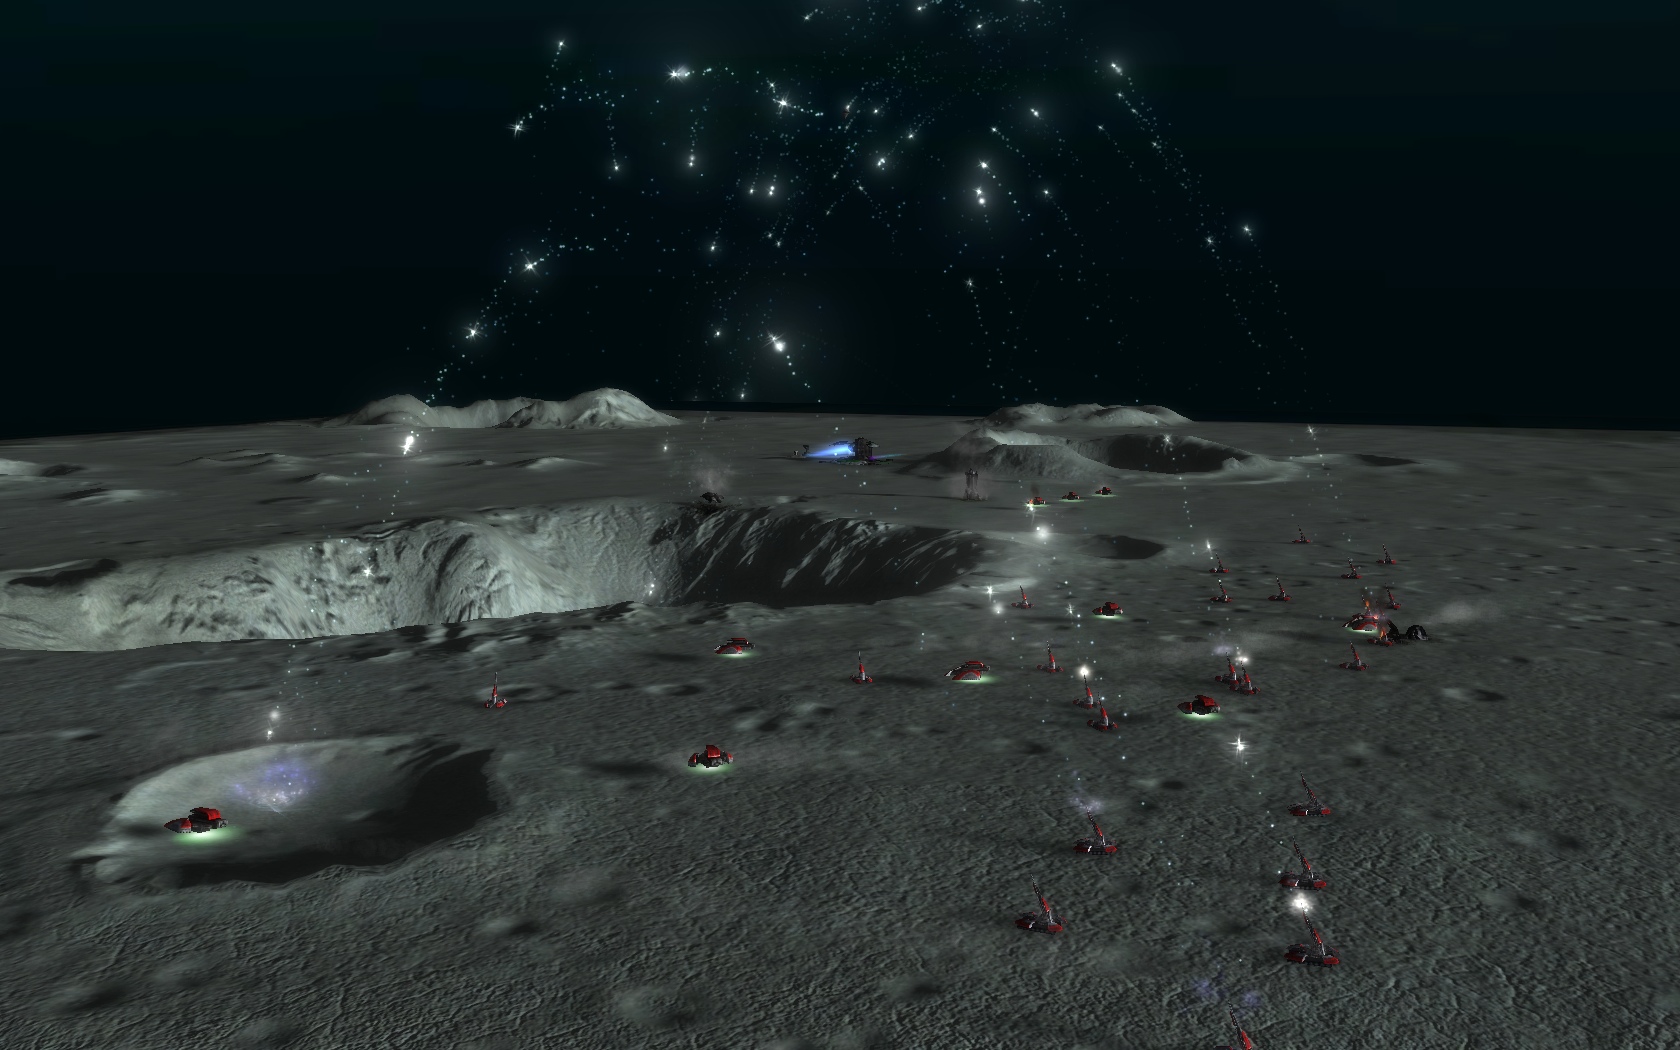
Ingame Description: "Fight for air superiority over this bottomless pit covered in fog. Lots of mass in the middle for an intense duel, just watch your step!" Detailed Description: One of the most unique types of maps in any RTS game, oh yes the air maps are back! Resources are split evenly in the corners(5 mass spots and 2 hydros each) with a big concentration in the middle (14 mass spots). In TA 1v1 these usually either ended very, very fast and were decided by the slightest micromanagement mistake of the early freedom fighter (TA's interceptor) fights for who gets the middle, the side corners and therefore more mass spots. The middle is the primary target for most games and it gets quite interesting in 2v2 play with 1 players trying to rush a T2 transport and get his comm in middle to claim it. Do not underestimate the corners though, because your start corner + 2 other corners can be just as good as 1 corner + the middle. Here's the math: Player 1 has his start 'island' and the middle so thats: 5 mass spots and 2 hydros + 14 mass spots = 19 mass points and 2 hydros Player 2 has his start 'island' and the other 2 side corners 'islands': (5 mass spots and 2 hydro) x 3 = 15 mass points and 6 hydros It evens out once you get a few extra fabricators for all those hydros to good use. Also, fabricator spam is less of a problem on this map as there is limited space and of course 1 bomber and all your fabs are gone. Expanding is critical!  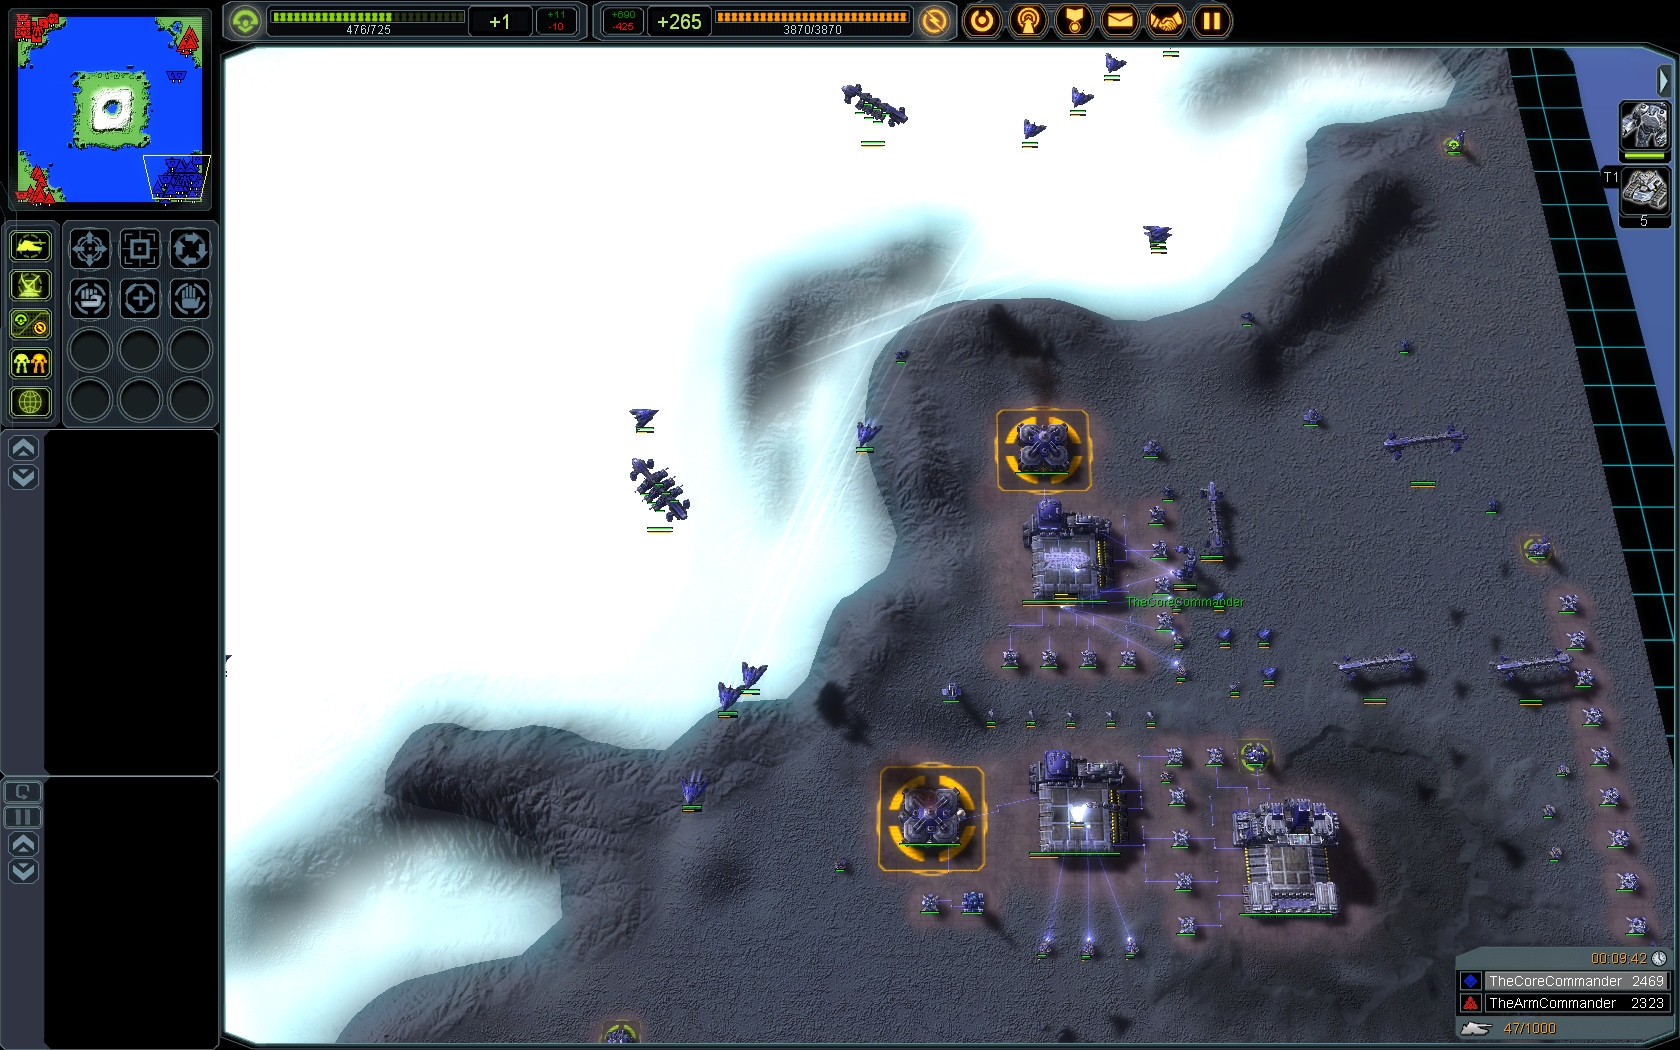 
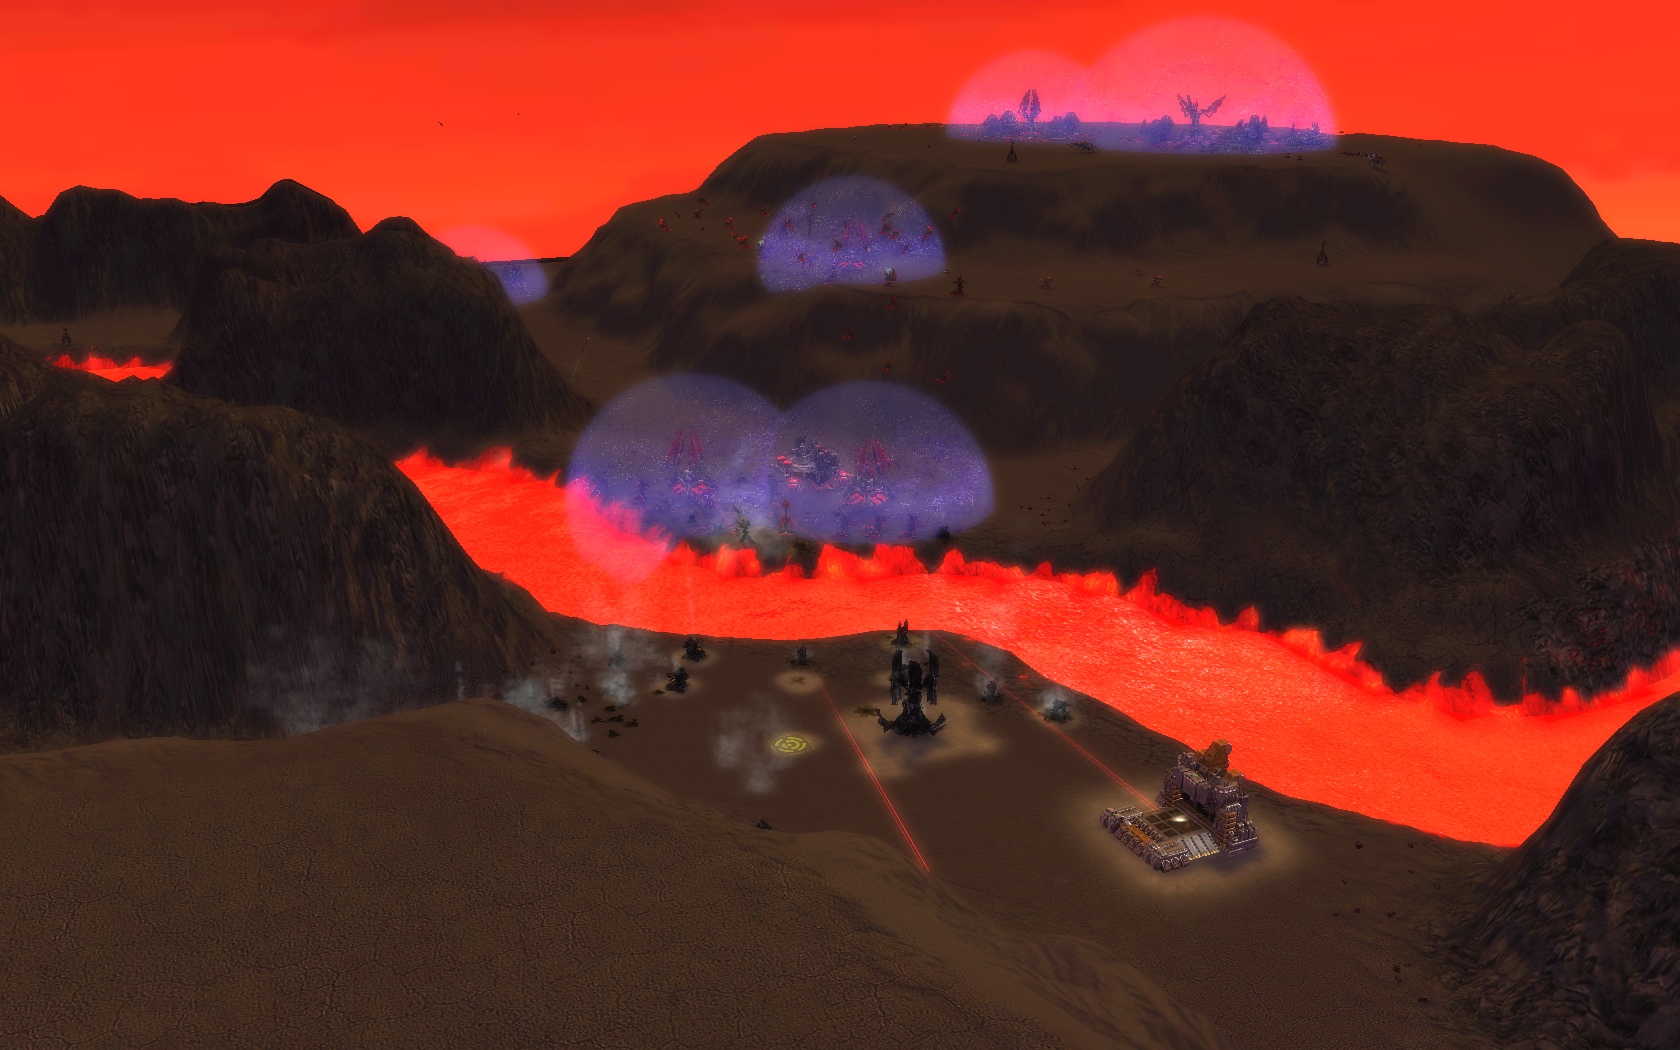
Lava & 2 Hills 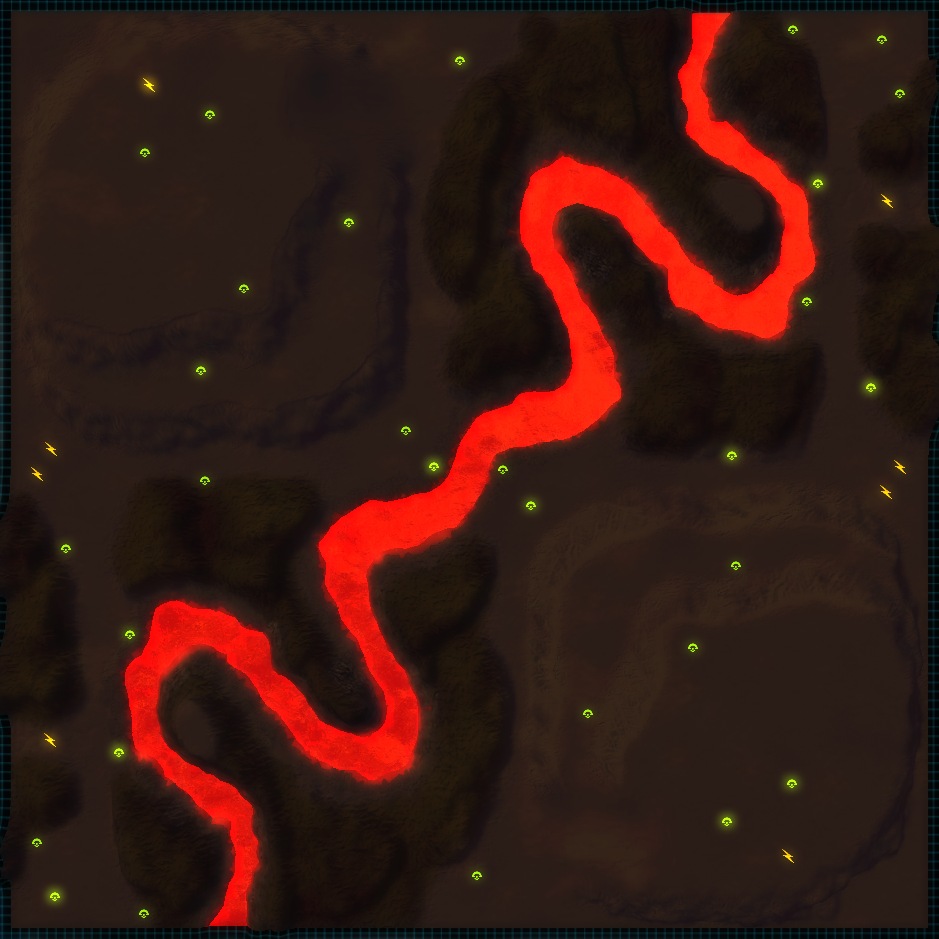 
Ingame Description: "An odd natural volcanic formation, this area is a great staging zone for many battles on this hot and rocky world." Detailed Description: A map with a little bit of everything: air, drops, turtling and T2 artillery, air experimentals and even nukes in some rare cases Primarly an air and drop spam map for the early game, it soon gets a lot of action, particurarly for the middle as any side who gets it, prevents the enemy from getting 2 critical mass spots. The middle's importance extends even more in late game as only from there T2 artillery can shoot in the deeper sections of the enemy base. Getting a foothold on the enemy's isle and getting some factories up is quite a devastanting move and not that hard to pull off since its hard to get air cover everywhere. Don't forget air repair pads if you enjoy setting your interceptors on patrol, they are invaluable. The bigger cliffs are quite good for protecting against bombers and T2 artillery so it's a wise move to build important things under their cover. 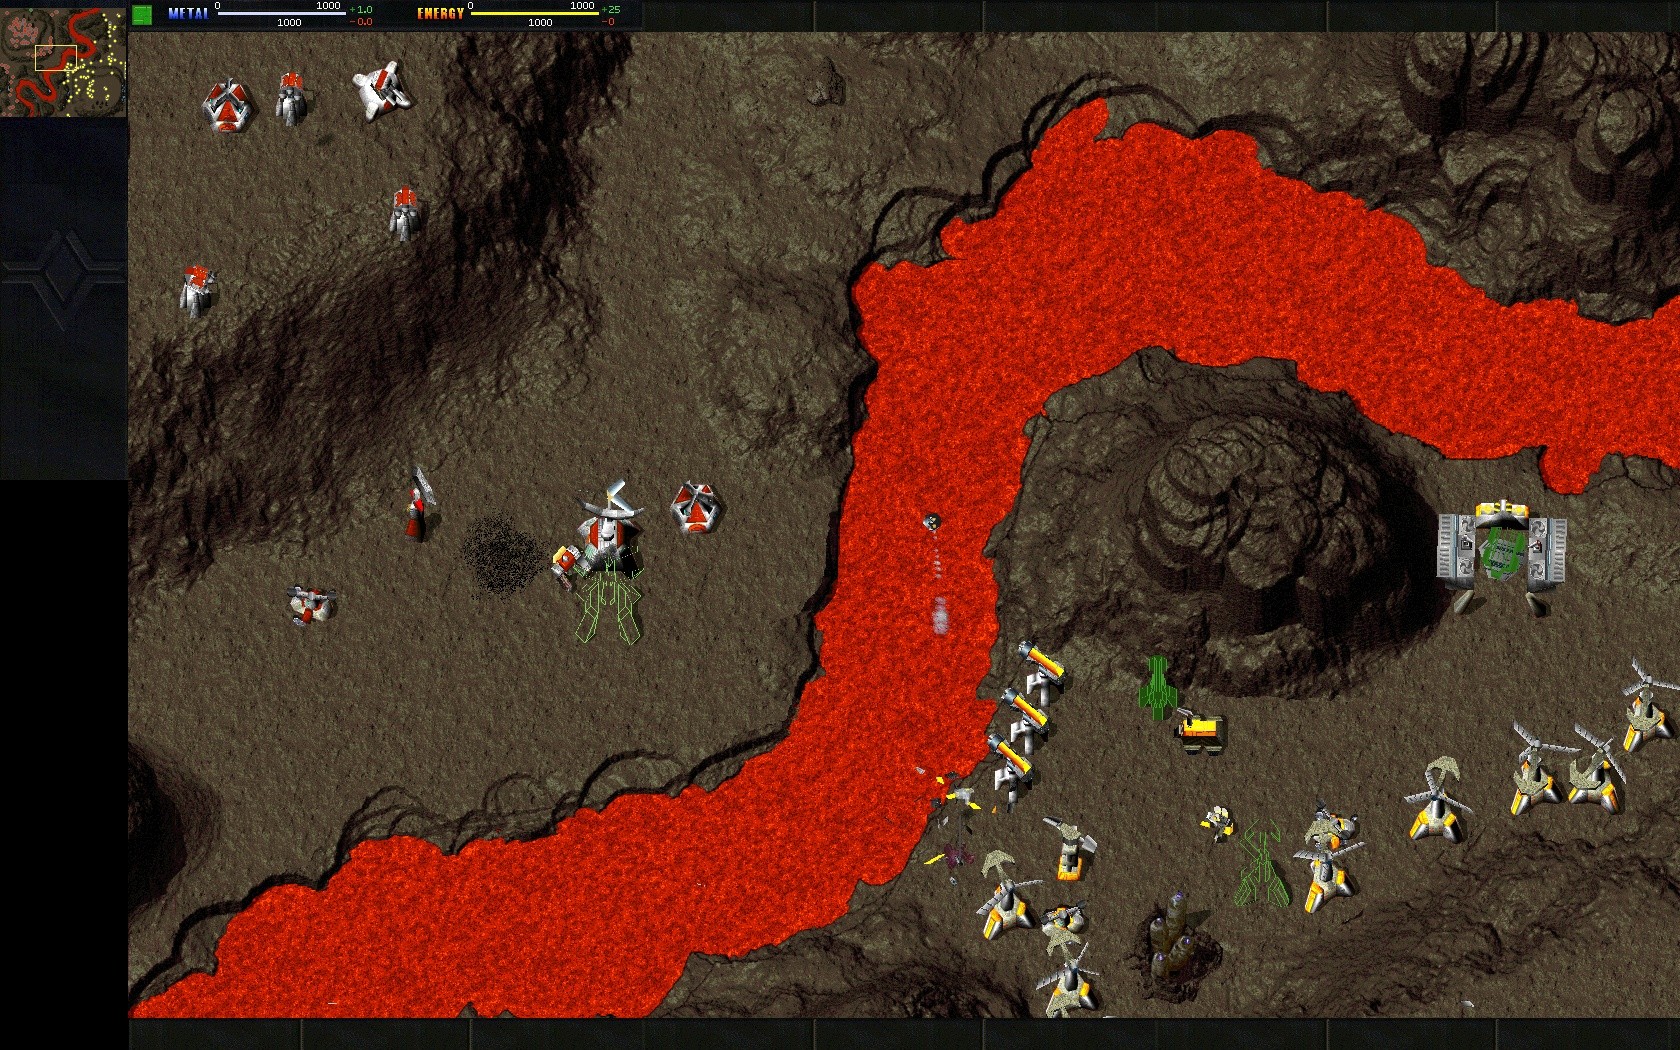 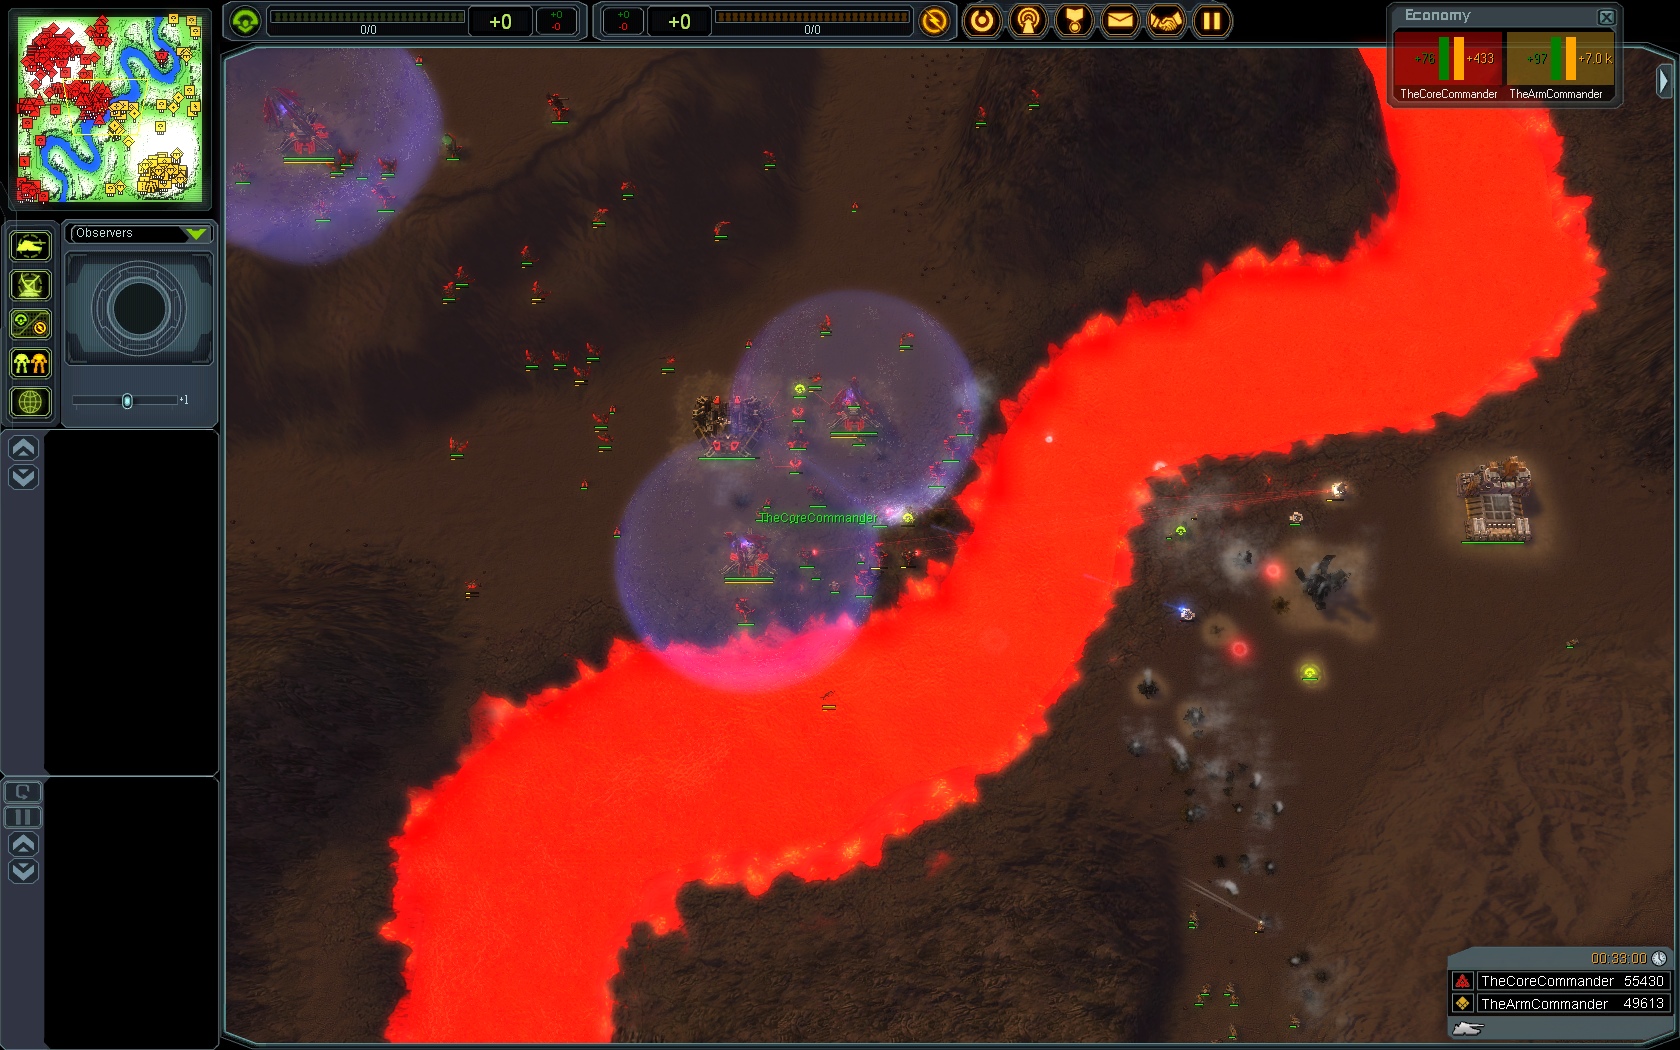 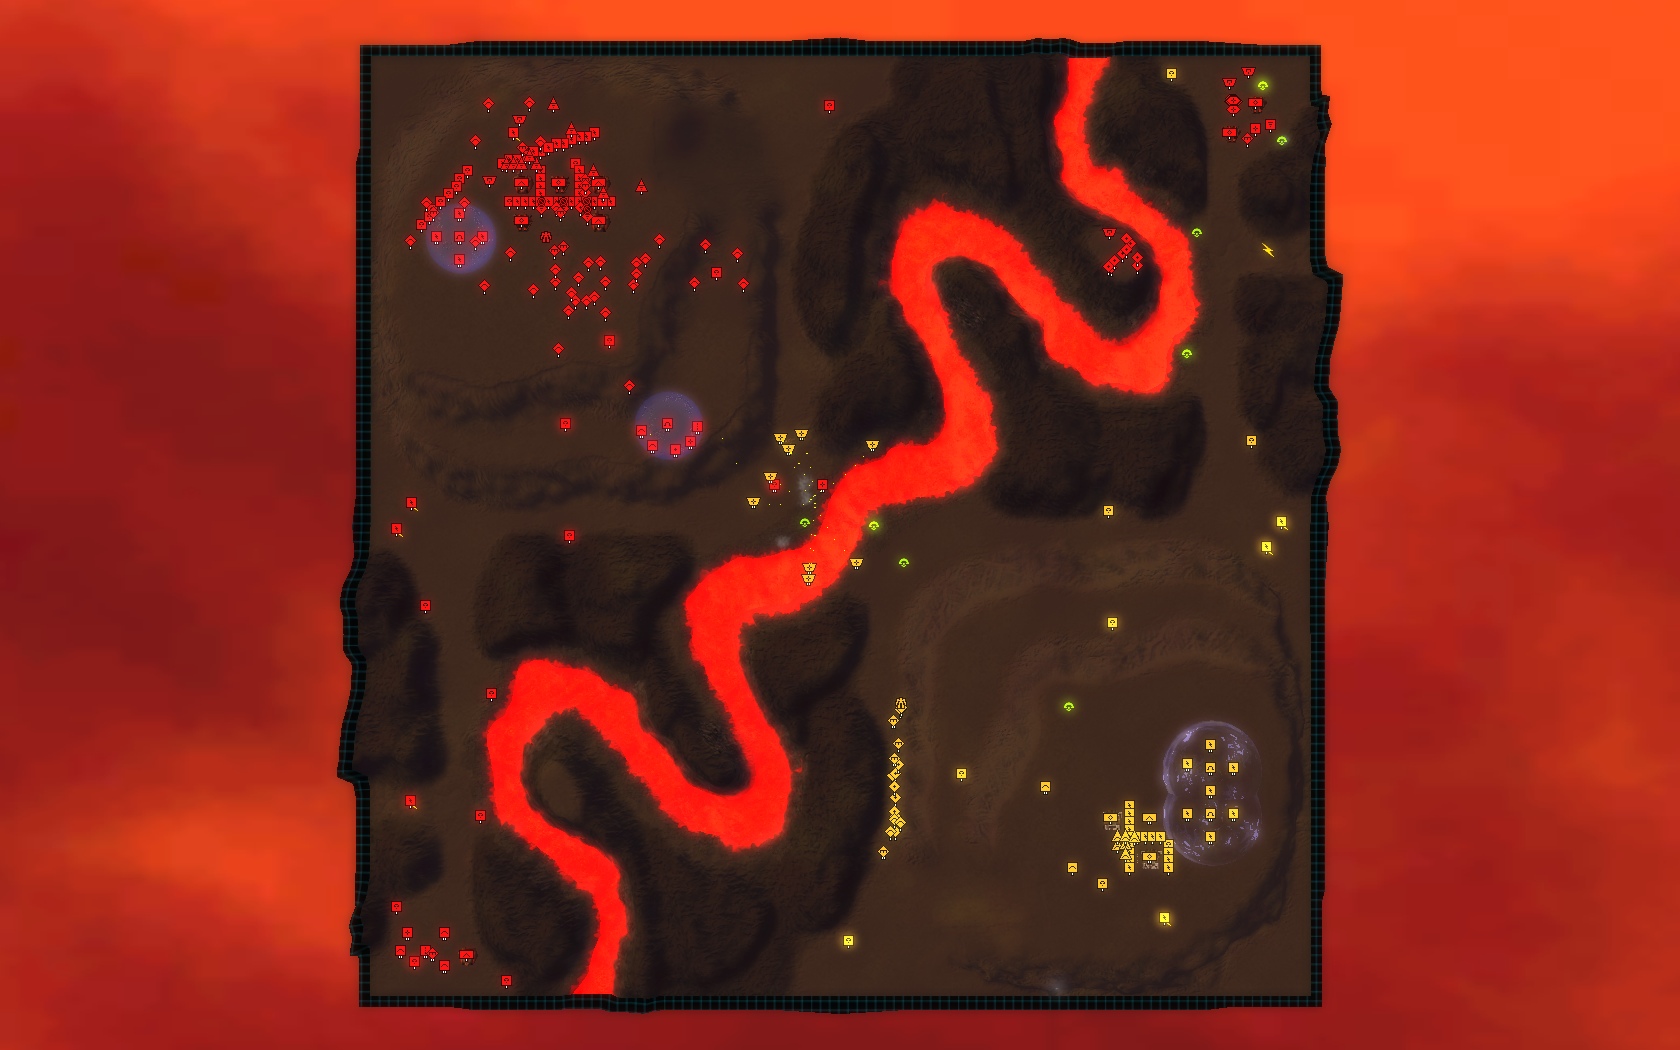
Great Divide 2 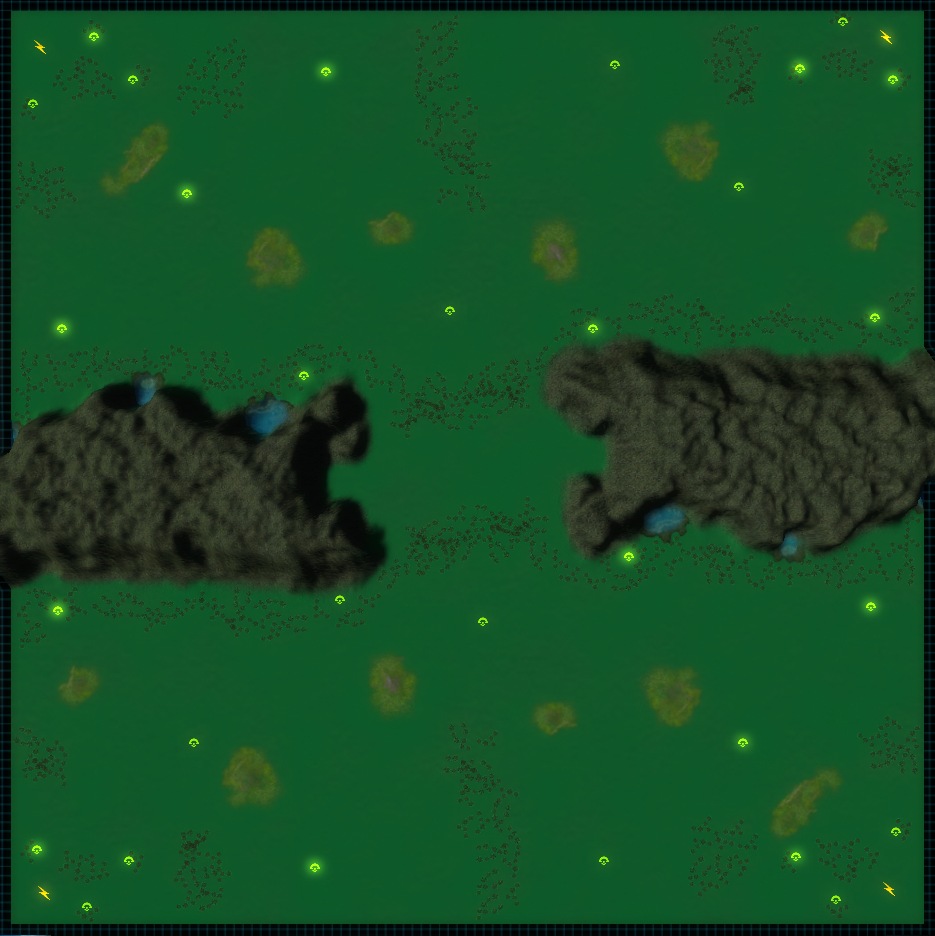 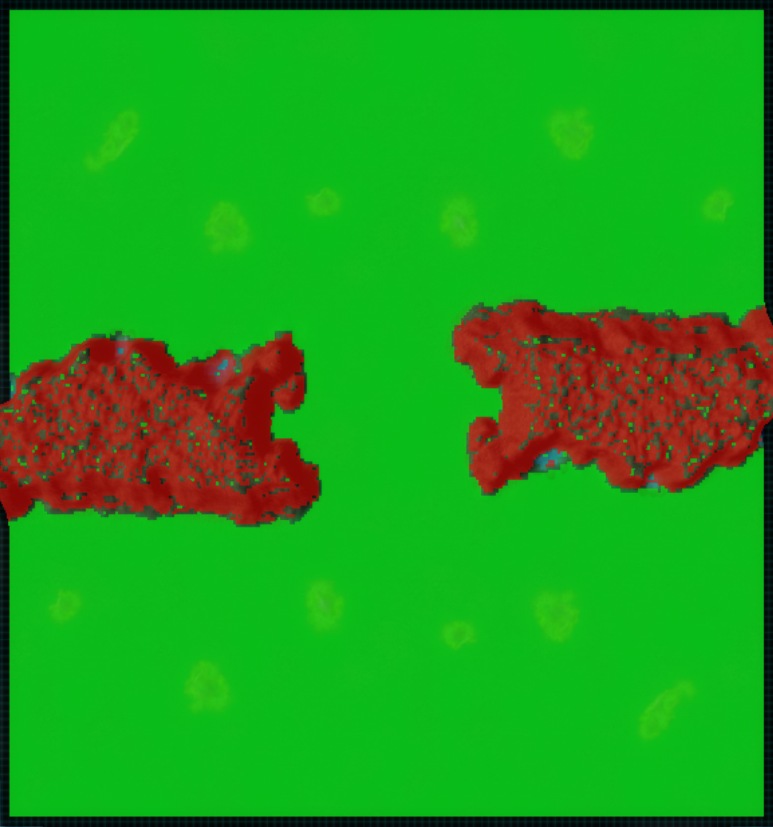
"This narrow mountain pass is a well known for the long battles that occur here. Many times experimental units are needed to break through these stalemates." The old custom map that became a TA classic. Similar top Fields of Isis at first glance, its smaller scale and just 1 set of natural obstacles that divide the players makes for a much more intense close quarter fight. Start points are similar, each player gets a hydro, more than enough mass deposits for a long and hard 1v1 match and just adequate for a 2v2. Very much like the GD2 in TA, theres a constant urgency on this map to get a T2 PD in the middle (kinda like Guardian cannons from TA) and start a crawl with mass T1 and T2 tanks and artilley. Another important thing is the fact that static T2 artillery cannot shoot over the mountains so, getting them up in middle is a must for a succesfull siege! Expect surprise drops at all times as they are quite powerfull and never be without shields after the T1 part of the game. 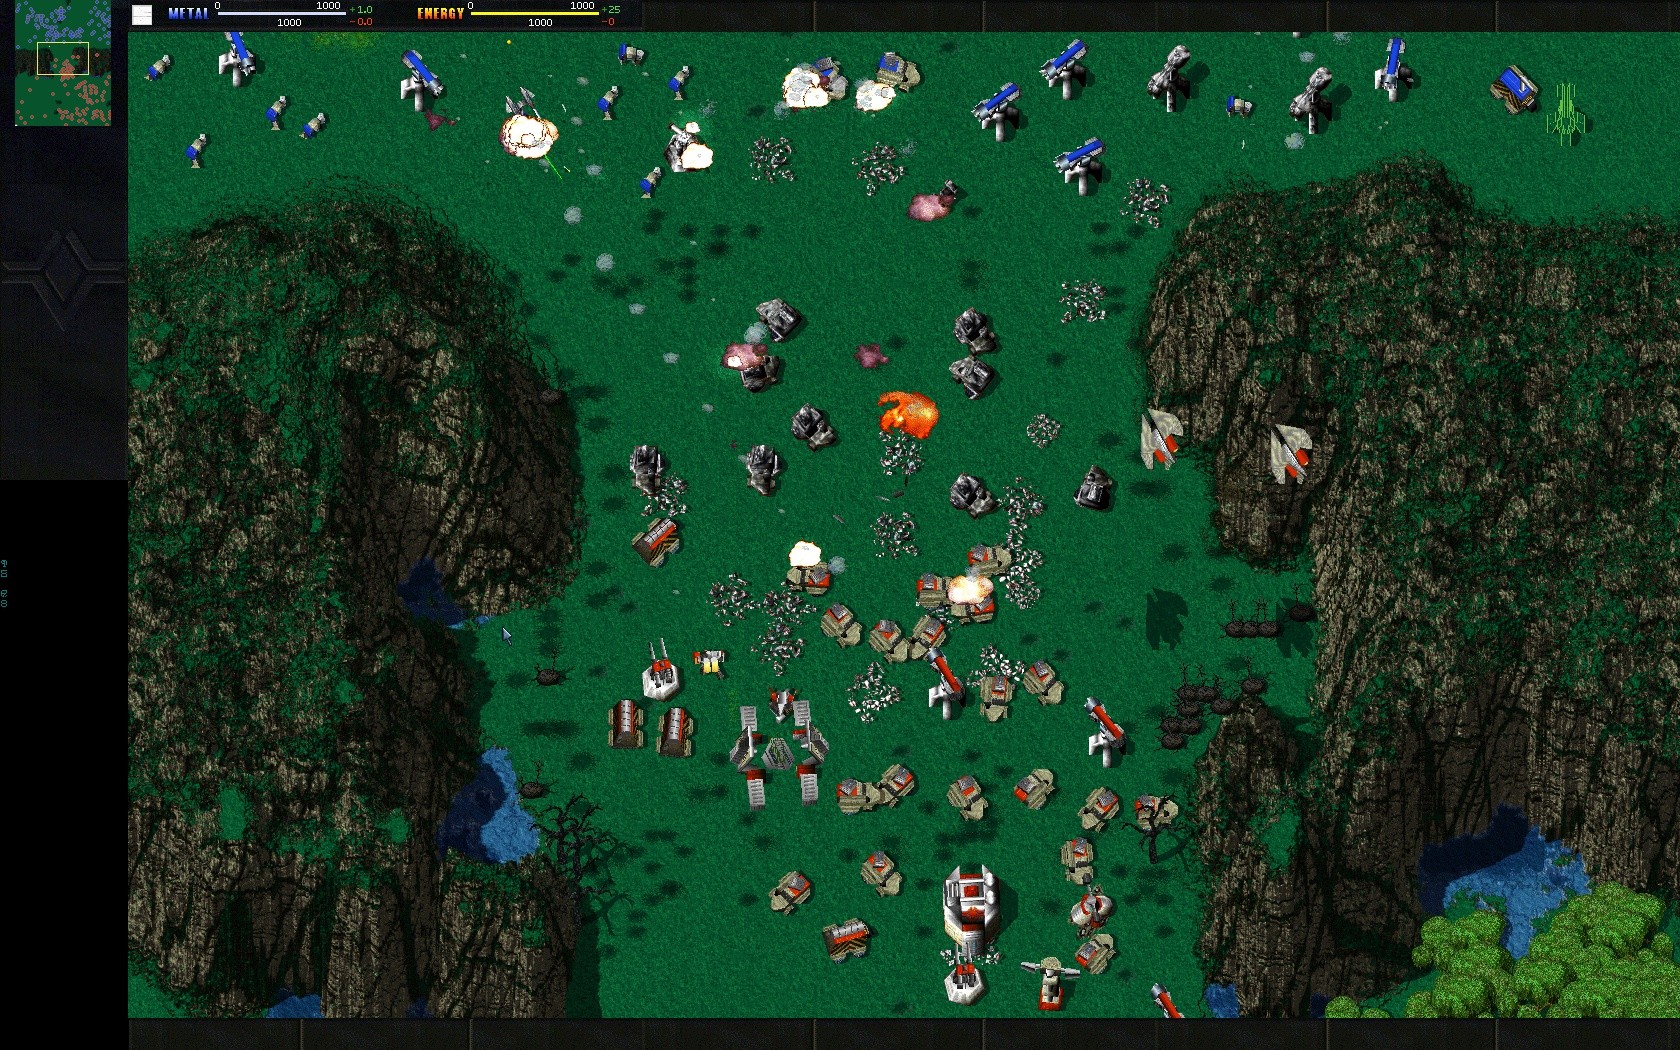  
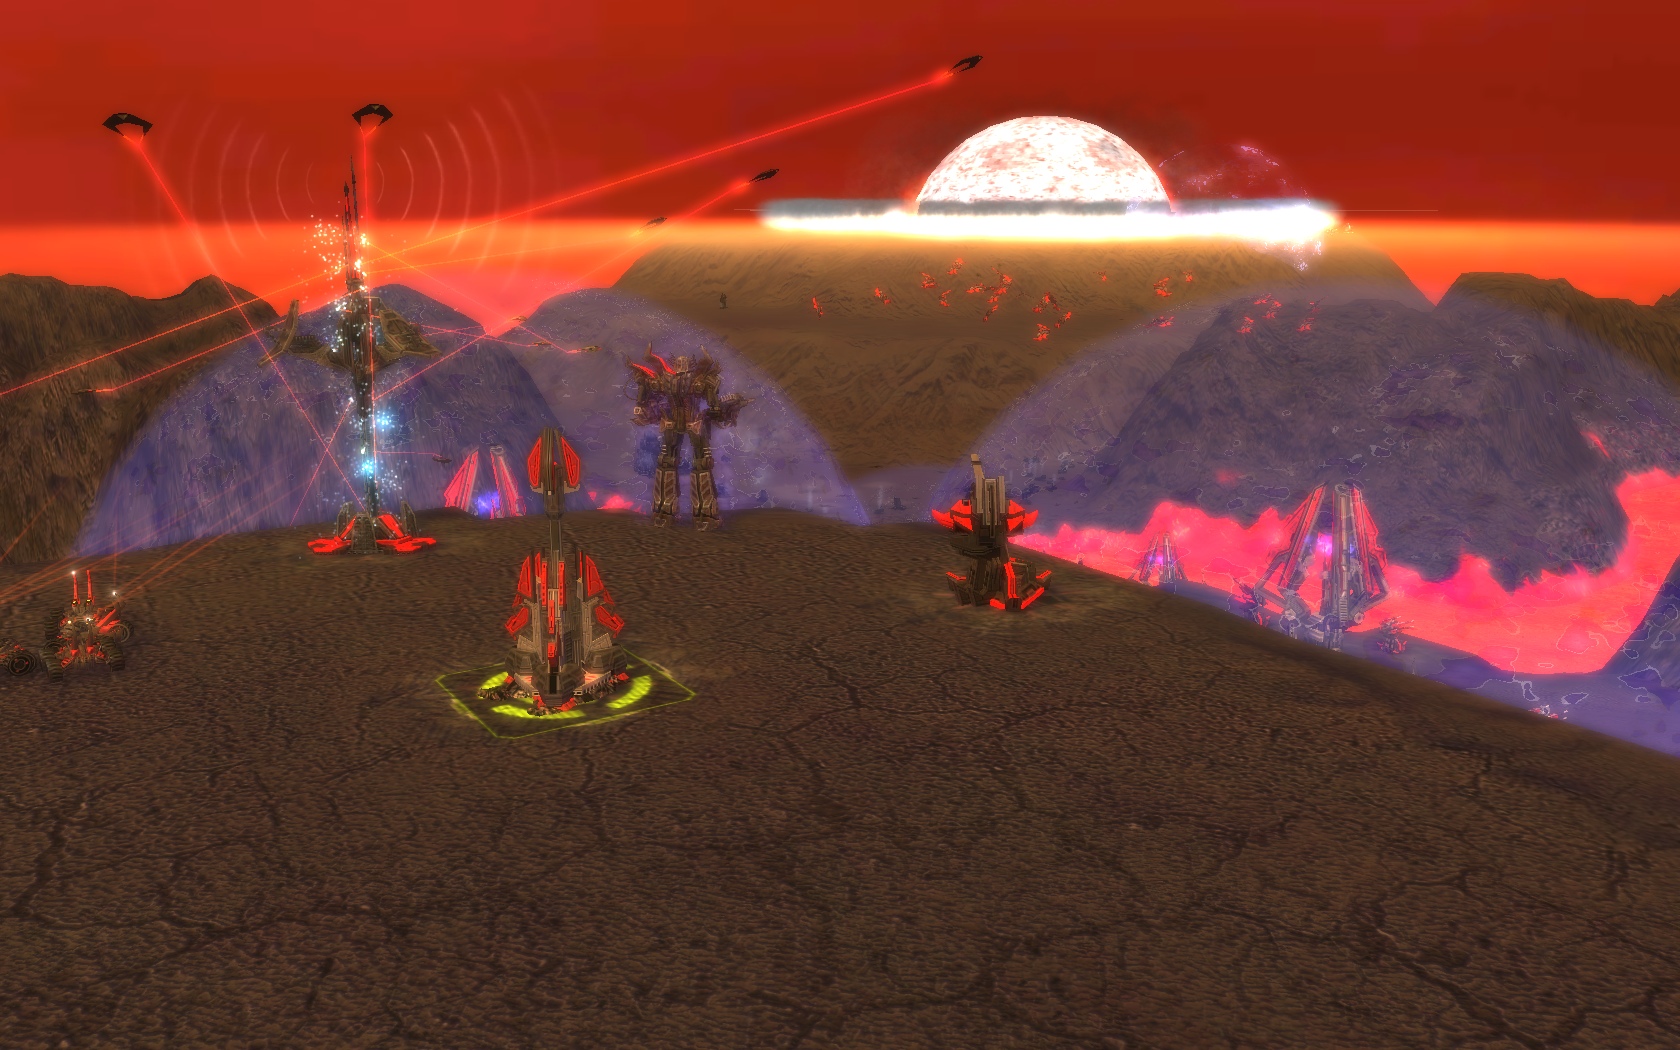
Gods of War  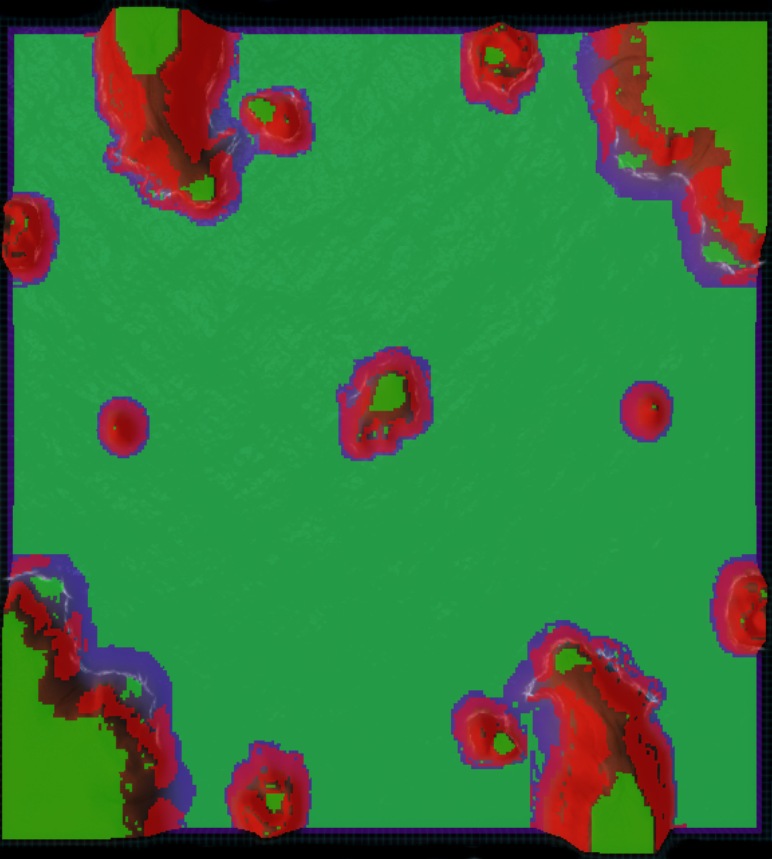
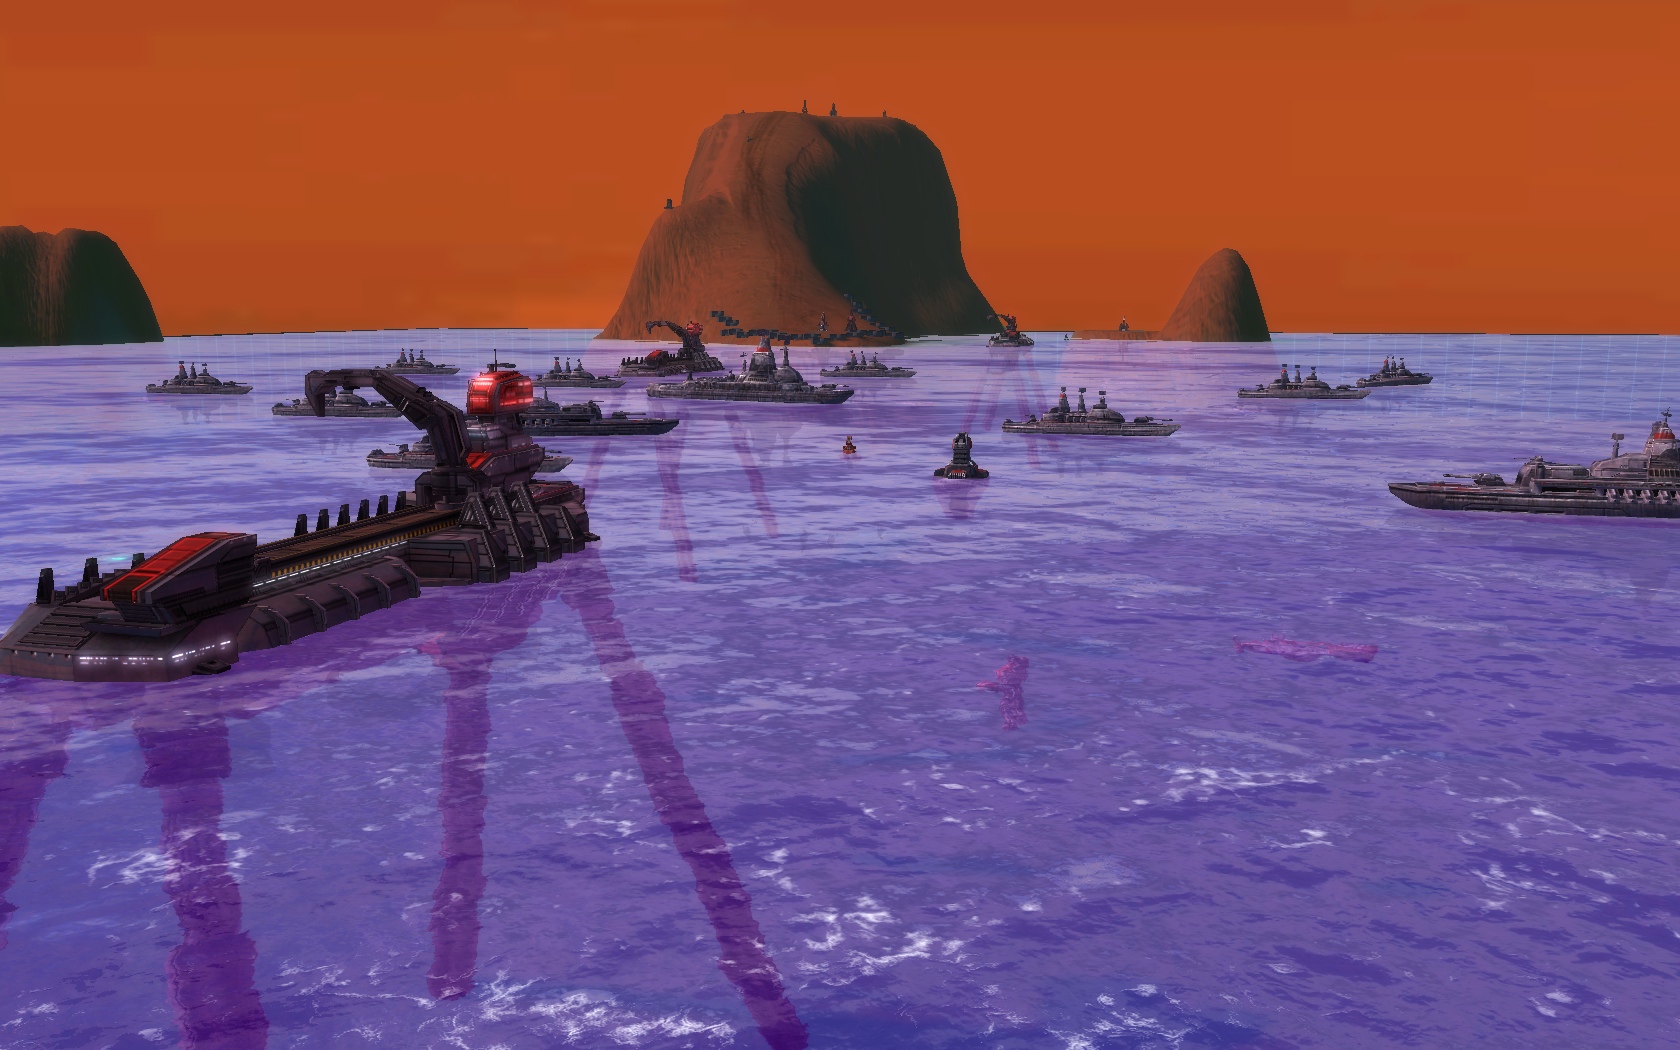
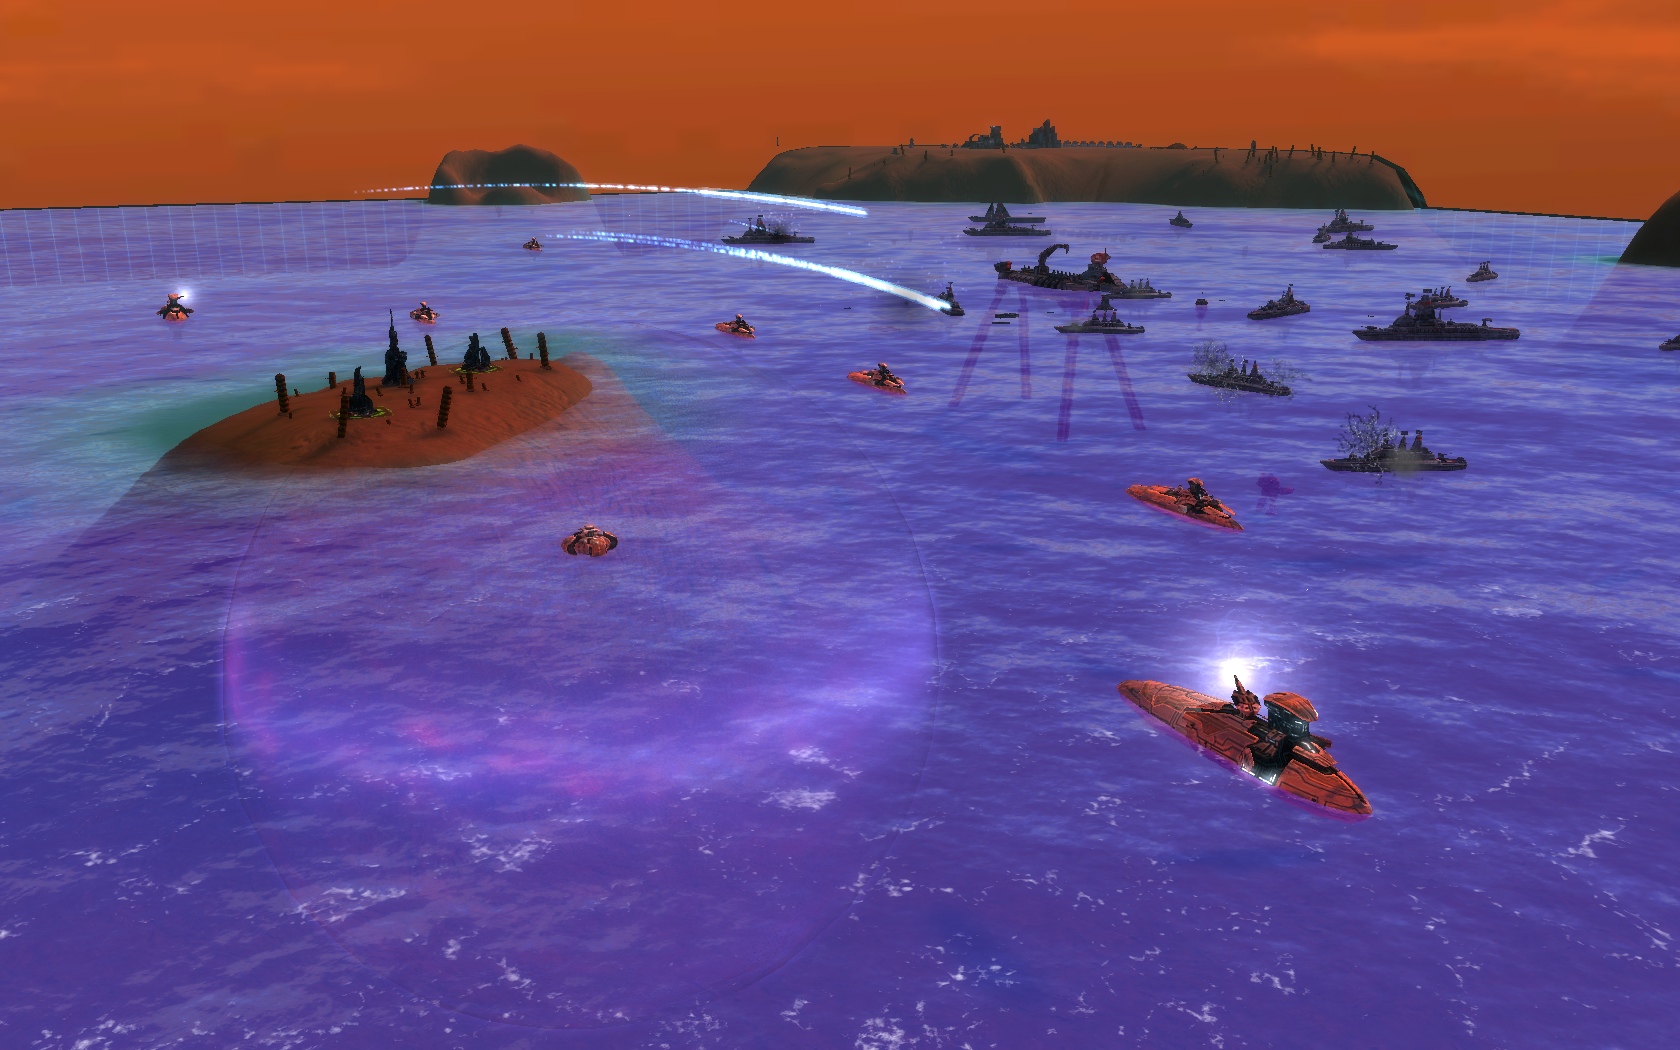
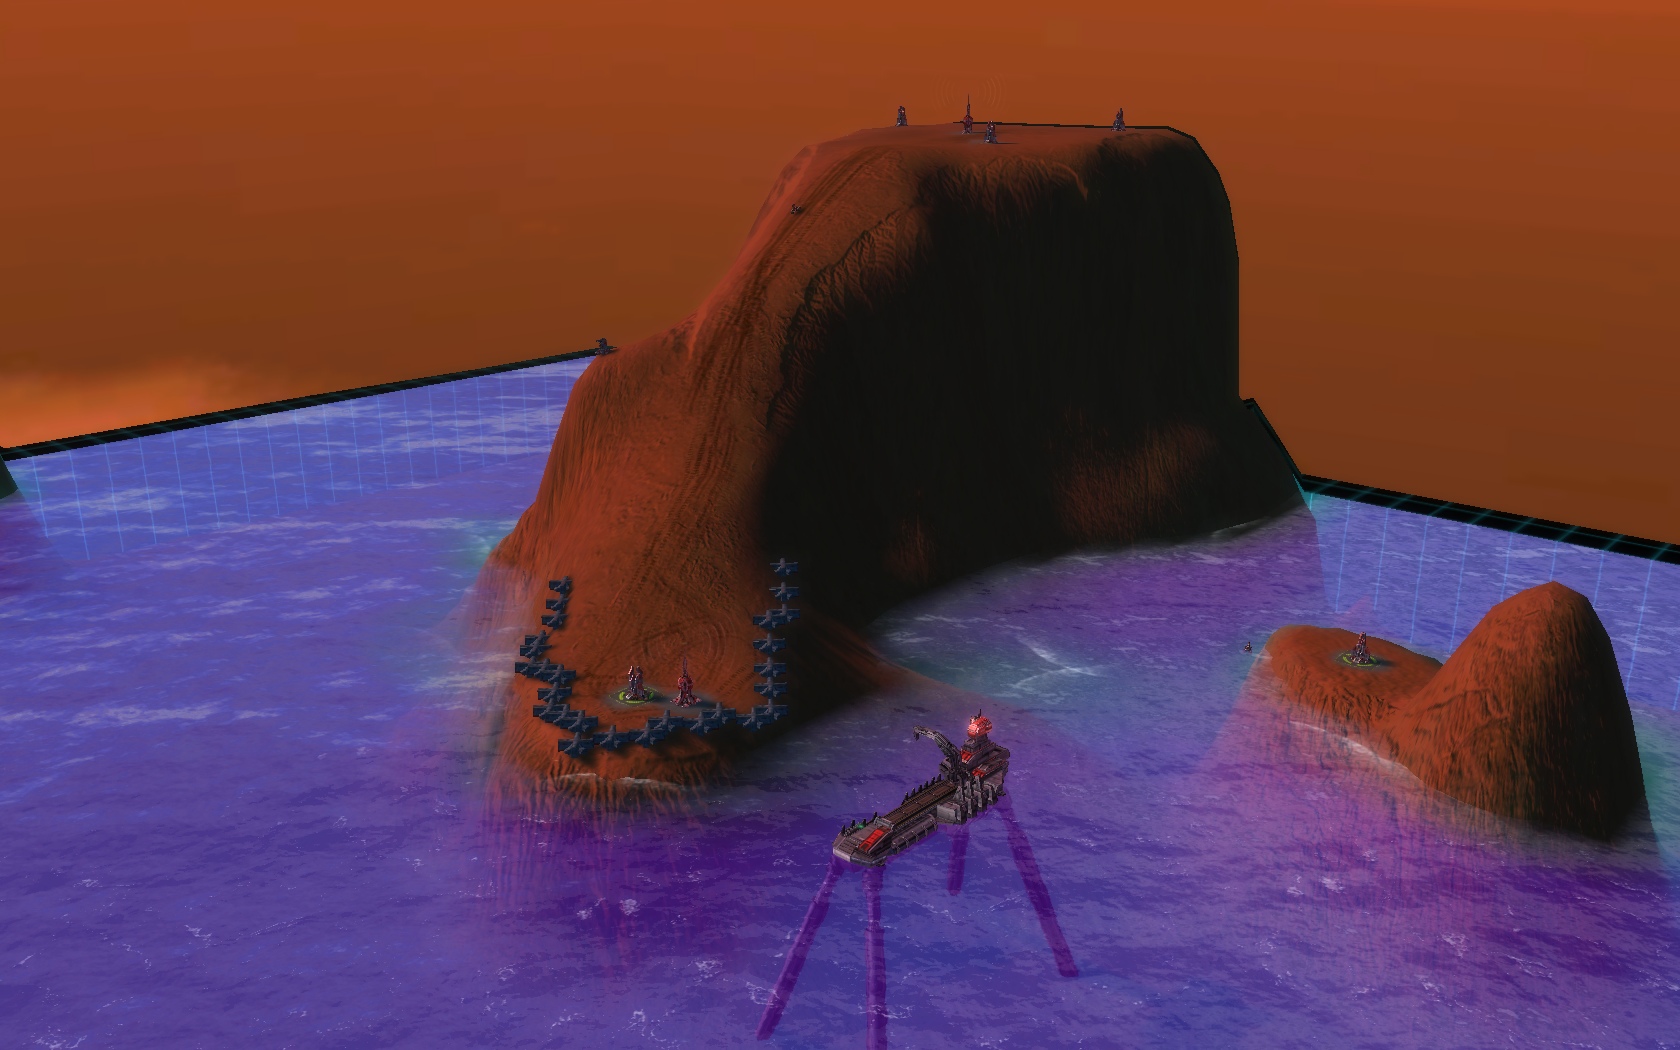
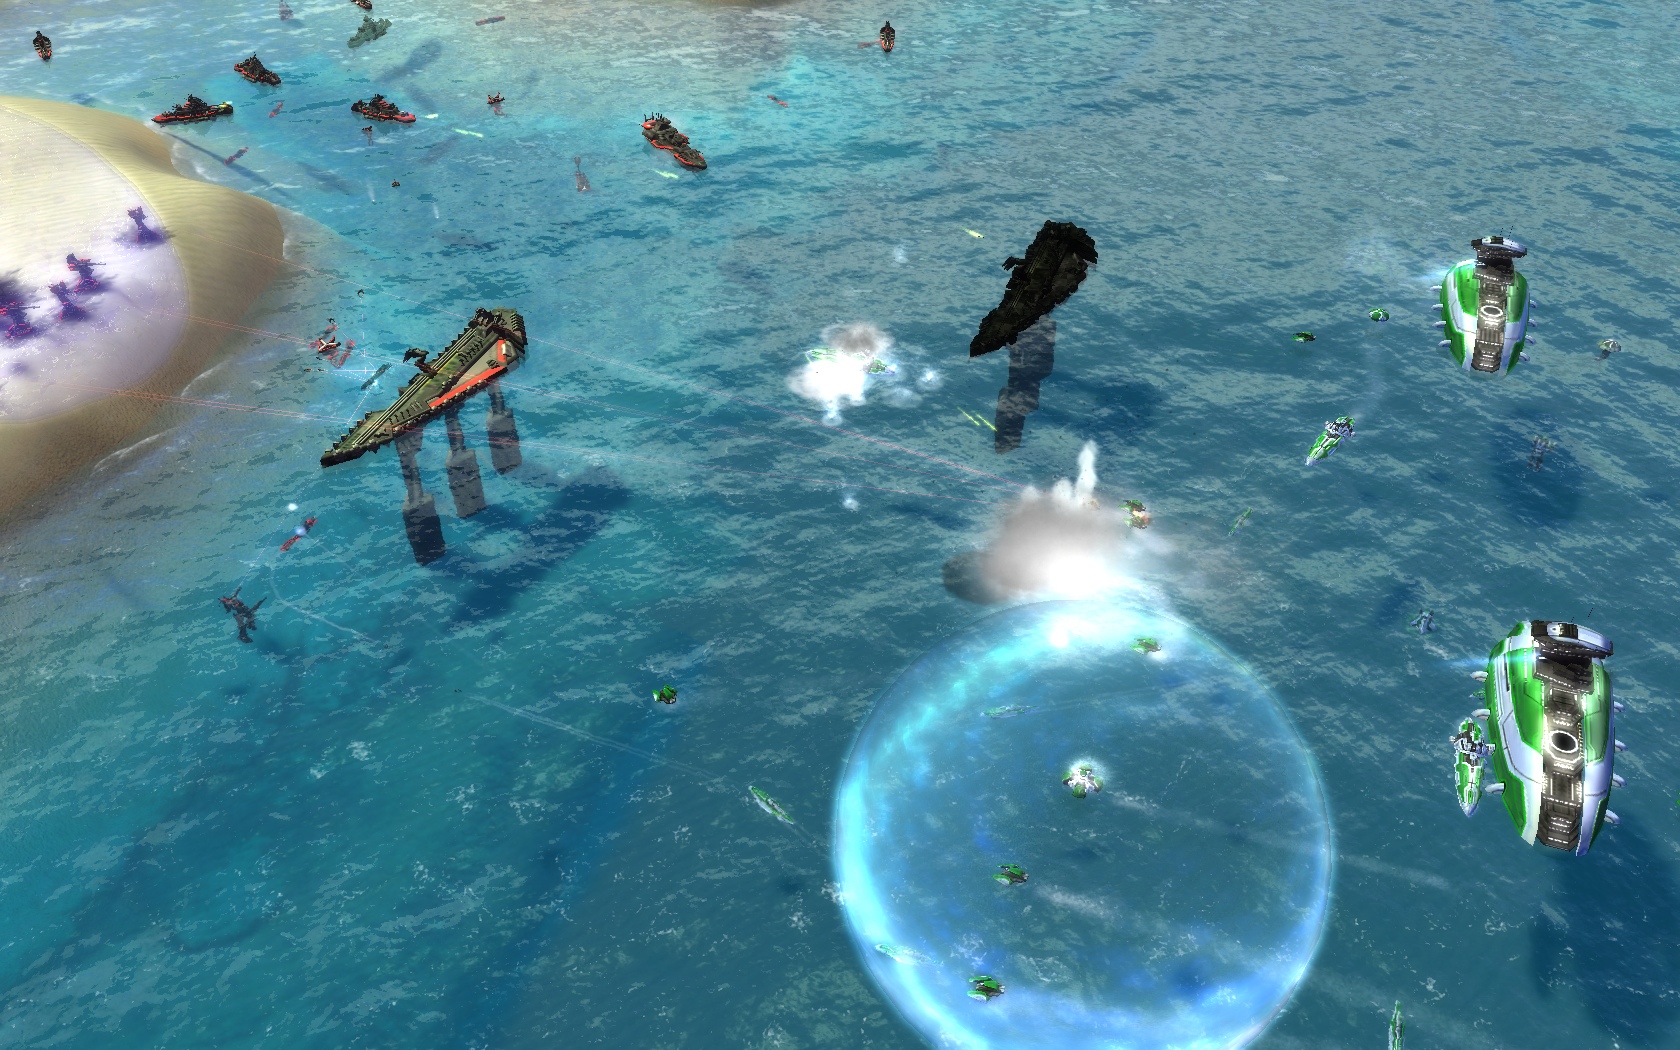
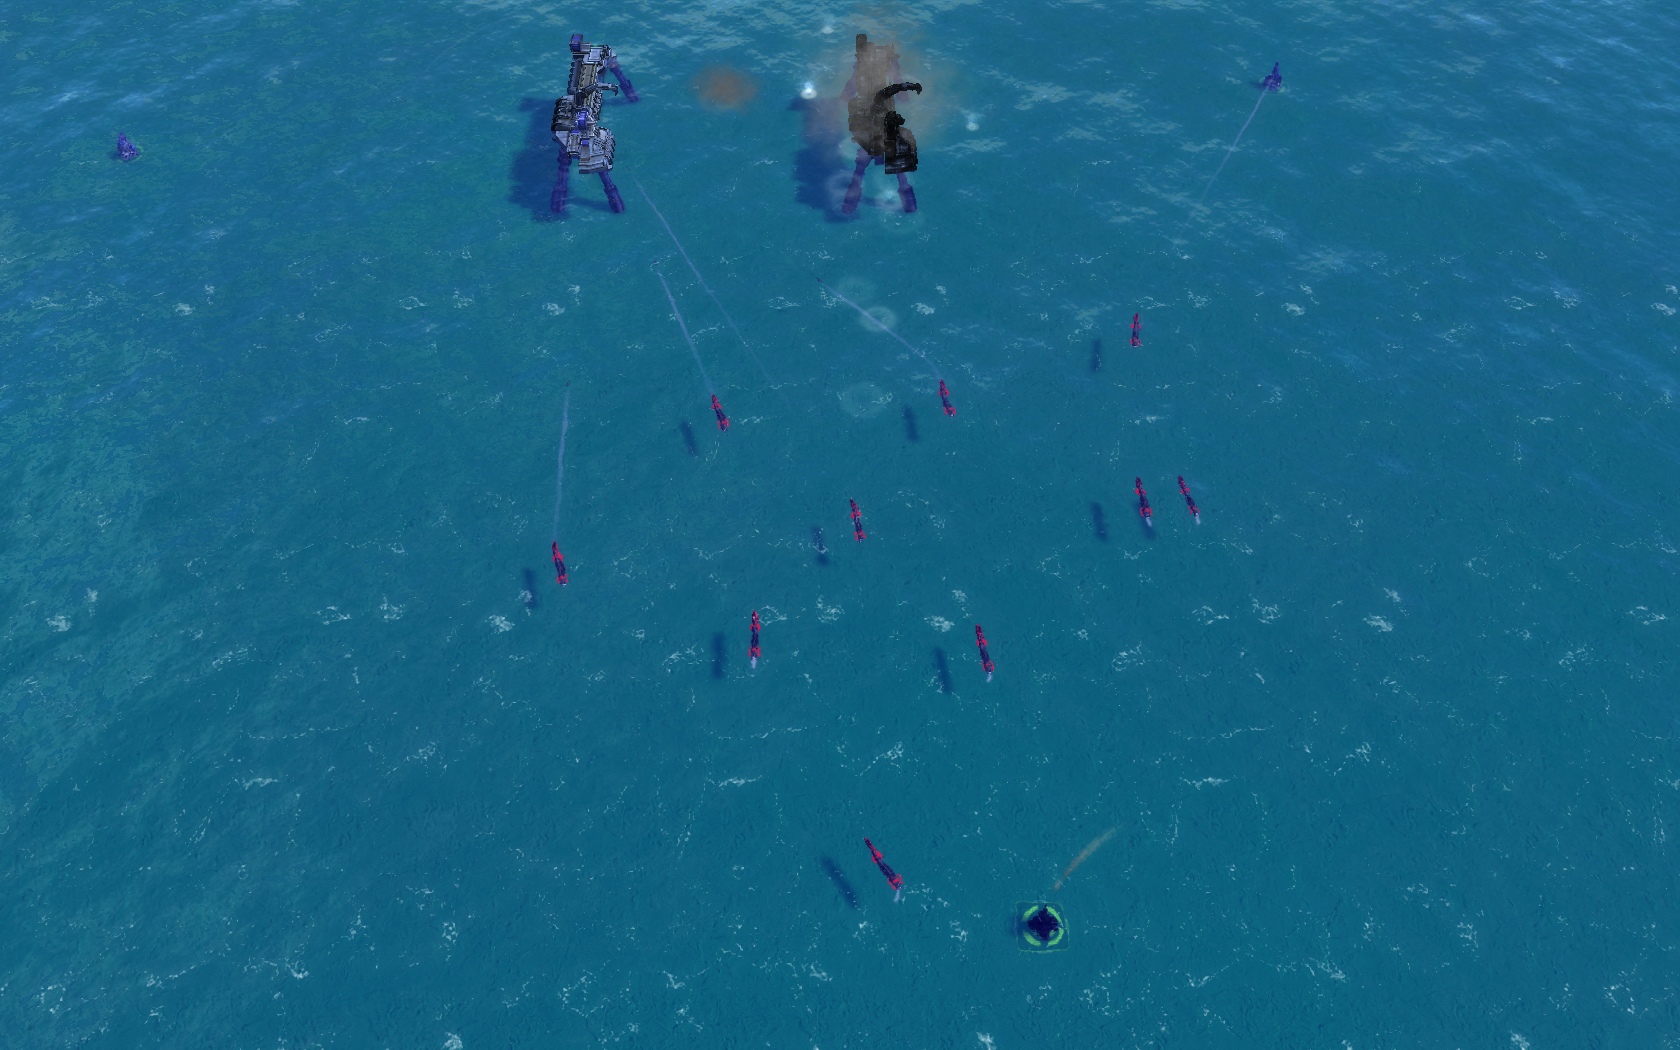
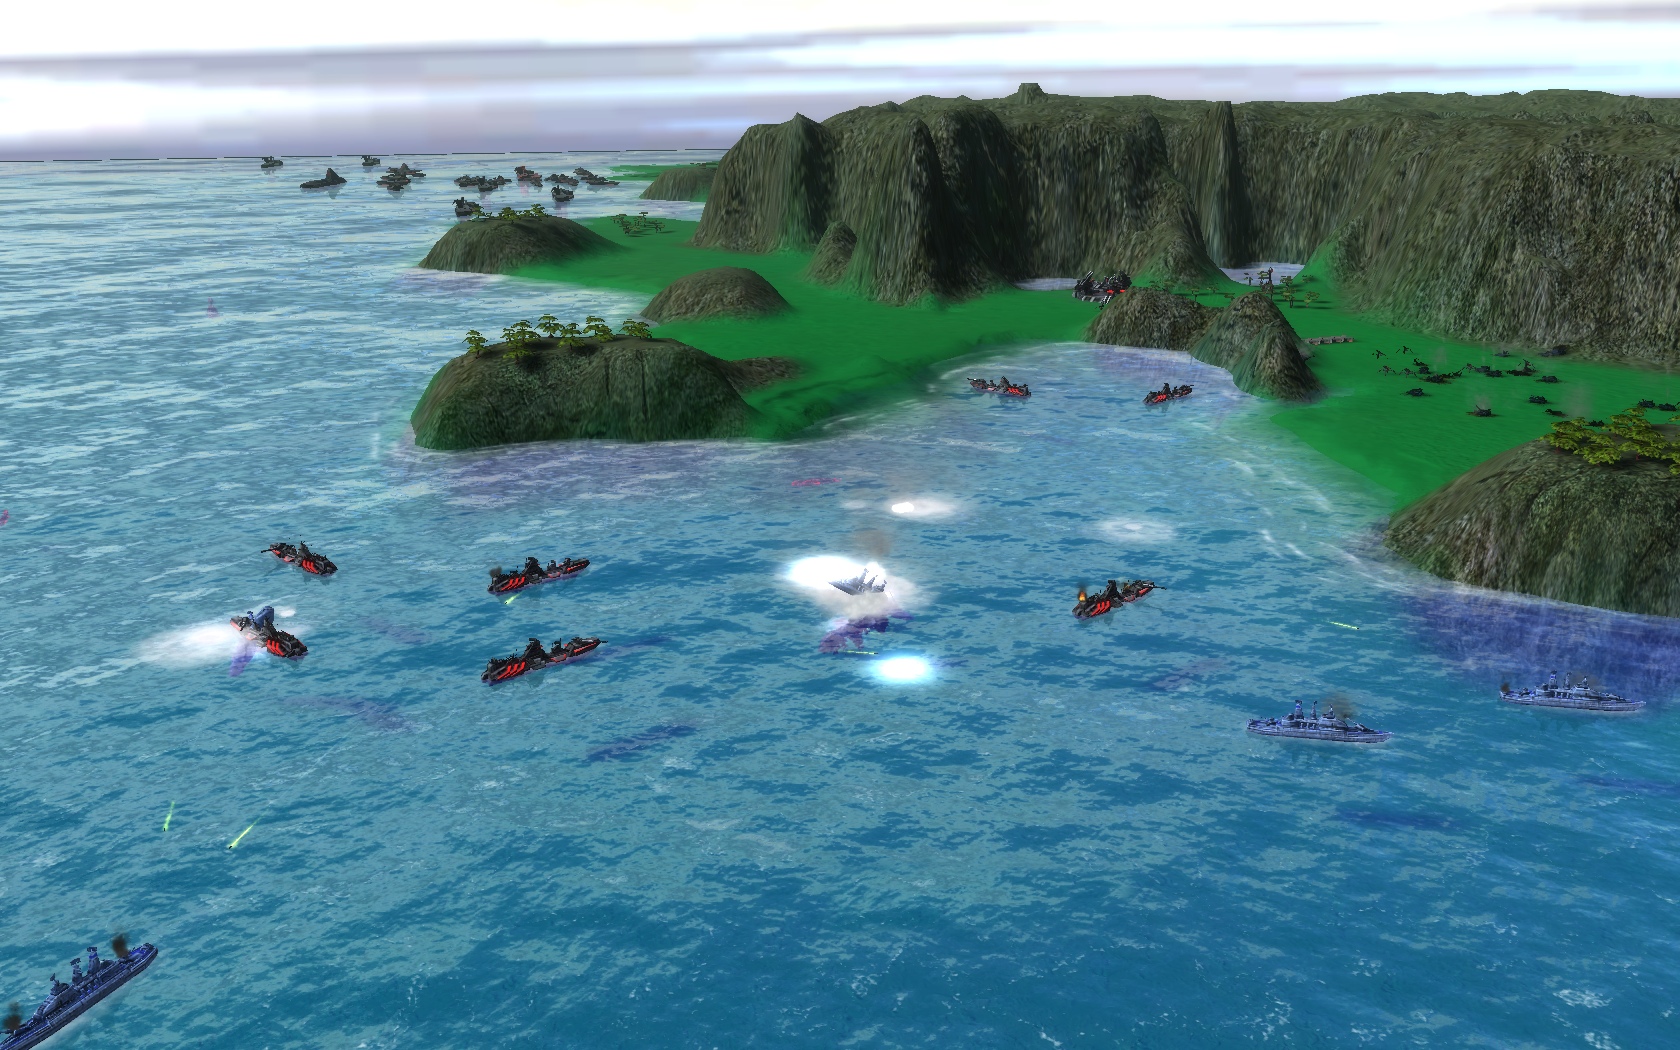
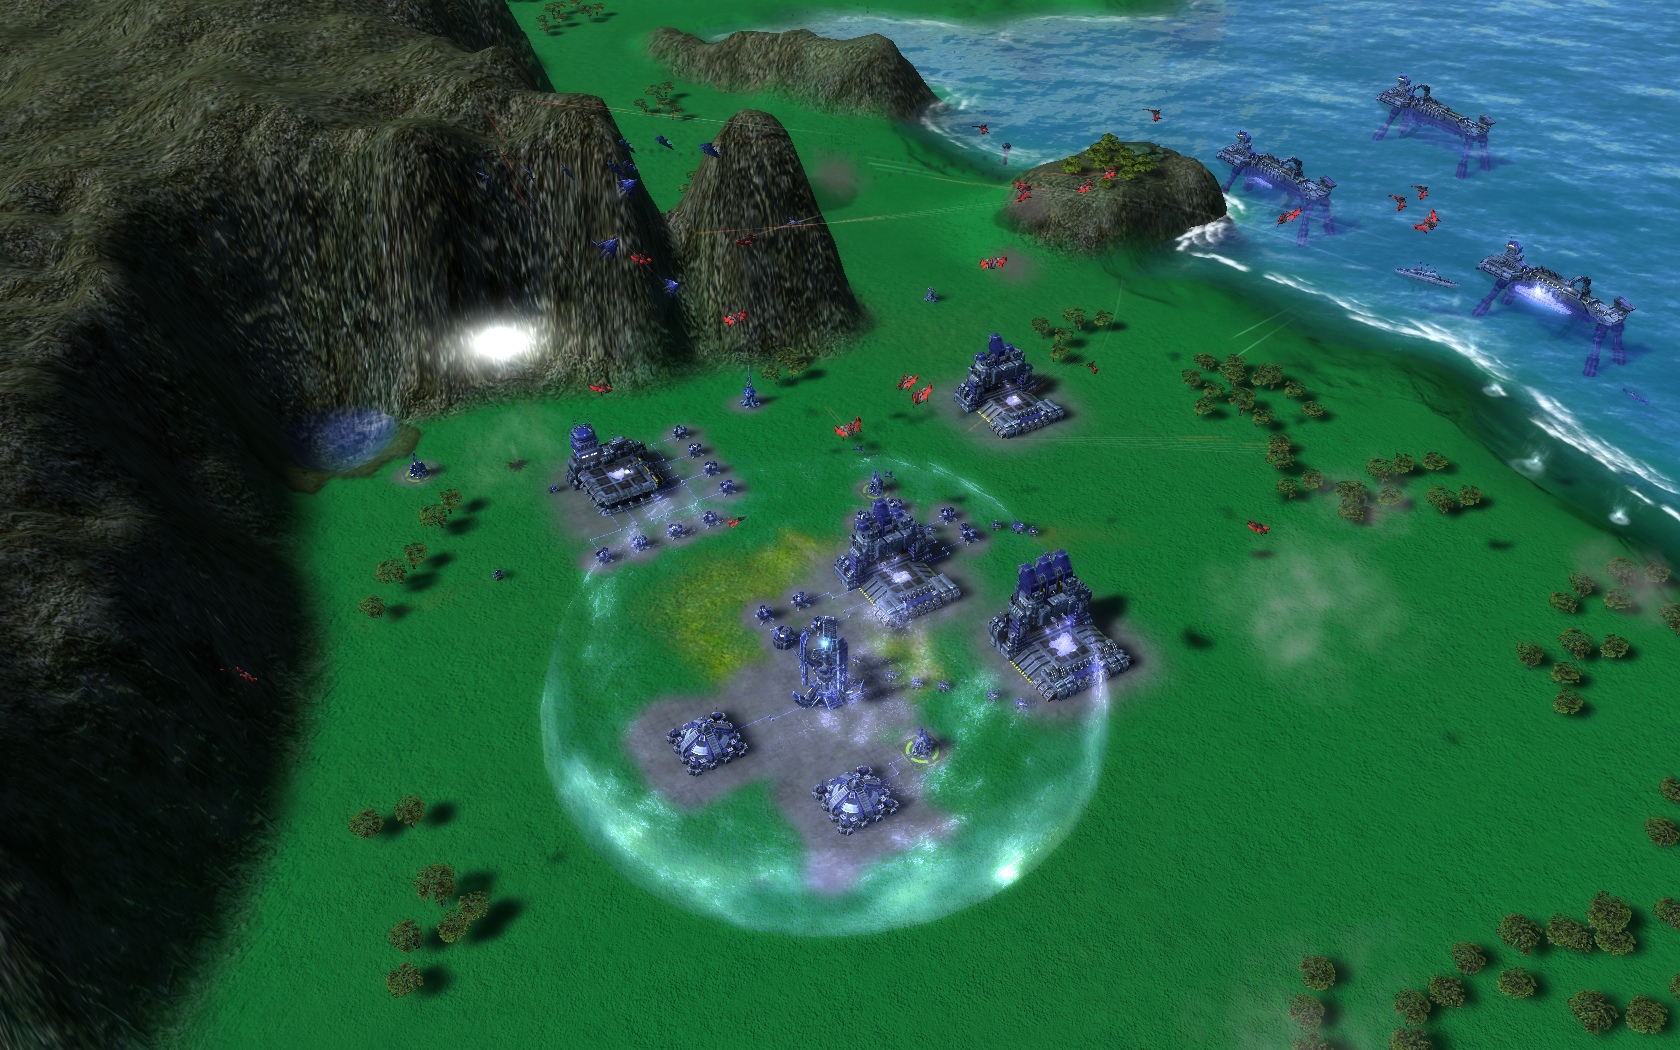
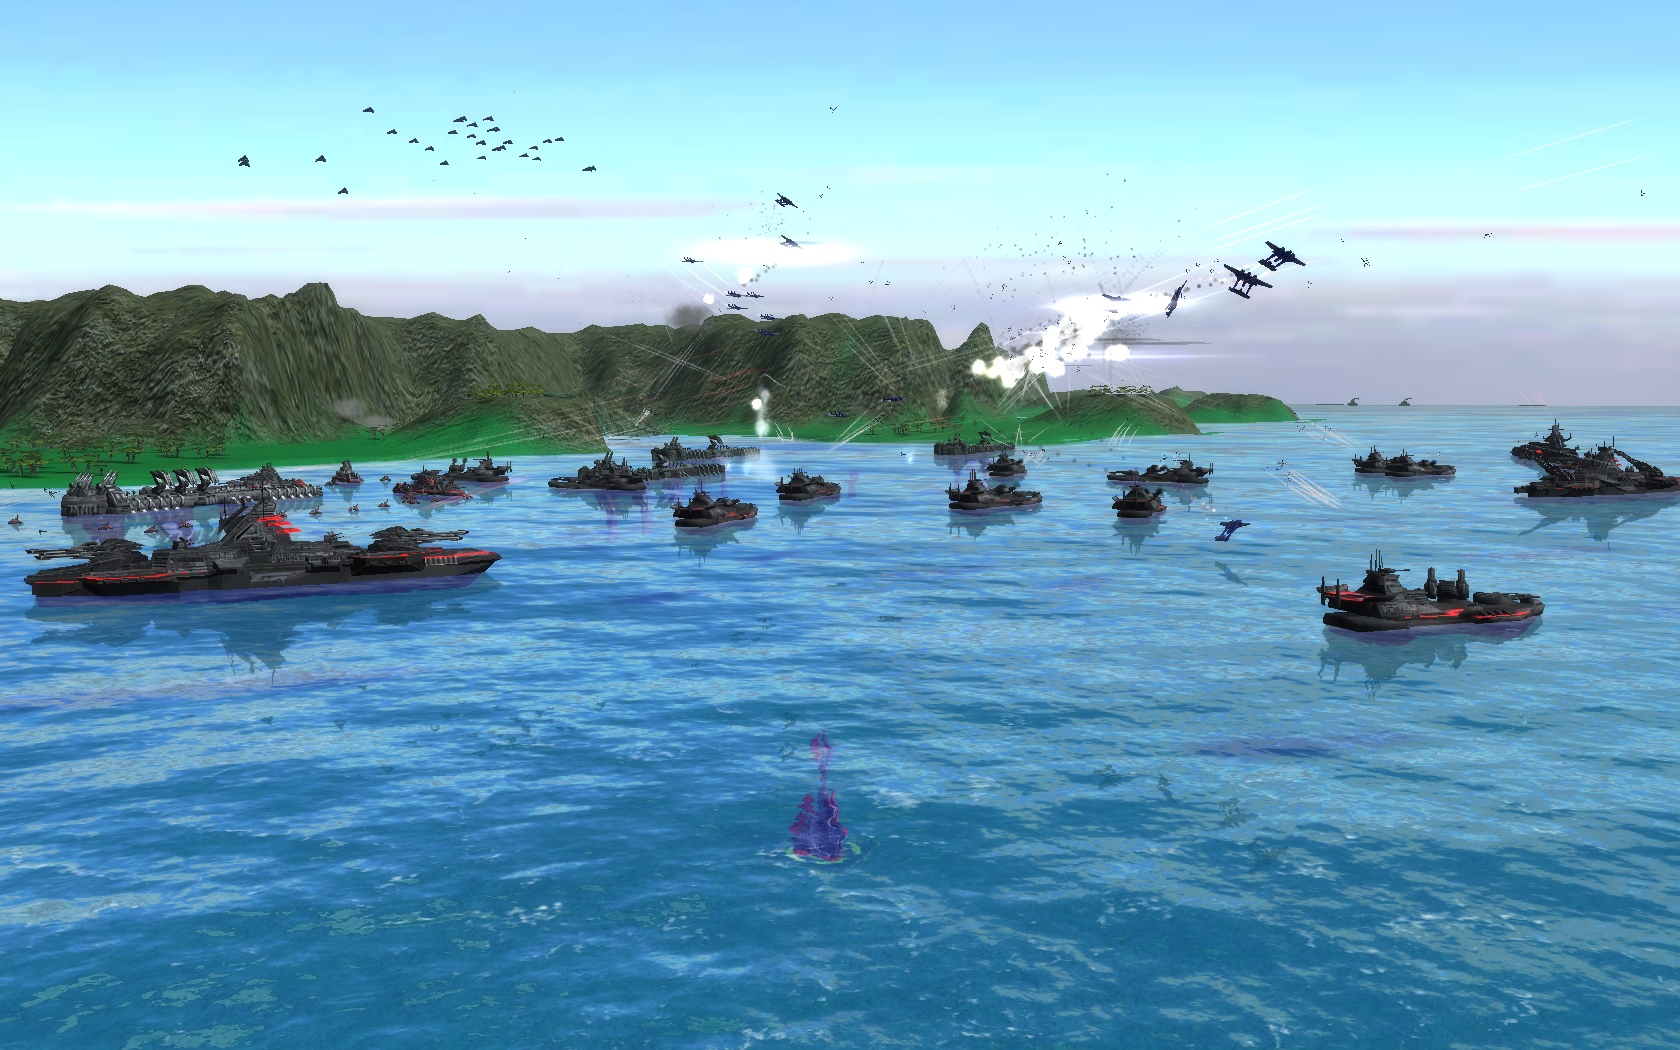
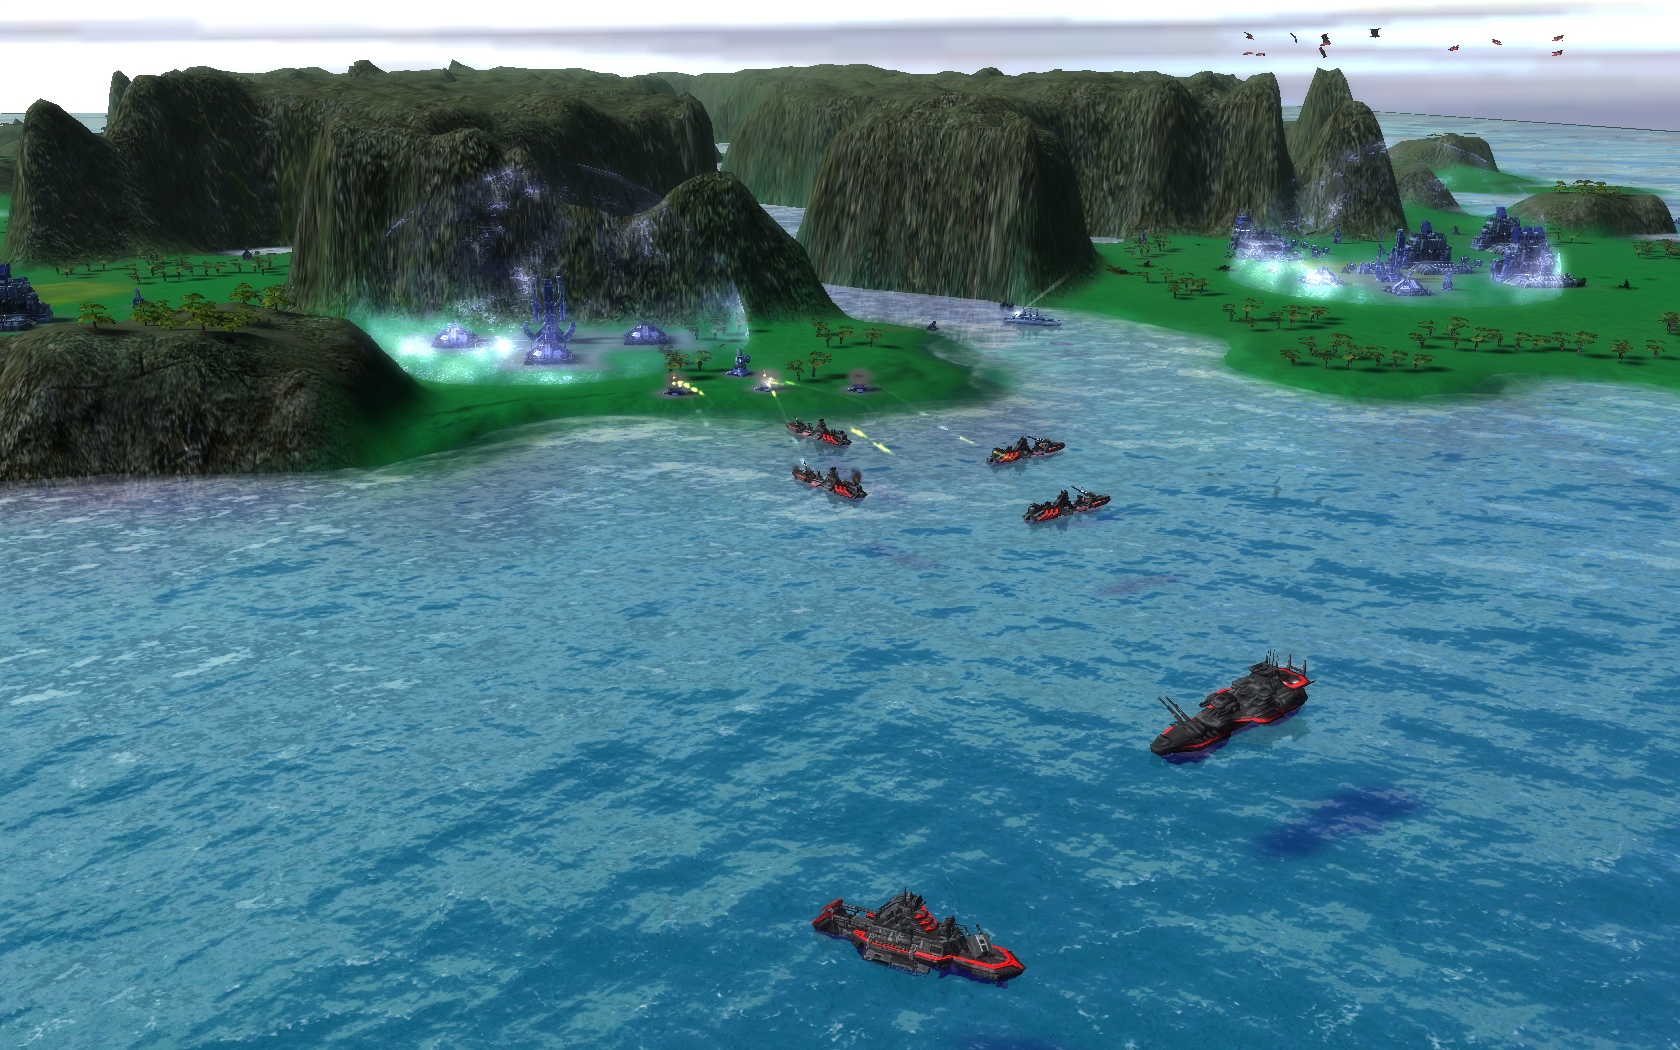
Ingame Description: "An ancient battleground, this area has changed much since the old days, yet only one thing always remains: the constant battles between veteran commanders." Detailed Description: Everyone should know this classic, as it is probably the most played TA map ever! The legendary TA map now remade in a more balanced and symetrical version, while keeping big featueres like the big cliff island, the general placement of the mass points and reclaimable features. As much as the map is changed it still captures the style of the original: the fast and furious battles for getting as many isles as possible! Drops are quite common and very powerfull here, both start islands only have 2 ramps for water access: this should make aurora spam less effective at harassing and really bad at claiming one of the occupied cliff islands. There's also an underwater ramp for amphibious vehicles and especially commanders so you can quickly go and try to capture one of the extra islands, just remember to be careful, as getting trapped on the isles while enemy subs patroll the area and bombers slowly killing off your commander is quite a bad ending. Mass destroyers, crusiers, subs and torp launchers are pretty standard for a medium to long game, but never leave torpedo bombers out of the equasion, they can be deadly. First rule when playing as another race vs Aeon: Rush a few frigates to keep the hovering tanks at bay but don't forget to get some subs as well! Some games can potentially tend to drag on, but if you manage to the get most of the mass spots and both islands, you can easily get some Tech 2 artillery up there and start shelling any turtle into oblivion. Screens:  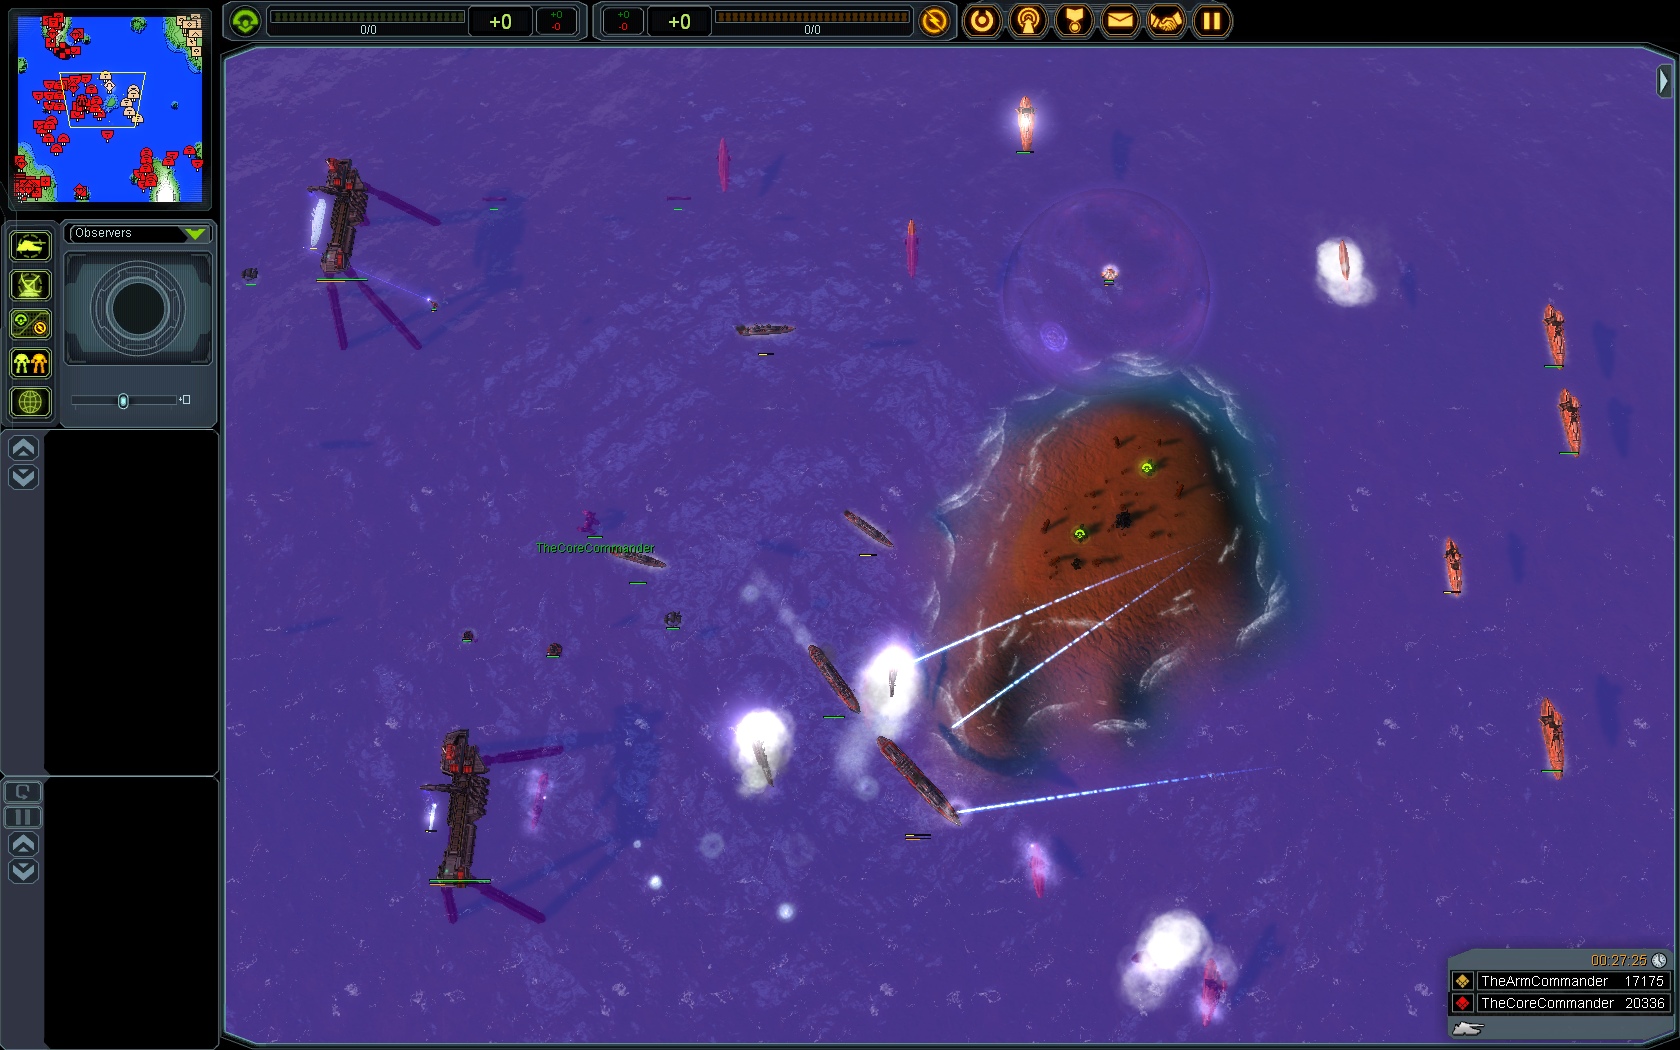 
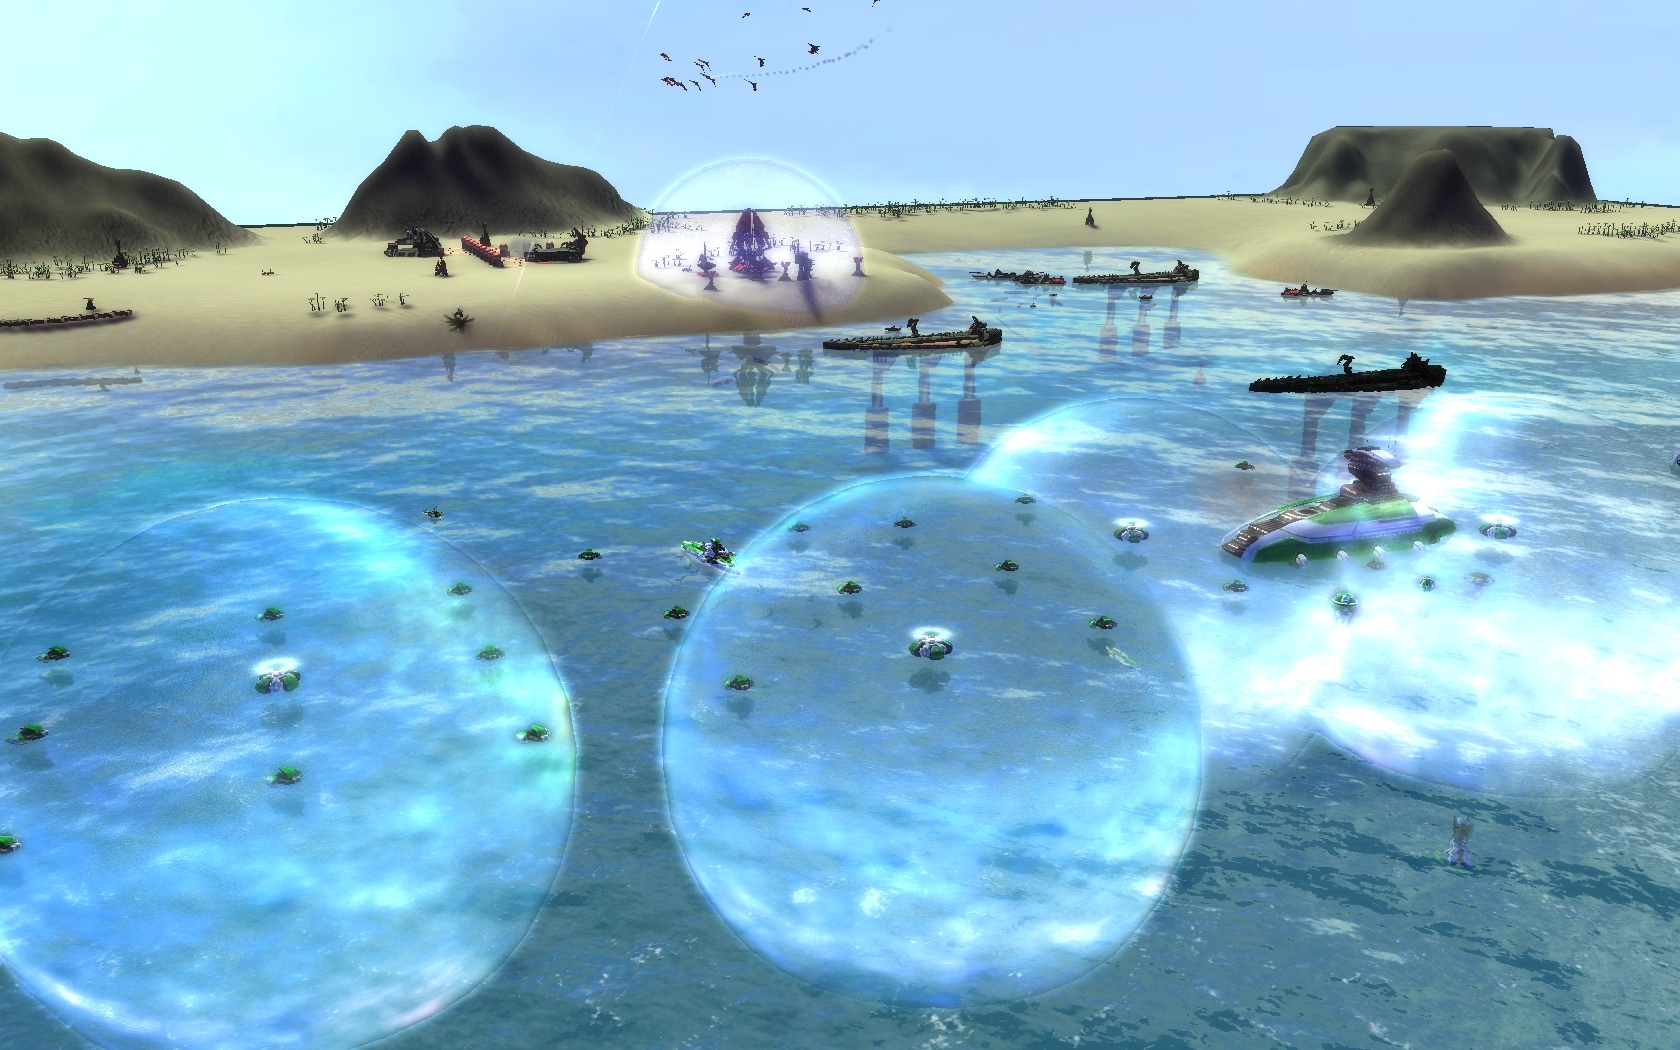
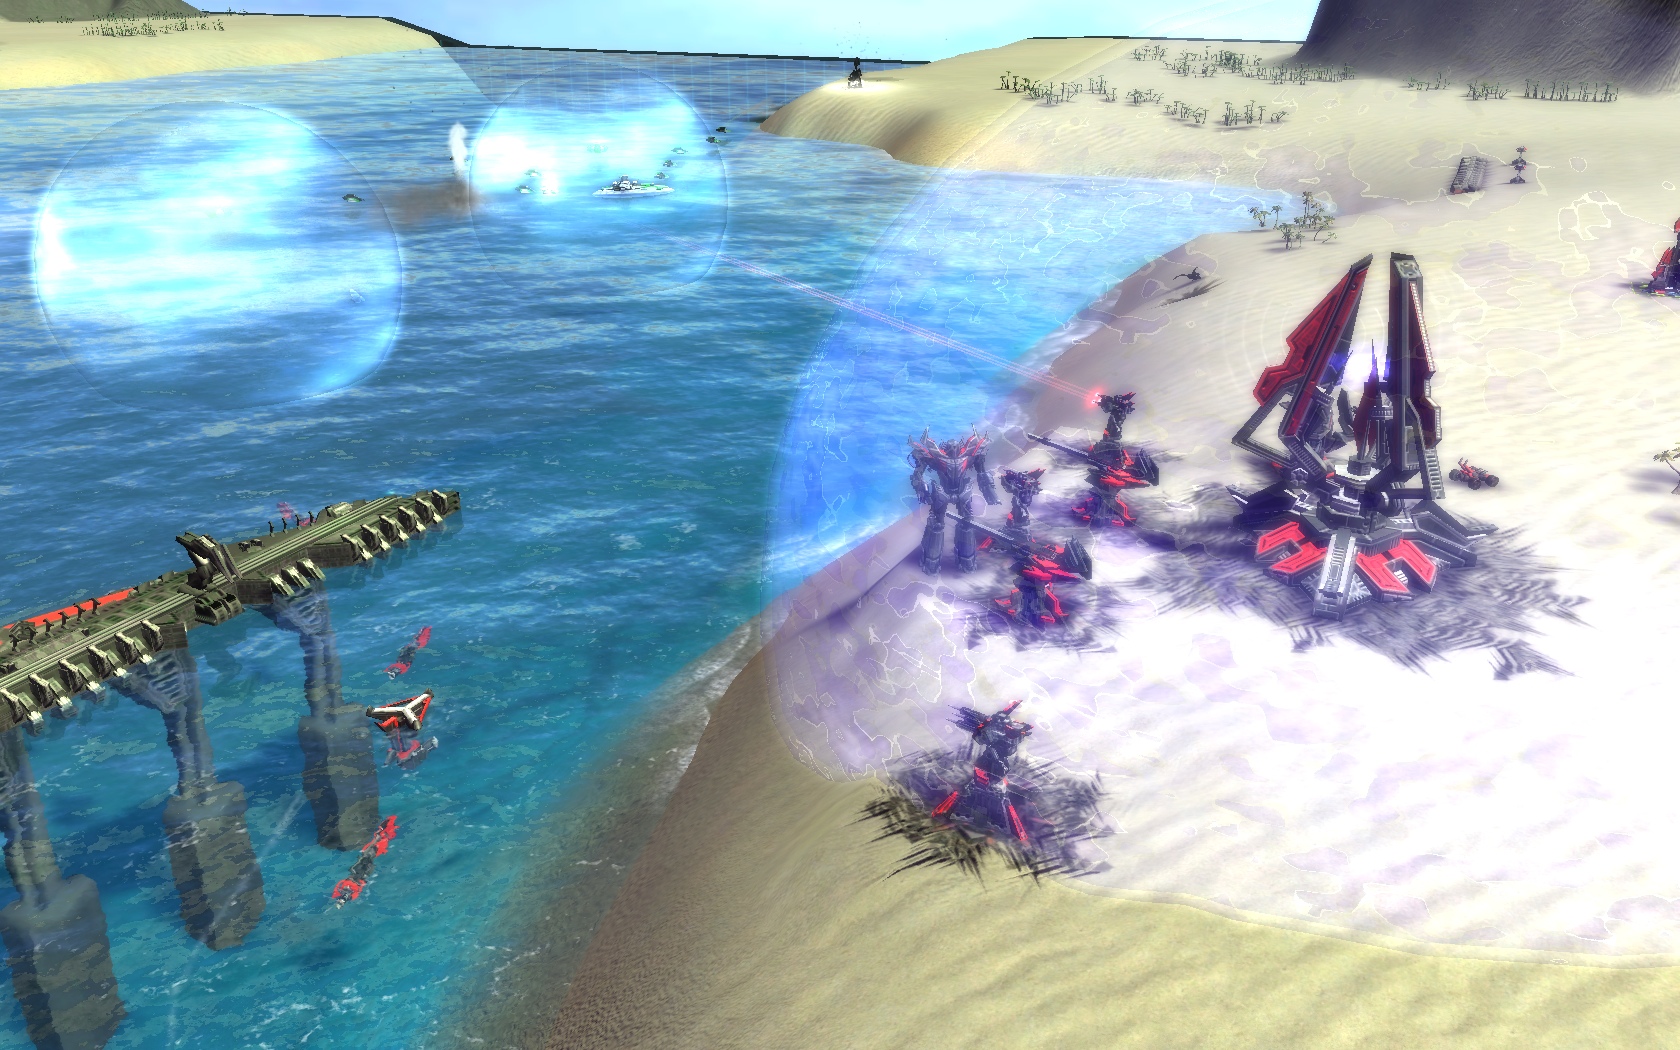
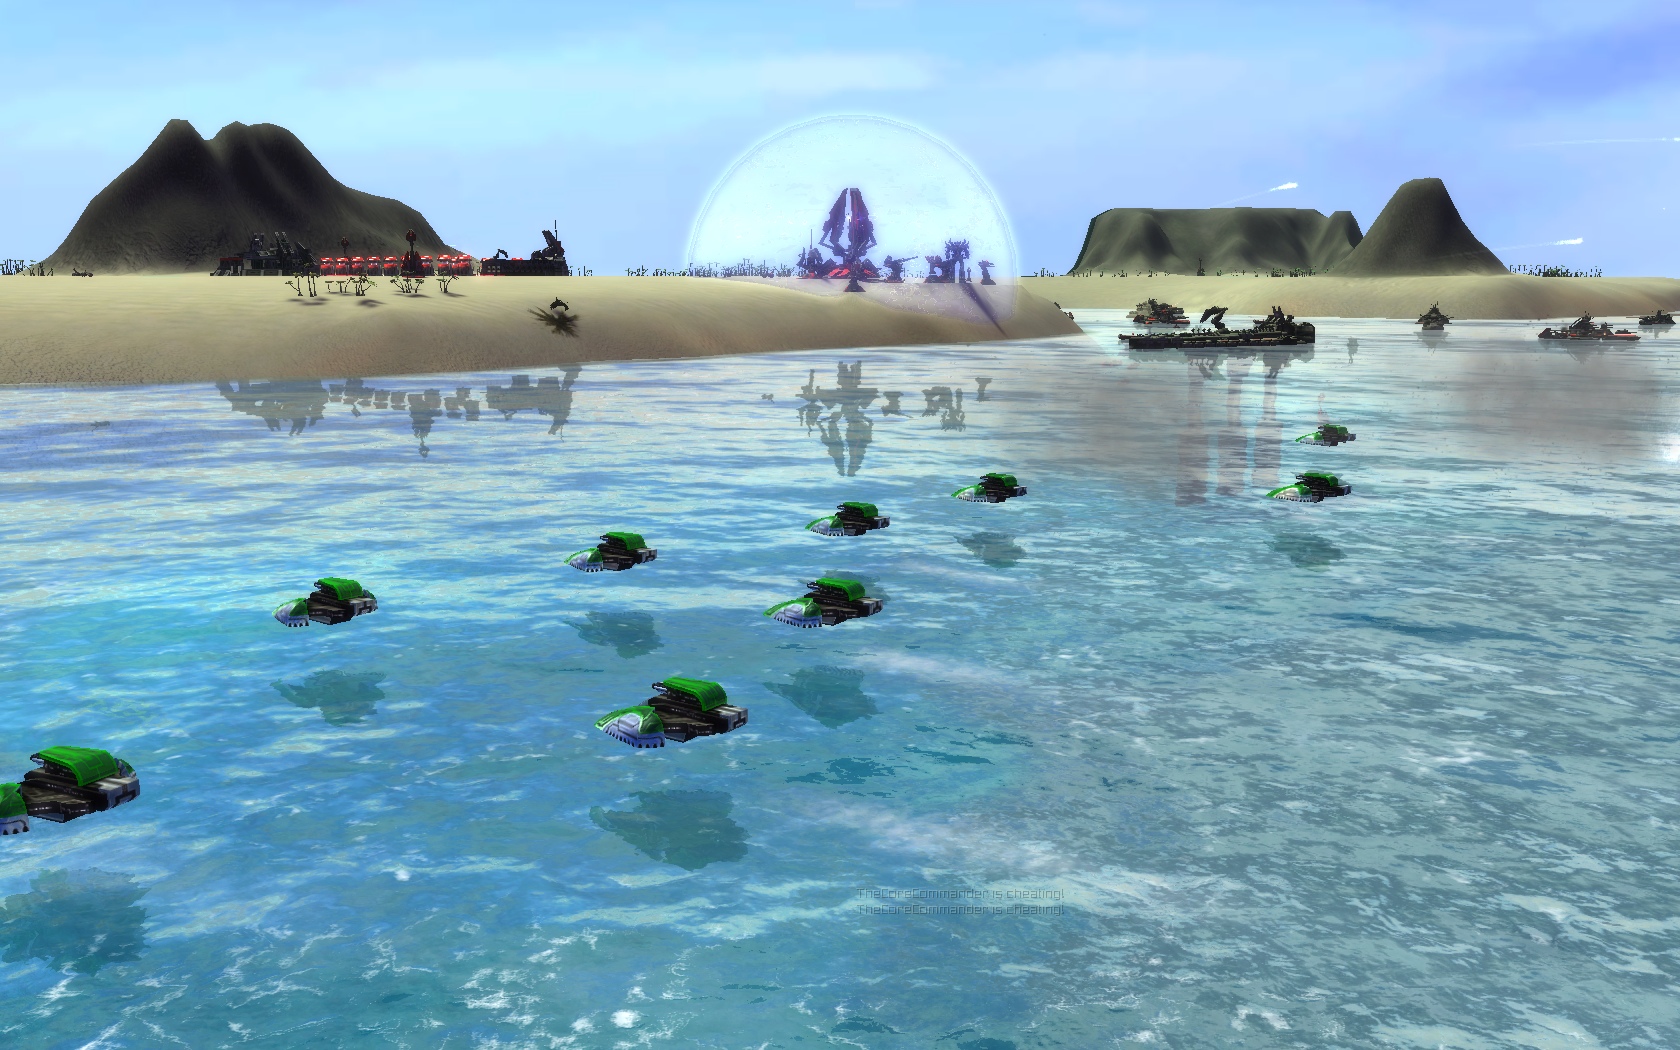
Coast to coast 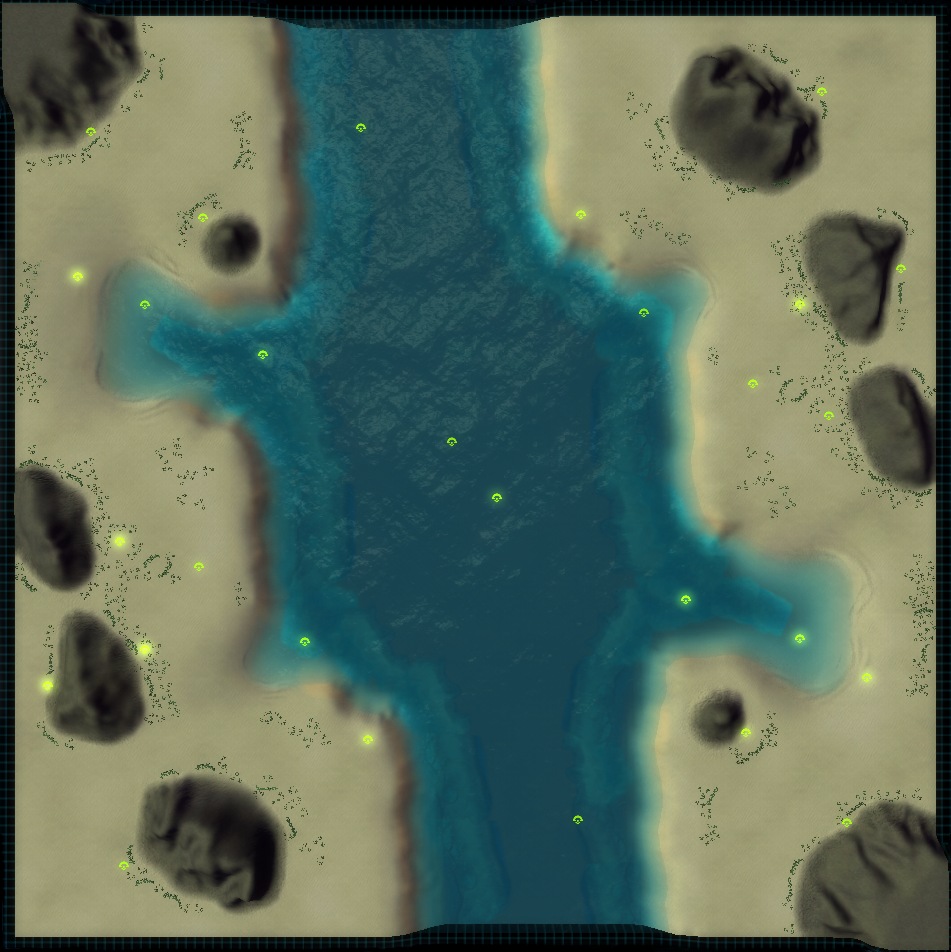 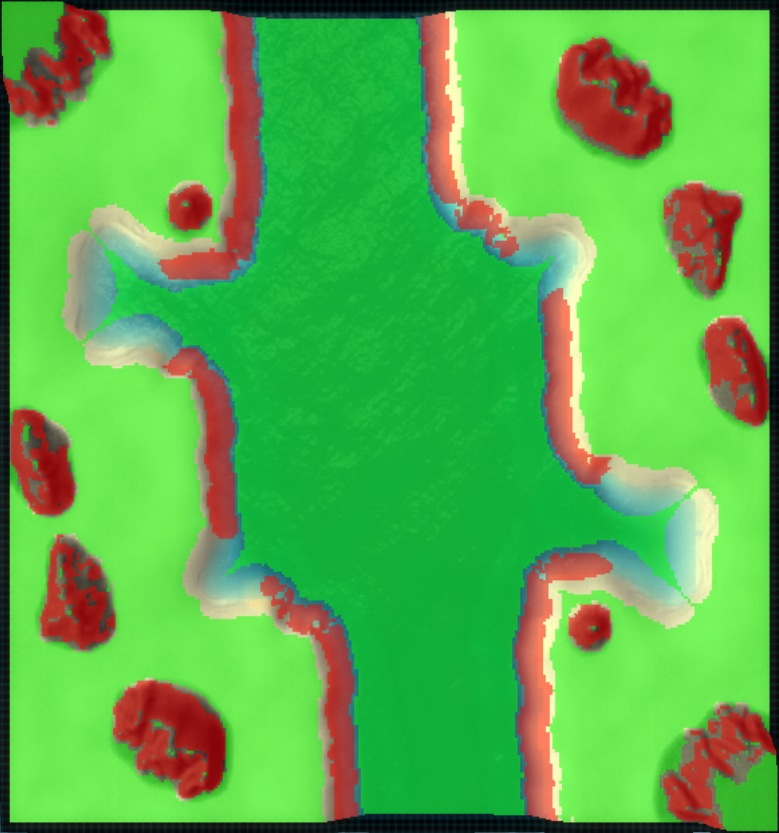
Ingame Description: "The sun, the coastal wind, the white sandy beaches-30-128-90 and the distant rumble of a volley of long range strategic artilleries firing in synchronization." Detailed Description: Similar to Gods of War in its naval and sub wars and Winter's Duel with it head to head style, this is a great map for competitive play. Drops are great here, especially in 1v1, since the the islands are quite big and hard to cover with anti air or interceptors in all places, at all times. Again, 2 ramps for both coasts, to keep the aurora spam down and the naval use to a maximum. The underwater mass spots add a whole new dimention to the gameplay, offering quite a nice boost to the economy, and usually being forced out of water is an instant lose. Usuall games are full of subs, frigates and torpedo launchers (with shipyards in front of them as shields) Screens: 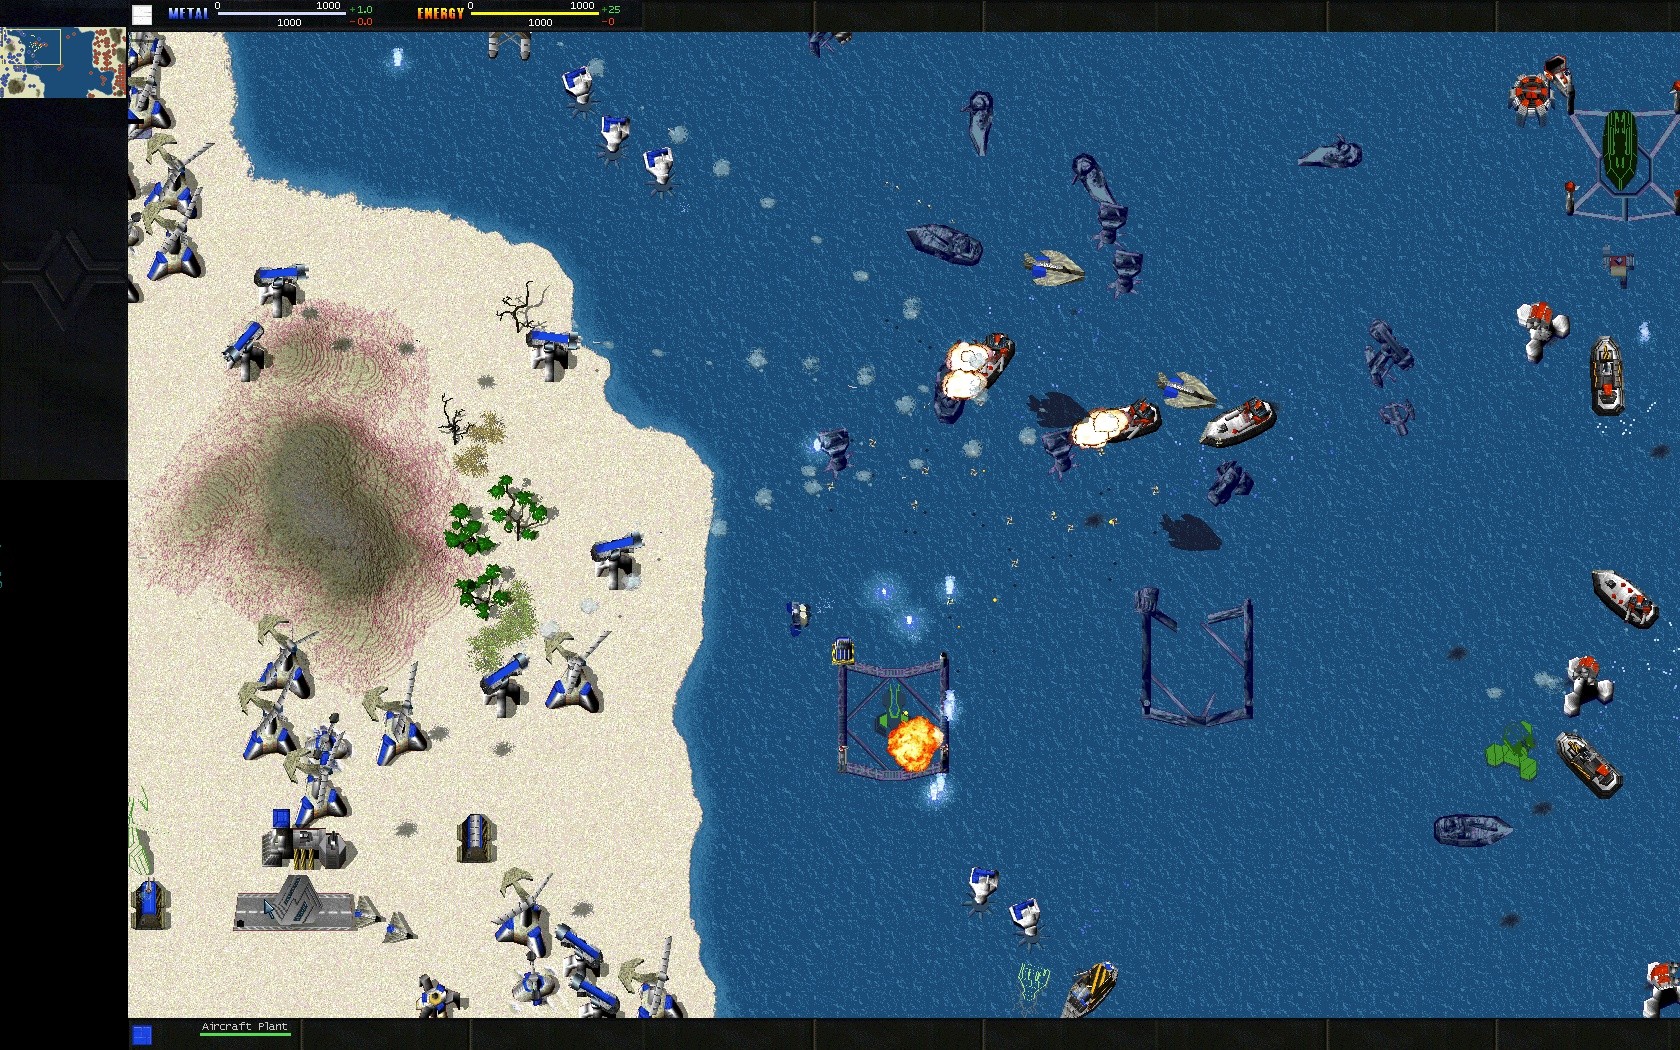 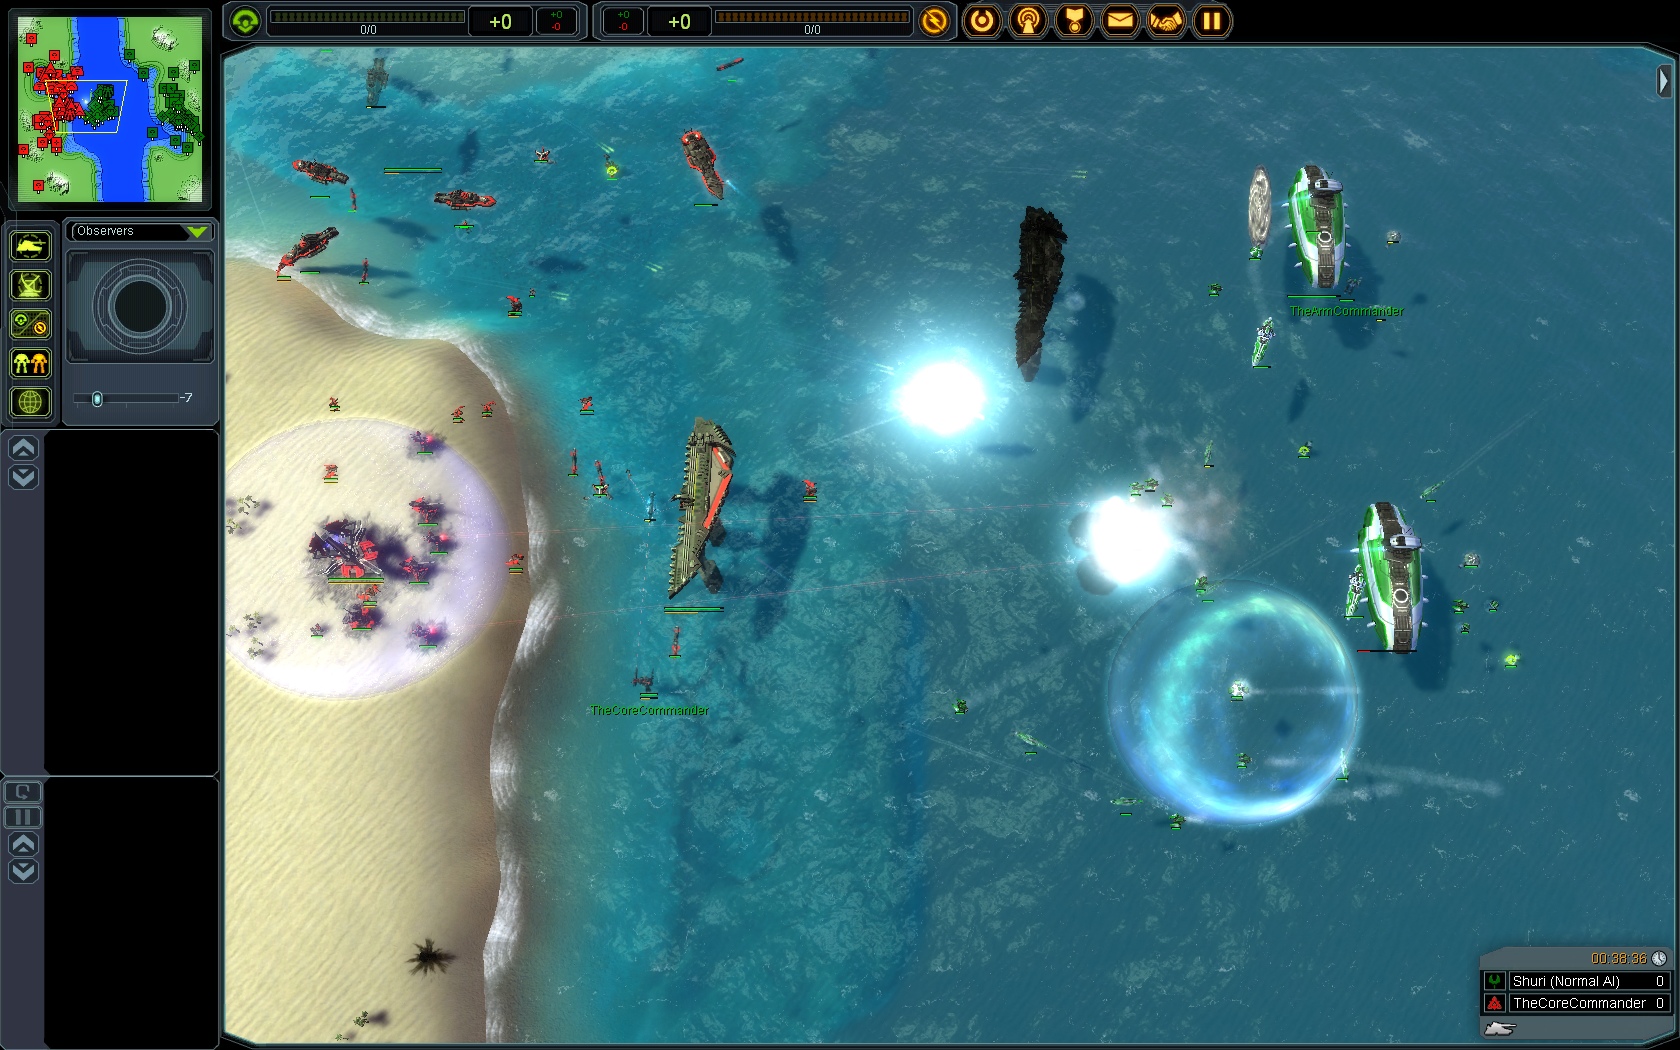 
Show down 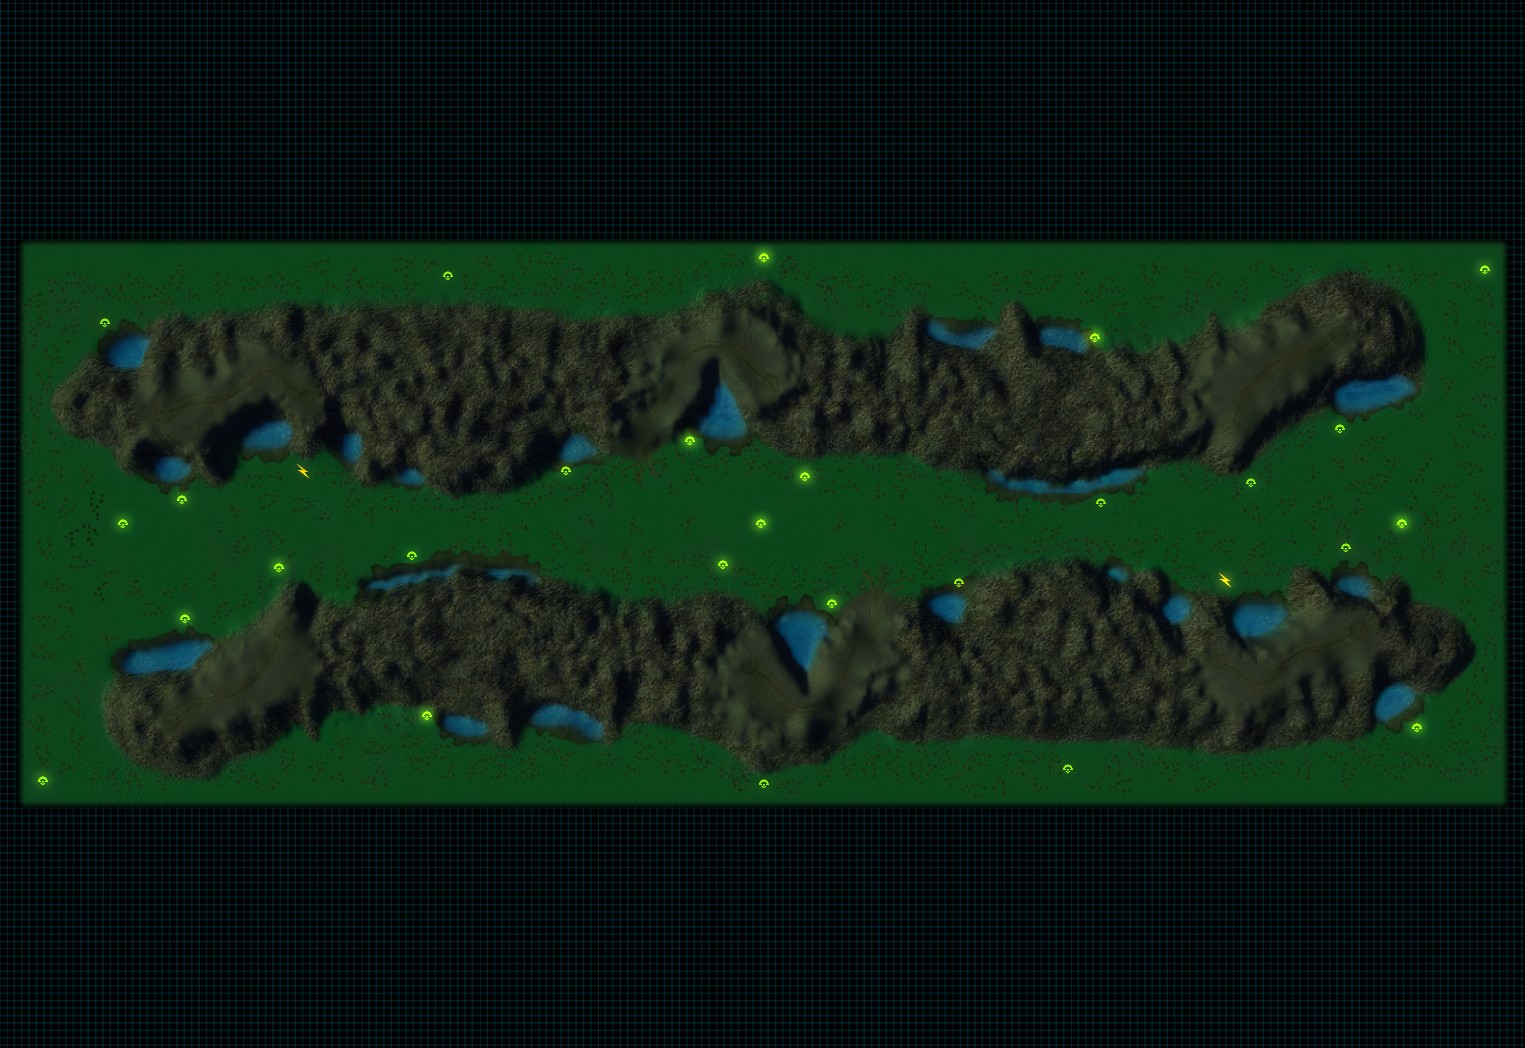 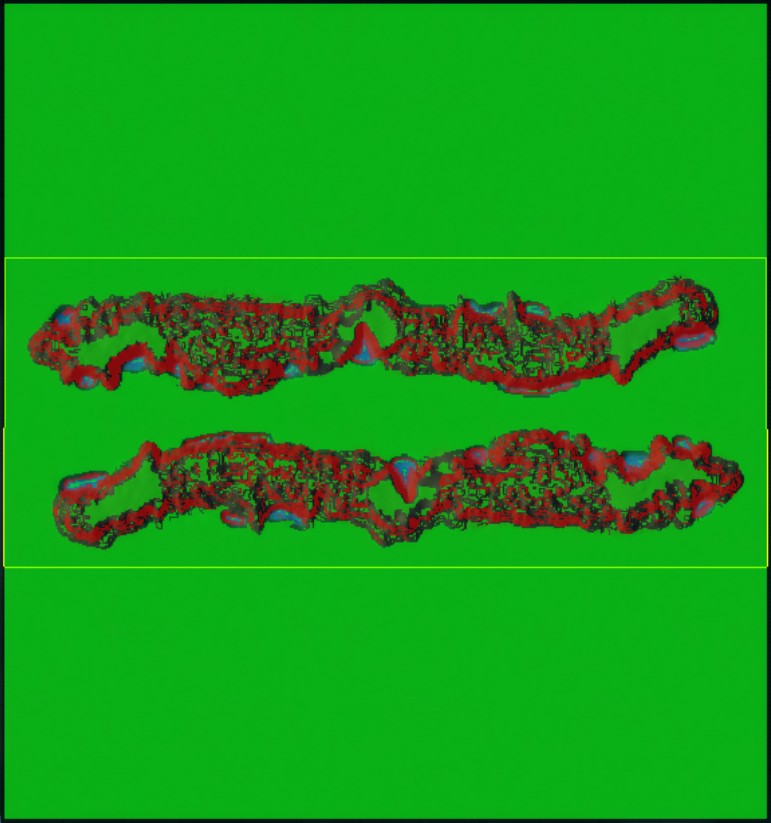
Ingame Description: "Make your way through the swampy lands to this natural passage and high cliffs perfect for surprise artillery drops. Only the bravest Commanders dare to meet in the middle and duke it out in a dance of death." Detailed Description: This map with its 3 passage ways forces the player to focus and try to manage 3 fronts at once, providing some interesting styles of play. Unlike the original TA version, the middle mountain parts have ramps added and a flat location where you can build T2 PDs and really hold your ground in middle. Really fast paced at the start with trying to keep your engineers alive while getting the mass extractors on all sides. There are also other flat locations near start positions, that are just perfect for a sneaky T1 artillery drop. Expect games here to finish pretty fast, if it gets to a long stalemate then get ready for some hardcore turtling and even experimentals! Screens: 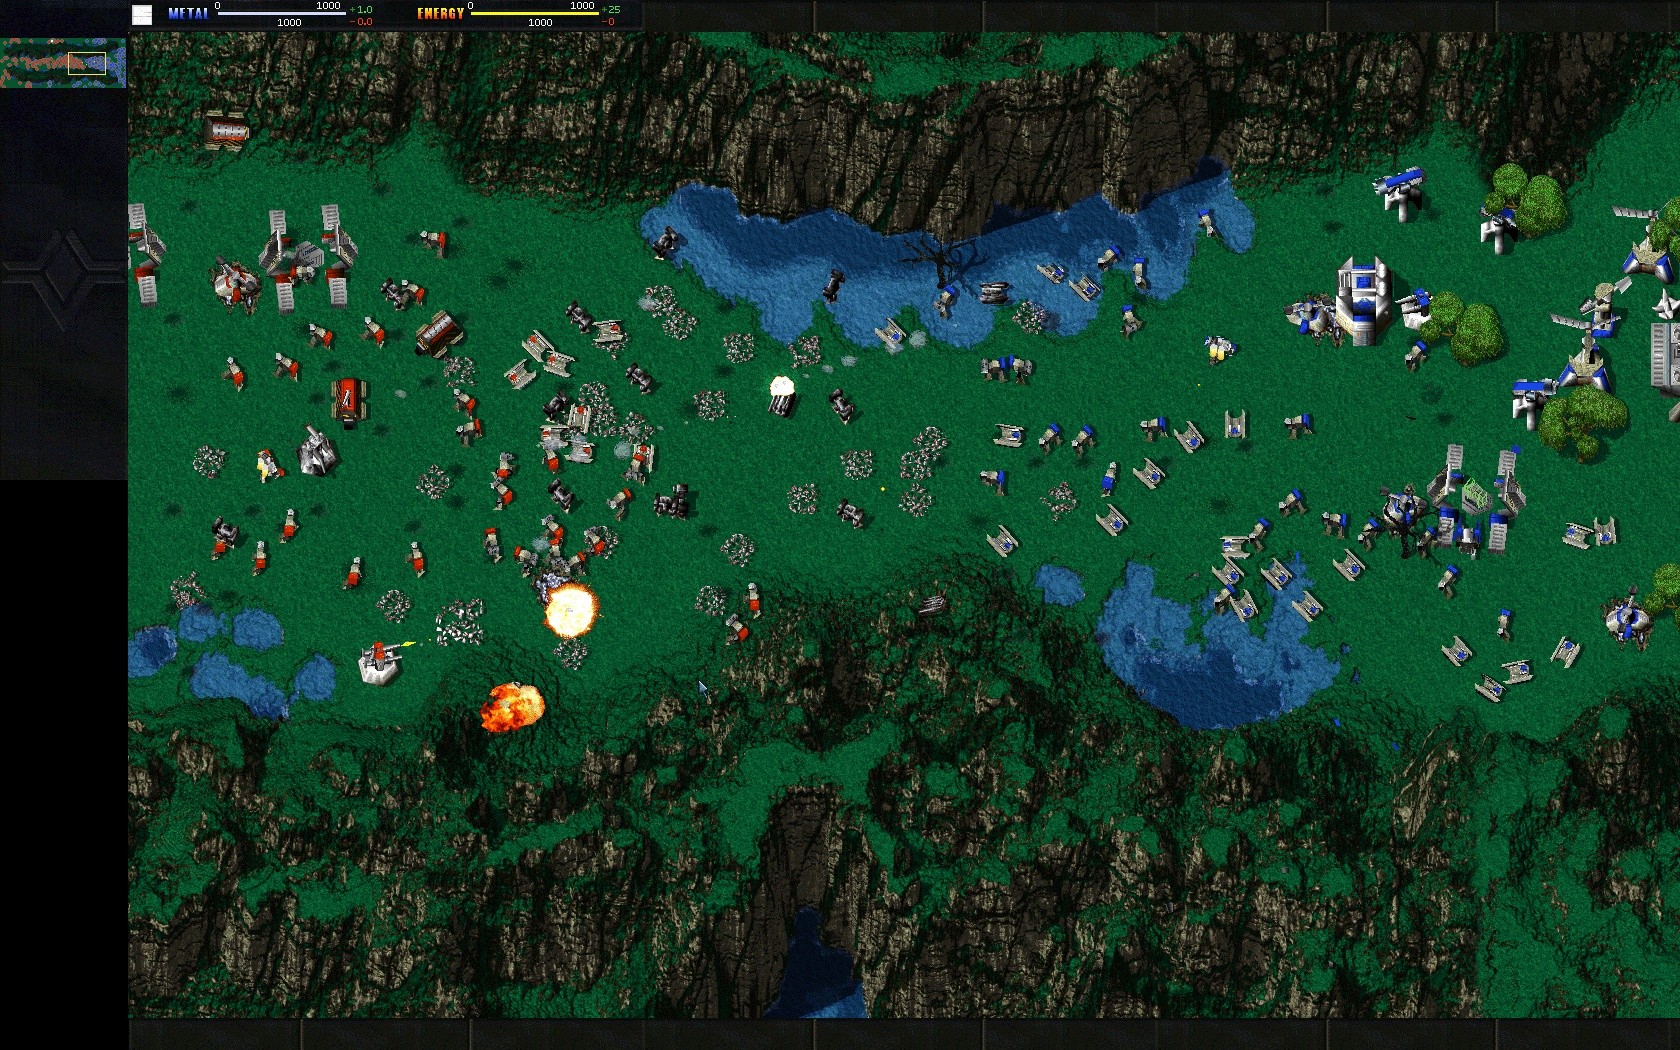  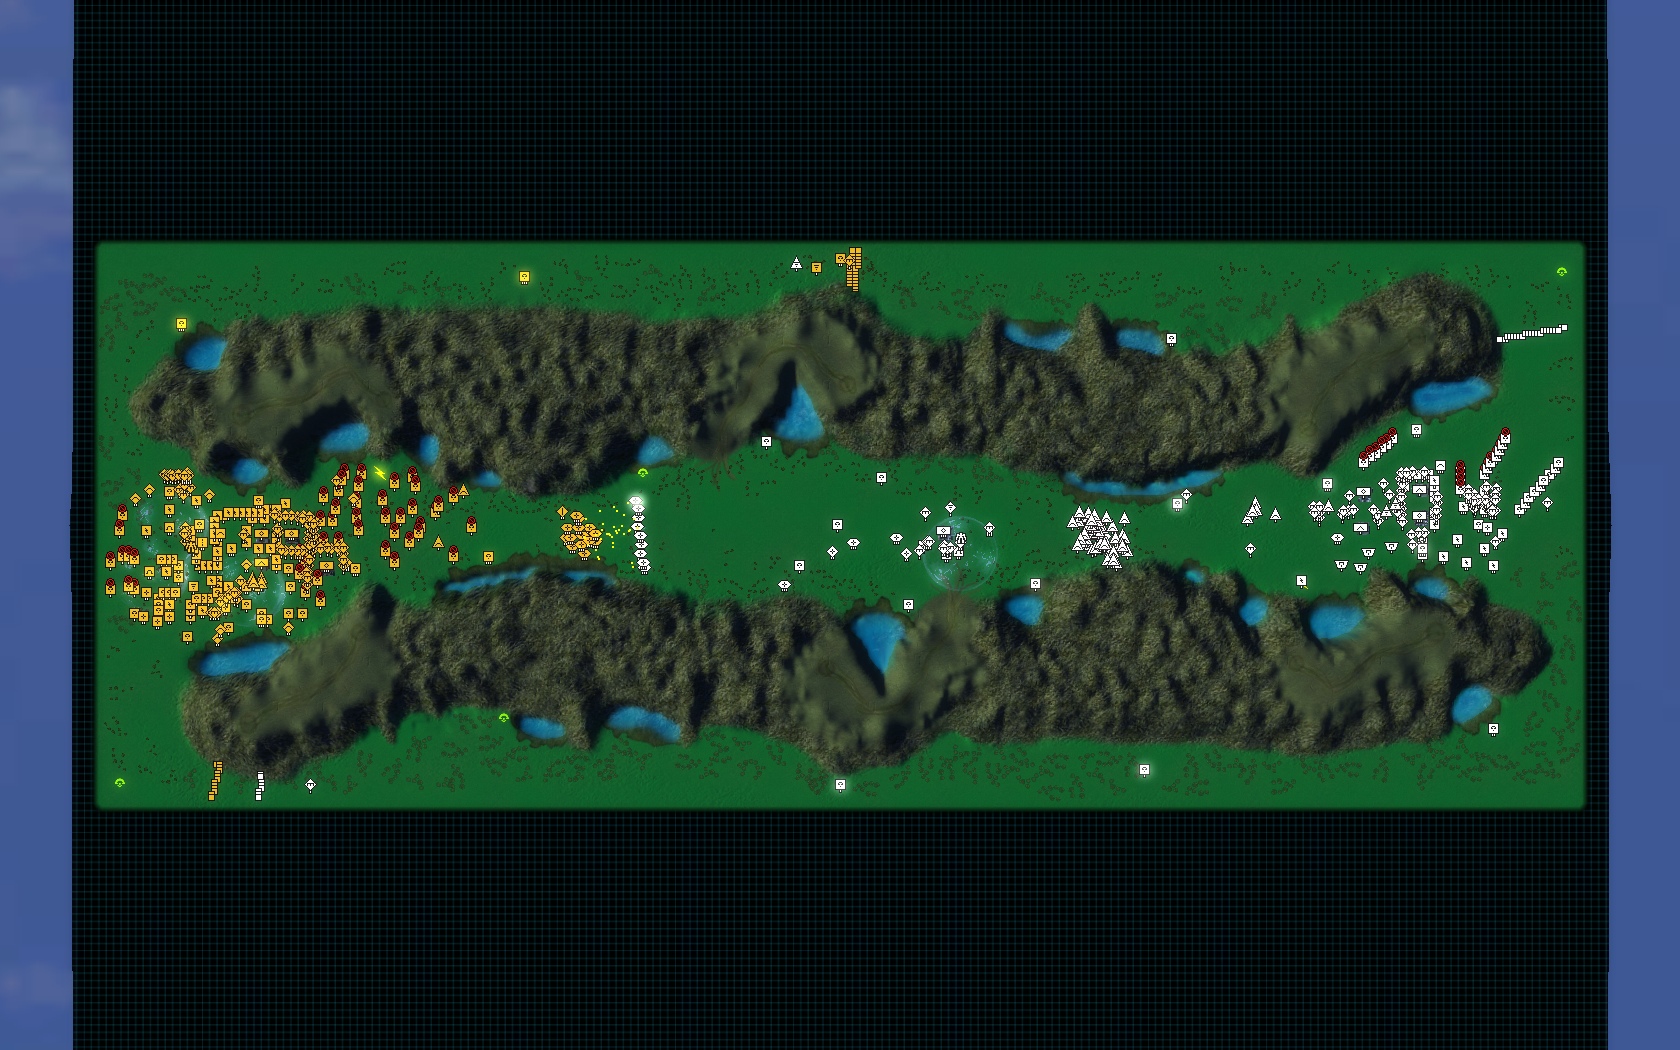
John's Pass 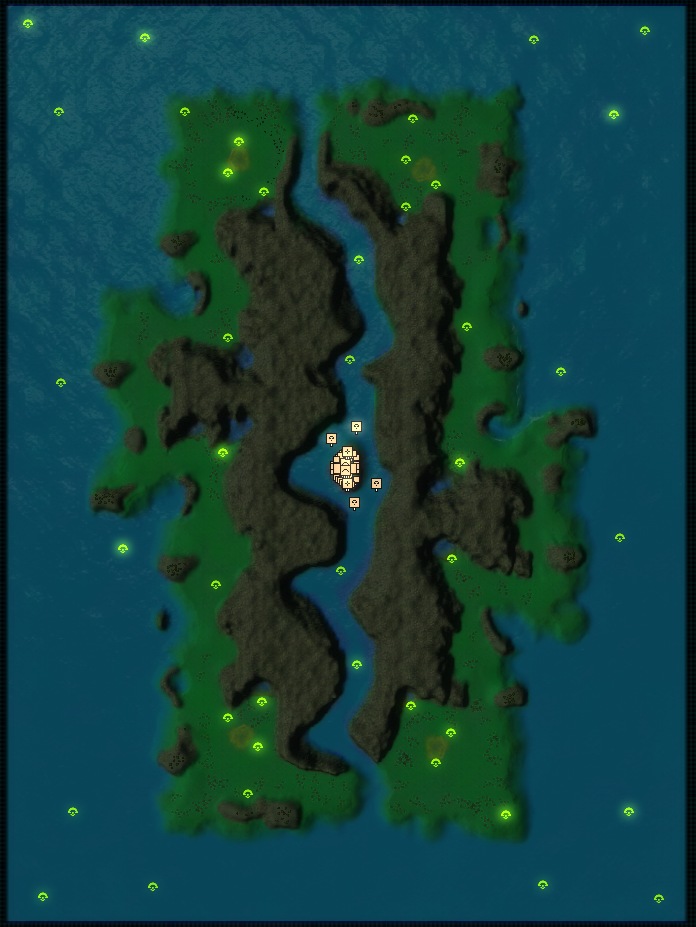 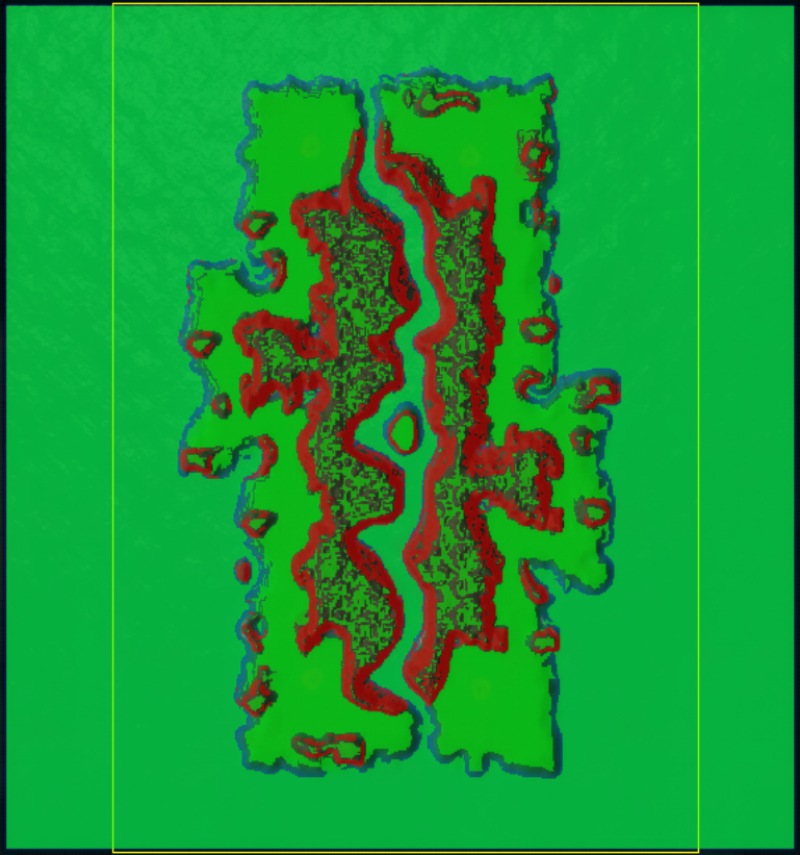
"This pass is thought to be a named after a great hero. Now only mining colonies have settled here, trying to extract precious minerals and make a living in these troubled times." Possibly one of the best TA map ever because of the combination of land, sea, air, amphib and underwater units that were essential in many games. The high number of underwater mass spots make holding the sea essential. Land can be strong, especially in 2v2, where one can go hard sea and his partner can commrush one of the oponent's base Most games here turn out preety big with epic destroyer, cruiser, sub and torpedo launcher spam. But lets not forget air: torpedo bombers and strategic bombers do a good job at sinking ships. A good idea is to build a sonar or two in the pass and upgrade them to T3 ASAP, as in that position they provide 100% sonar coverage on the map. There are Civilians in middle guarding the 6 mex spots there, they have 2 Cerebus and 2 flak towers and 2-3 Frigates take care of the civs pretty easy so middle is really worth getting. Screens: 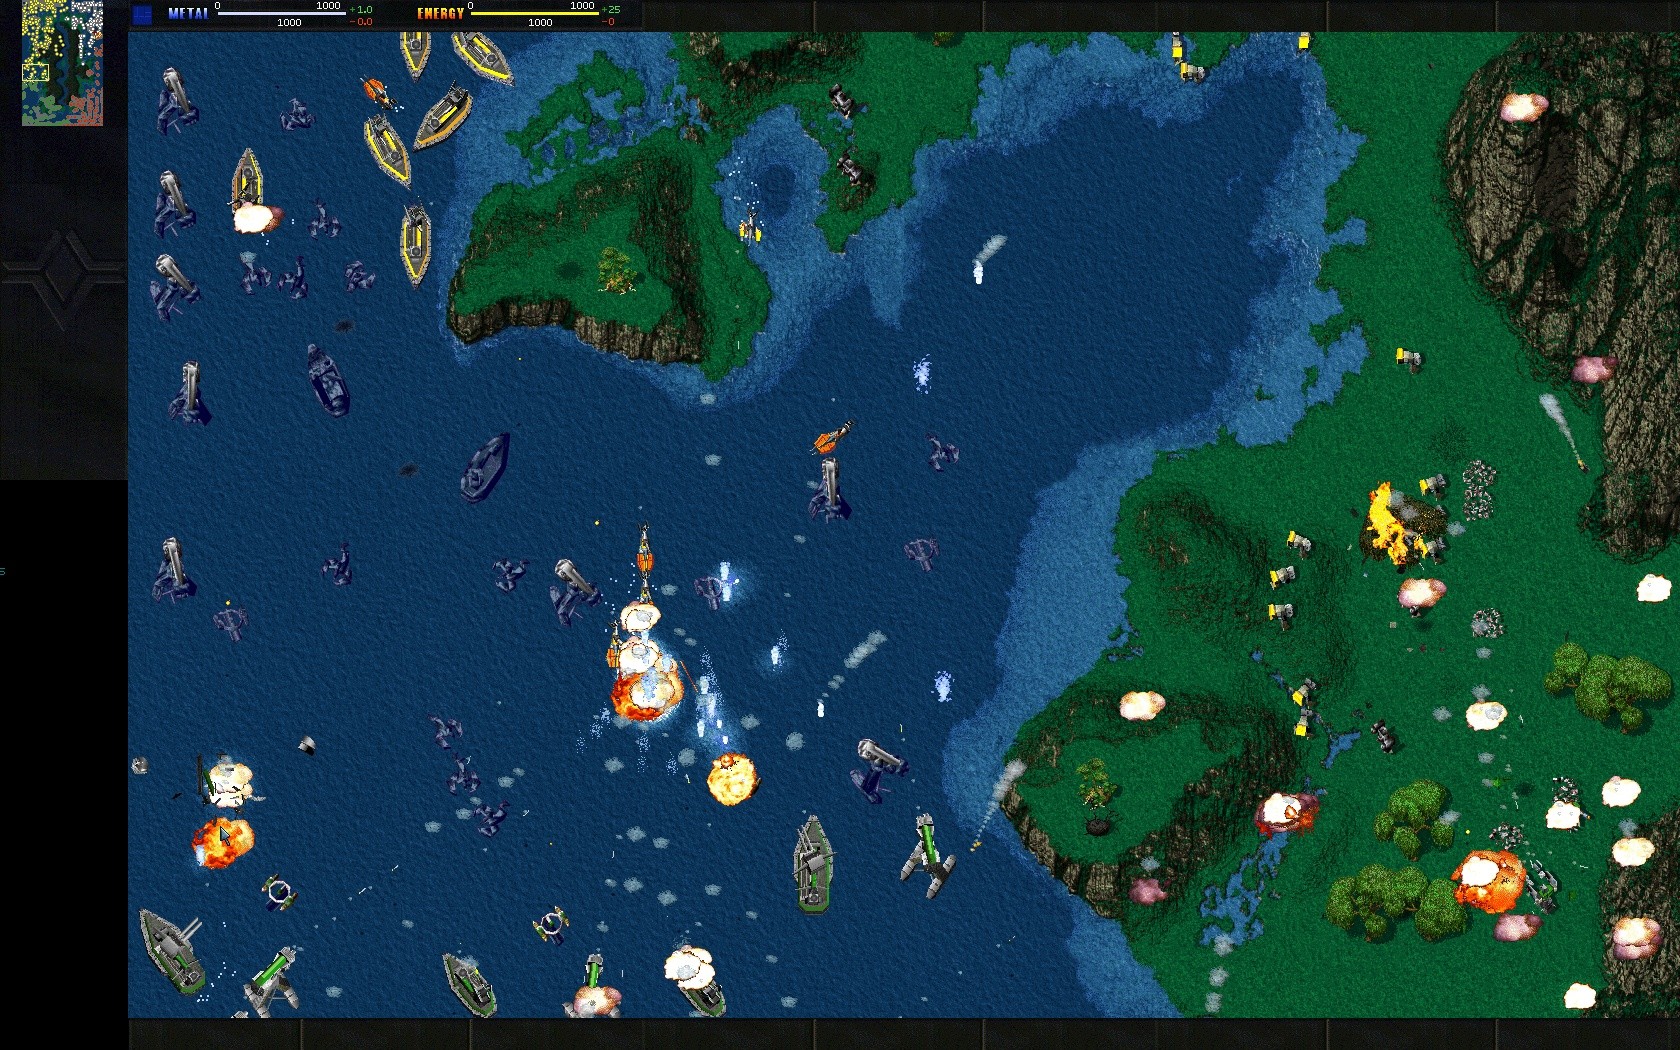  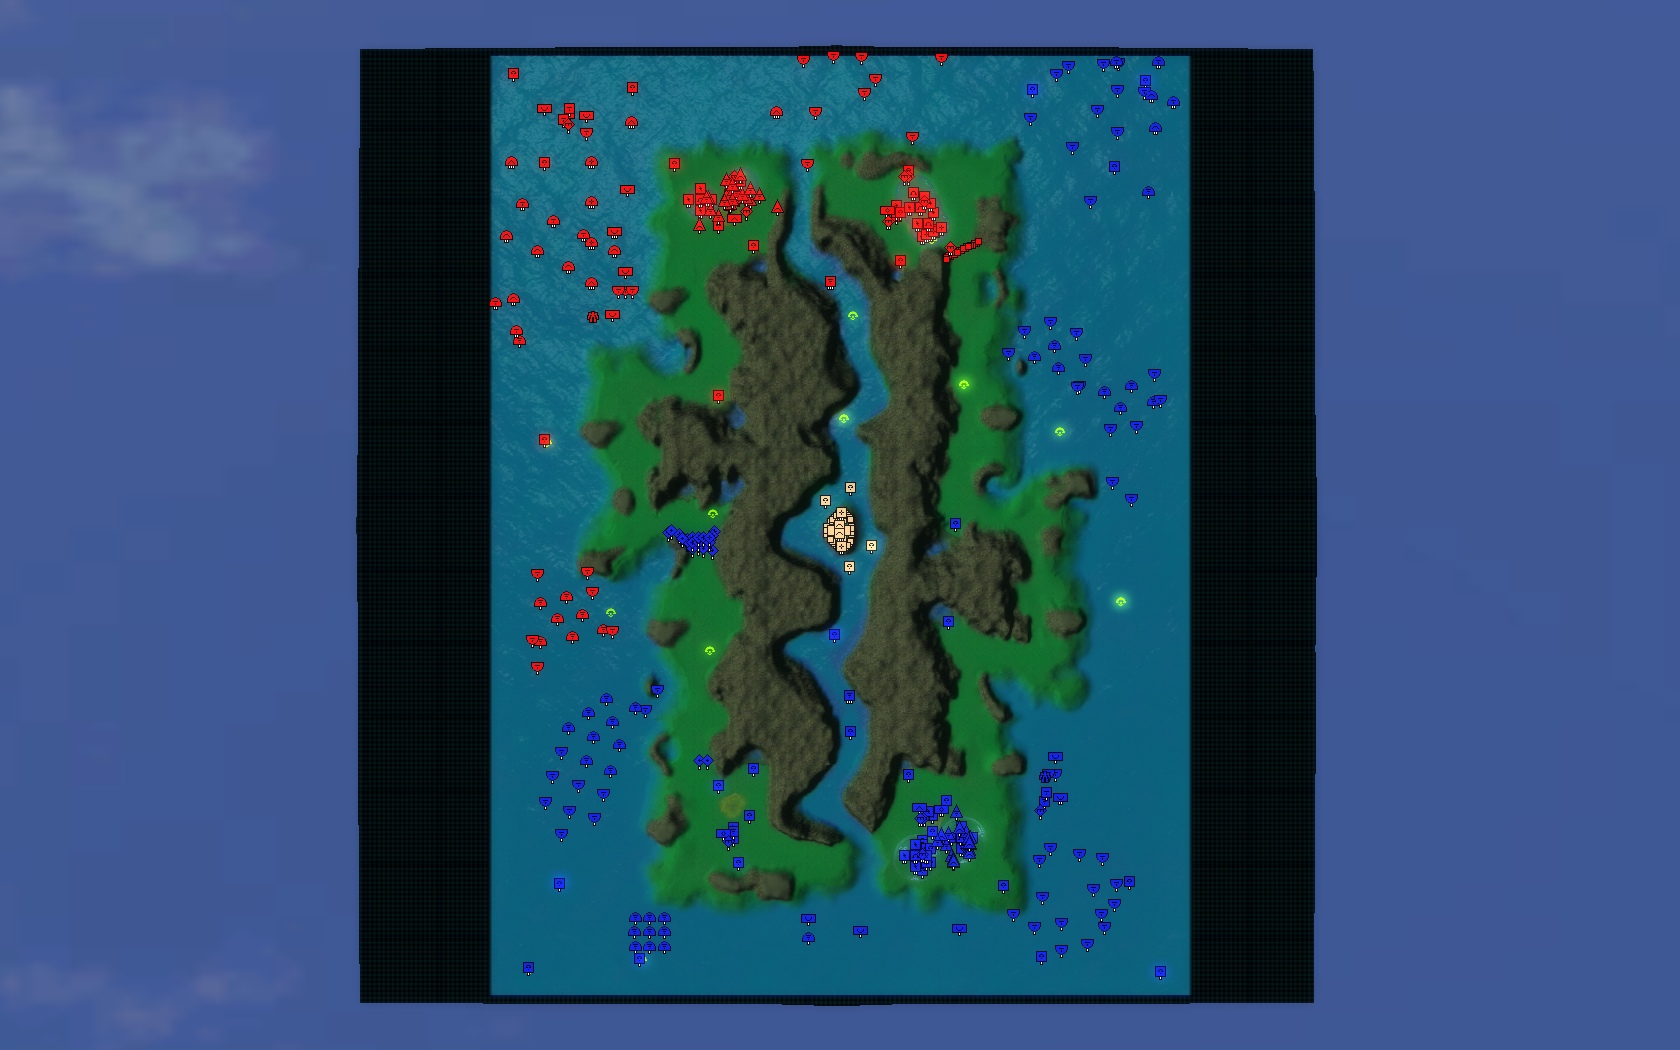
Credits and contributers Mapping: TheCoreCommander TheArmCommander (Greenheaven) Stix (ton of help on Great Divide 2 and a few others) Balance testers: Out/TAC Mentel Ar-bee Artistic Poita_ Battlemose Prepare TAG_ROCK_ Timmyfred Sir_Loui TheBigOne TheLittleOne Gnug215 Gnug125 Cauldr0n Greystreet Djinn Scripting help: Saya (Water makes units go boom script - 'lava' script) Felan (helping me adjust some scripts) PainAngel (thanks for the Water to Lava LUA file) _________________  Last edited by The Core Commander on Sat Sep 22, 2007 5:42 am; edited 4 times in total |
|